Importing ICS Files into Google Calendar: A Comprehensive Guide
Related Articles: Importing ICS Files into Google Calendar: A Comprehensive Guide
Introduction
With great pleasure, we will explore the intriguing topic related to Importing ICS Files into Google Calendar: A Comprehensive Guide. Let’s weave interesting information and offer fresh perspectives to the readers.
Table of Content
Importing ICS Files into Google Calendar: A Comprehensive Guide
Importing .ics (iCalendar) files into Google Calendar is a straightforward process that unlocks a world of scheduling possibilities. Whether you’re managing complex project timelines, coordinating events with multiple participants, or simply transferring calendar data from another application, understanding how to effectively import .ics files is crucial for efficient time management and collaboration. This comprehensive guide will explore the process in detail, addressing various scenarios and troubleshooting common issues, ensuring you become a master of calendar import.
Understanding .ics Files and Their Significance
Before delving into the import process, let’s clarify what an .ics file represents. An .ics file, or iCalendar file, is a standard text-based format for encoding calendar data. This format is widely supported by various calendar applications, making it an excellent method for exchanging calendar information across different platforms and devices. An .ics file contains details such as event titles, descriptions, dates, times, locations, attendees, and even recurring patterns. This universality makes it a powerful tool for synchronization and data migration.
Methods for Importing .ics Files into Google Calendar
There are primarily two ways to import .ics files into your Google Calendar:
1. Direct Upload via the Google Calendar Interface: This is the most common and user-friendly method.
-
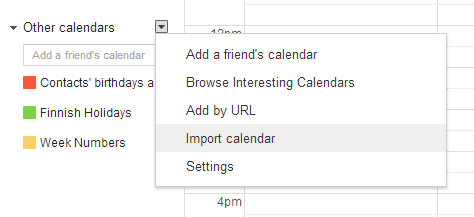
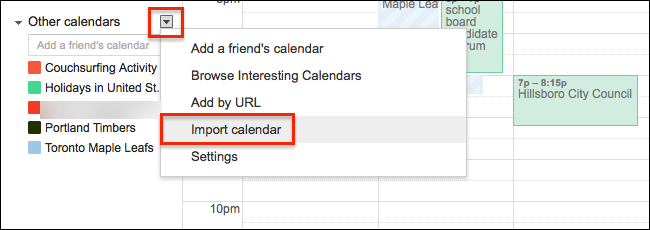
Accessing the Import Function: Log into your Google Calendar account. Navigate to the calendar you wish to import the .ics file into. Click on the gear icon (Settings) in the upper right corner. Select "Settings" from the dropdown menu. Within the Settings menu, find the "Import & export" tab. You should see an "Import" button. Click it.
-
Selecting the .ics File: A file upload window will appear. Locate the .ics file on your computer and select it. Click "Open" to initiate the upload.
-
Reviewing and Importing: Google Calendar will analyze the .ics file. You’ll typically see a summary of the events being imported, allowing you to review them before proceeding. Confirm the import by clicking the appropriate button (usually "Import").
-
Post-Import Verification: After the import process is complete, check your calendar to ensure all events have been imported correctly and are displayed as expected.
2. Using Google Calendar’s Email Functionality (Less Common): While not the primary method, you can technically import a .ics file by attaching it to an email and sending it to your Google Calendar address. This method is less reliable and generally not recommended due to potential issues with email client compatibility and file size limitations. The direct upload method is far superior in terms of reliability and ease of use.
Handling Different Scenarios and Complexities
The straightforward import process outlined above works flawlessly for most basic .ics files. However, some scenarios might require additional attention:
-
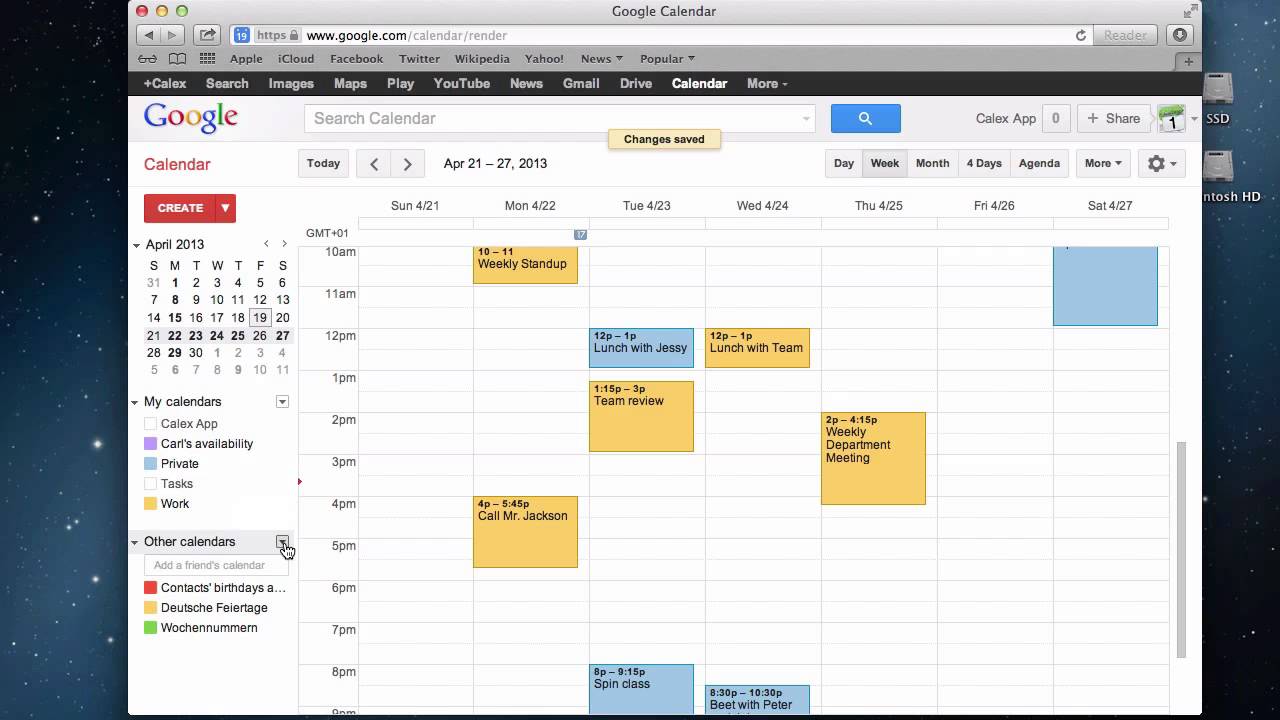
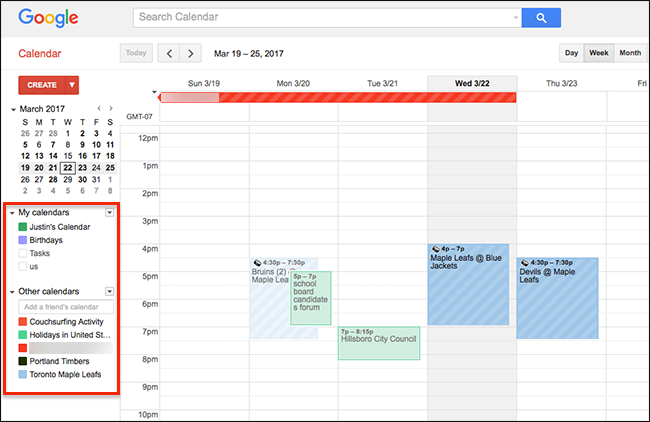
Multiple Calendars: If you want to import events into a specific calendar (other than your default calendar), ensure you’ve selected the correct calendar before initiating the import process. Google Calendar allows you to create multiple calendars for better organization.
-
Recurring Events: .ics files often contain recurring events. Google Calendar handles these seamlessly, importing the entire recurring series. You can subsequently modify individual instances or the entire series within Google Calendar after the import.
-
Conflicting Events: If the imported .ics file contains events that conflict with existing events in your Google Calendar, Google Calendar will usually highlight the conflicts, allowing you to manage them appropriately. You might need to manually adjust the timing or delete conflicting events.
-
Large .ics Files: For very large .ics files, the import process might take longer. Patience is key, and it’s advisable to ensure a stable internet connection during the import. Extremely large files might even cause the import to fail; in such cases, consider breaking the file into smaller, more manageable chunks.
-
Corrupted .ics Files: If the .ics file is corrupted, the import process might fail or result in incomplete or inaccurate data. Ensure the .ics file was created and saved correctly. If you suspect corruption, try obtaining a fresh copy of the file.
-
Encoding Issues: Rarely, encoding issues can prevent the correct interpretation of the .ics file. If you encounter problems, try opening the .ics file in a text editor to inspect its contents and ensure proper encoding (usually UTF-8).
Troubleshooting Common Import Issues
Despite the simplicity of the import process, some issues might arise. Here are some common problems and their solutions:
-
Import Failure: If the import fails, check your internet connection, ensure the .ics file is not corrupted, and verify that you have sufficient permissions to access and modify your Google Calendar.
-
Missing Events: If some events are missing after the import, check the .ics file’s content to ensure all events are present and correctly formatted. Also, review Google Calendar’s import log for any error messages.
-
Incorrect Timing: If events are displayed at incorrect times, double-check the time zone settings in both the .ics file and your Google Calendar. Ensure that the time zone specified in the .ics file is compatible with your Google Calendar settings.
-
Data Discrepancies: If data discrepancies exist between the .ics file and the imported events, try re-importing the file after ensuring it’s up-to-date and correctly formatted.
-
Access Restrictions: If you’re importing a .ics file shared with you, ensure you have the necessary permissions to access and import the calendar data.
Advanced Techniques and Considerations
-
Using Third-Party Tools: Several third-party tools and applications can facilitate the import of .ics files into Google Calendar, offering additional features and functionalities. These tools often provide more control over the import process and can handle complex scenarios more efficiently.
-
API Integration: For advanced users and developers, Google Calendar offers an API (Application Programming Interface) that allows programmatic access and manipulation of calendar data. This allows for automated and customized import processes.
-
Regular Backups: Regularly backing up your Google Calendar data is crucial to prevent data loss. Google Calendar itself offers various backup options, and you can also export your calendar data as an .ics file for offline storage.
Conclusion:
Importing .ics files into Google Calendar is a fundamental task for anyone managing their schedule effectively. By understanding the process, addressing potential challenges, and utilizing advanced techniques when necessary, you can seamlessly integrate external calendar data into your Google Calendar, streamlining your workflow and enhancing your organizational capabilities. This comprehensive guide has equipped you with the knowledge and troubleshooting skills to confidently manage all your calendar import needs. Remember to always verify the imported events to ensure accuracy and consistency with your existing calendar entries.


Closure
Thus, we hope this article has provided valuable insights into Importing ICS Files into Google Calendar: A Comprehensive Guide. We hope you find this article informative and beneficial. See you in our next article!