Sharing Your Google Calendar: A Spectacular, Breathtaking, and Splendid Guide
Related Articles: Sharing Your Google Calendar: A Spectacular, Breathtaking, and Splendid Guide
Introduction
With great pleasure, we will explore the intriguing topic related to Sharing Your Google Calendar: A Spectacular, Breathtaking, and Splendid Guide. Let’s weave interesting information and offer fresh perspectives to the readers.
Table of Content
Sharing Your Google Calendar: A Spectacular, Breathtaking, and Splendid Guide
Google Calendar is more than just a digital diary; it’s a powerful collaboration tool. Sharing your calendar effectively can streamline teamwork, enhance family organization, and even simplify your social life. This comprehensive guide will take you through every aspect of sharing your Google Calendar, from the simplest methods to the most nuanced settings, ensuring a spectacular, breathtaking, and splendid experience.
Part 1: Understanding Sharing Options and Permissions
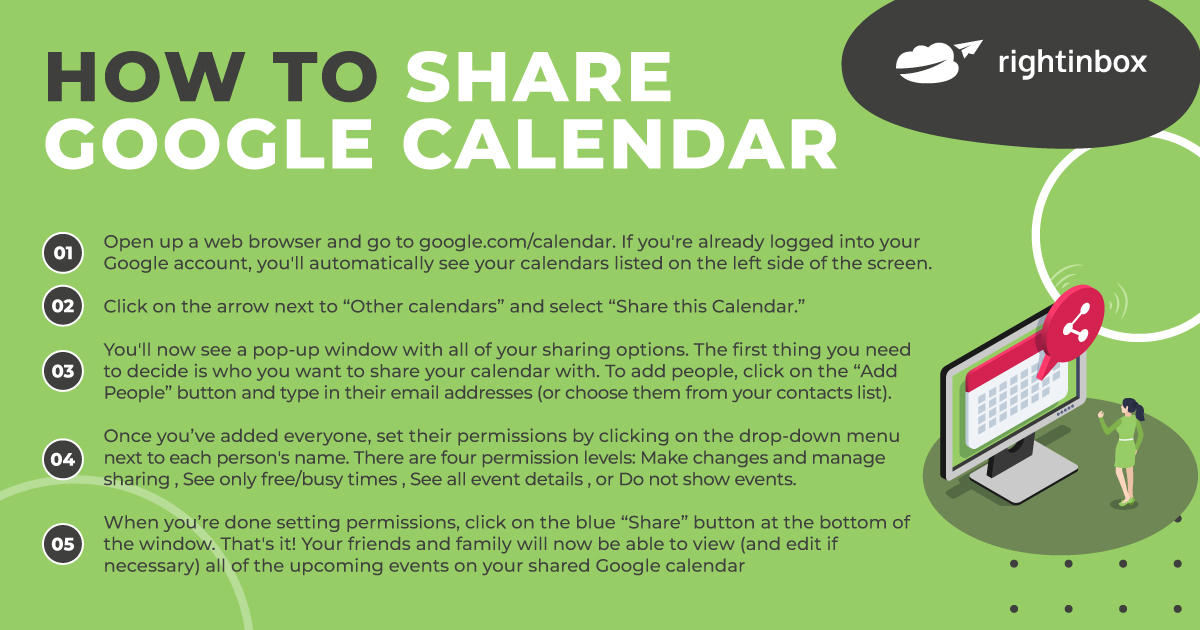
Before diving into the specifics, let’s grasp the fundamental concepts of sharing in Google Calendar. The key lies in understanding the different permission levels you can grant:
-
See only free/busy information: This is the most restrictive option. Others can see when you’re busy or available, but they won’t see the details of your appointments. This is ideal for maintaining privacy while still allowing others to schedule meetings around your availability.
-
See all event details: This grants complete access to your calendar. Recipients will see the titles, descriptions, locations, and times of all your events. Use this option with individuals you trust and with whom you want to share comprehensive scheduling information.
-
Make changes to events: This permission level allows recipients not only to see your calendar but also to add, edit, or delete events. Exercise caution with this setting, as it gives significant control over your calendar. Only grant this permission to individuals who need to manage your schedule directly.
-
Add guests to events: This additional permission enables recipients to invite others to events on your calendar. This is useful for assistants or colleagues who need to manage meeting invitations on your behalf.
Part 2: Sharing Your Entire Calendar – The Basics
Sharing your entire calendar is straightforward and often the most convenient method for those you regularly collaborate with. Here’s how to do it:
-
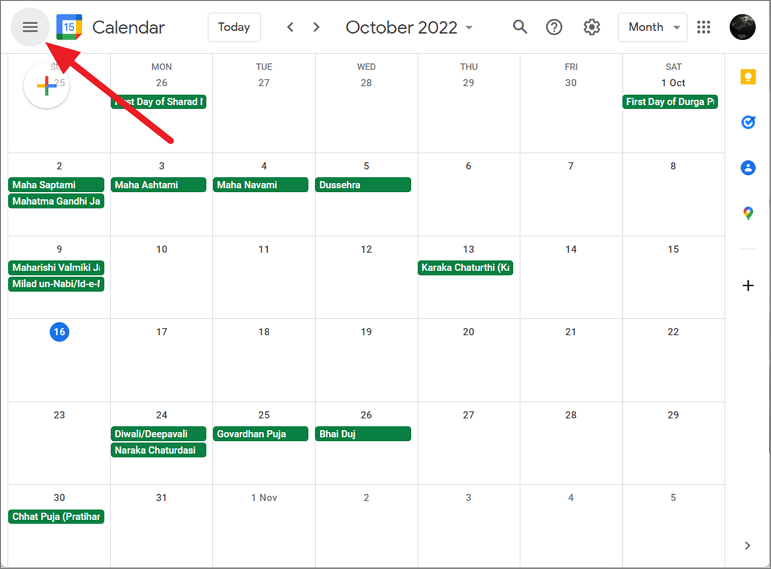
Open Google Calendar: Access your Google Calendar through your web browser or mobile app.
-
Locate the calendar you wish to share: In the left-hand sidebar, you’ll see a list of your calendars. Select the calendar you want to share.
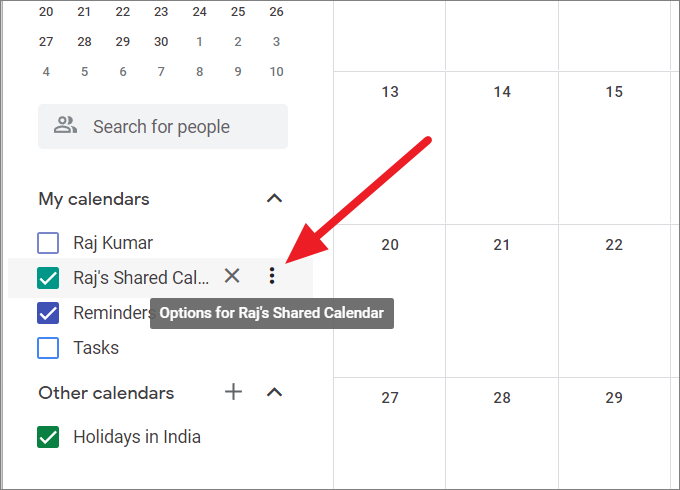
-
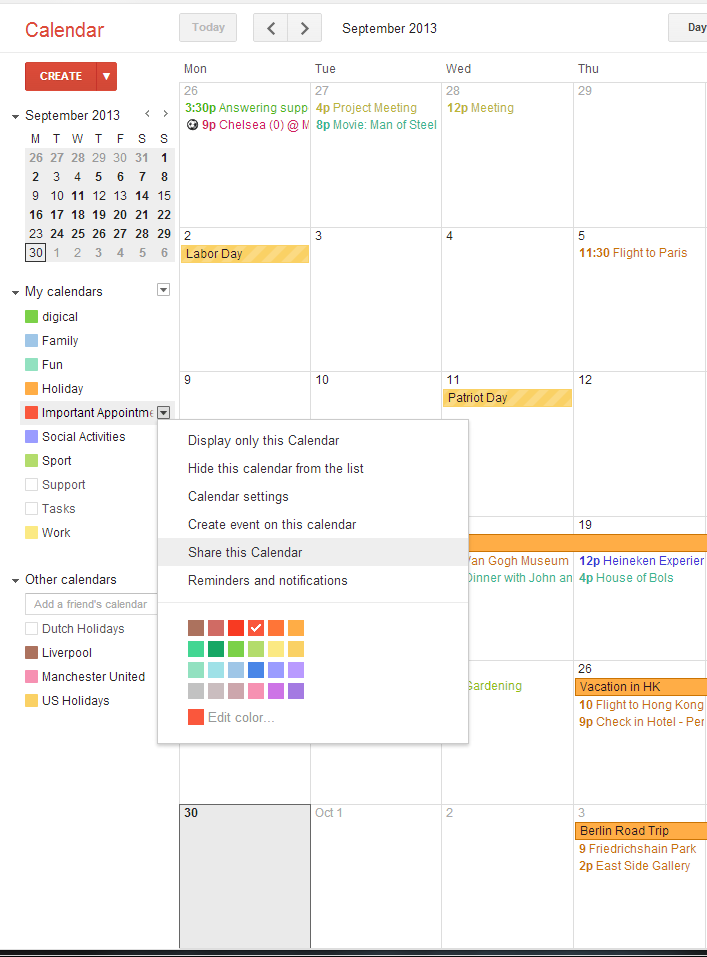
Access the settings: Click on the three vertical dots (more options) next to the calendar’s name.
-
Choose "Share with people and groups": This option will open a new window allowing you to share your calendar.
-
Enter the email address(es): Type the email address(es) of the person(s) you want to share your calendar with. You can add multiple email addresses, separating them with commas.
-
Select the permission level: Choose the appropriate permission level from the dropdown menu (See only free/busy information, See all event details, Make changes to events, Add guests to events). Carefully consider the level of access you’re granting.
-
Add an optional message (optional): You can include a brief message explaining why you’re sharing your calendar.
-
Click "Send": Once you’ve configured the settings, click "Send" to share your calendar.
The recipient will receive an email notification, and your calendar will appear in their Google Calendar list.
Part 3: Sharing Specific Events – Maintaining Privacy
While sharing your entire calendar is efficient, it might not always be necessary or desirable. You can selectively share individual events while keeping the rest private:
-
Open the event you wish to share: Navigate to the specific event in your calendar.
-
Click on the three vertical dots (more options): Locate these dots on the event itself.
-
Select "Guest List": This will open the guest list for the event.
-
Enter the email address(es): Add the email addresses of the people you want to invite to this specific event.
-
Choose a notification setting: Decide whether to send email invitations or not.
-
Click "Save": This will send invitations to the specified individuals for only that particular event.
Part 4: Advanced Sharing Techniques – Customization and Control
For a truly spectacular and splendid calendar sharing experience, let’s explore some advanced features:
-
Creating a public calendar: This allows anyone with the link to view your calendar, even without a Google account. Use this option cautiously and only for calendars intended for public access, like a community event calendar. To create a public calendar, follow the sharing steps above, but instead of adding email addresses, choose "Make public" and copy the generated link.
-
Calendar nicknames: You can assign a more descriptive name to your calendar for easier identification by you and those you share it with. This is particularly helpful when managing multiple calendars.
-
Color-coding calendars: Assign different colors to your calendars to visually distinguish them. This makes it easy to spot specific events at a glance.
-
Using calendar subscriptions: Instead of sharing a calendar, you can subscribe to a public calendar. This is useful for staying updated on events hosted by others without granting them access to your own calendar.
-
Managing sharing settings: At any point, you can revisit the sharing settings to modify permissions or remove individuals from your shared calendar. This ensures you maintain control over your calendar’s accessibility.
Part 5: Troubleshooting Common Sharing Issues
Occasionally, you might encounter problems when sharing your Google Calendar. Here are some common issues and their solutions:
-
Recipient can’t see the calendar: Double-check that you entered the correct email address and that the recipient has a Google account. Ensure the correct permission level is selected.
-
Recipient sees only free/busy information: Verify that you haven’t accidentally restricted the permission level to "See only free/busy information."
-
Changes aren’t reflected: If you’ve granted "Make changes to events" permission, ensure the recipient is saving their changes correctly.
Part 6: Beyond Sharing: Collaborating Effectively
Sharing your calendar is just the first step. Effective collaboration requires clear communication and established protocols. Consider these points:
-
Establish clear communication channels: Use email, messaging apps, or regular meetings to discuss scheduling conflicts or coordinate events.
-
Use calendar descriptions effectively: Provide detailed descriptions for your events, including relevant information like agendas, links, or contact details.
-
Regularly review and update sharing settings: Periodically review your sharing settings to ensure they align with your current needs and to remove access for individuals who no longer require it.
By mastering these techniques and understanding the nuances of Google Calendar sharing, you can transform your scheduling from a mundane task into a spectacular, breathtaking, and splendid experience of seamless collaboration and effortless organization. Embrace the power of shared calendars, and watch your productivity and collaboration soar.


Closure
Thus, we hope this article has provided valuable insights into Sharing Your Google Calendar: A Spectacular, Breathtaking, and Splendid Guide. We thank you for taking the time to read this article. See you in our next article!