Sharing Your Apple Calendar: A Comprehensive Guide for Seamless Collaboration
Related Articles: Sharing Your Apple Calendar: A Comprehensive Guide for Seamless Collaboration
Introduction
With great pleasure, we will explore the intriguing topic related to Sharing Your Apple Calendar: A Comprehensive Guide for Seamless Collaboration. Let’s weave interesting information and offer fresh perspectives to the readers.
Table of Content
Sharing Your Apple Calendar: A Comprehensive Guide for Seamless Collaboration

Sharing your Apple Calendar is a crucial aspect of effective time management and collaboration, whether you’re coordinating schedules with family, colleagues, or friends. Apple’s Calendar app offers several methods for sharing, each with its own advantages and disadvantages. This comprehensive guide will delve into each method, providing clear instructions and troubleshooting tips, ensuring you can seamlessly share your calendar with anyone, regardless of their device or operating system.
I. Understanding Calendar Sharing Options in Apple’s Ecosystem:
Before we dive into the specifics, it’s important to understand the different ways you can share your Apple Calendar. The primary methods revolve around:
-
Public Calendars: These calendars are visible to anyone with the link. Anyone can view the events, but they cannot make changes. This is ideal for broadcasting information, such as company holidays or public events.
-
Shared Calendars: This is the most common method for collaboration. You can grant varying levels of access – view-only or editing permissions – to specific individuals or groups. This allows for real-time scheduling coordination.
-
iCloud Calendar Sharing: This leverages iCloud’s infrastructure for seamless sharing among Apple devices and users. It’s the most integrated and convenient method for Apple users.
-
Third-Party Calendar Apps: While this guide focuses on Apple’s native Calendar app, it’s worth noting that many third-party calendar apps offer similar sharing functionalities, potentially with additional features.
II. Sharing Your Calendar using iCloud (Most Common Method):
This method is the easiest and most effective for sharing with other Apple users, offering a smooth and integrated experience.
A. Sharing an Entire Calendar:
-
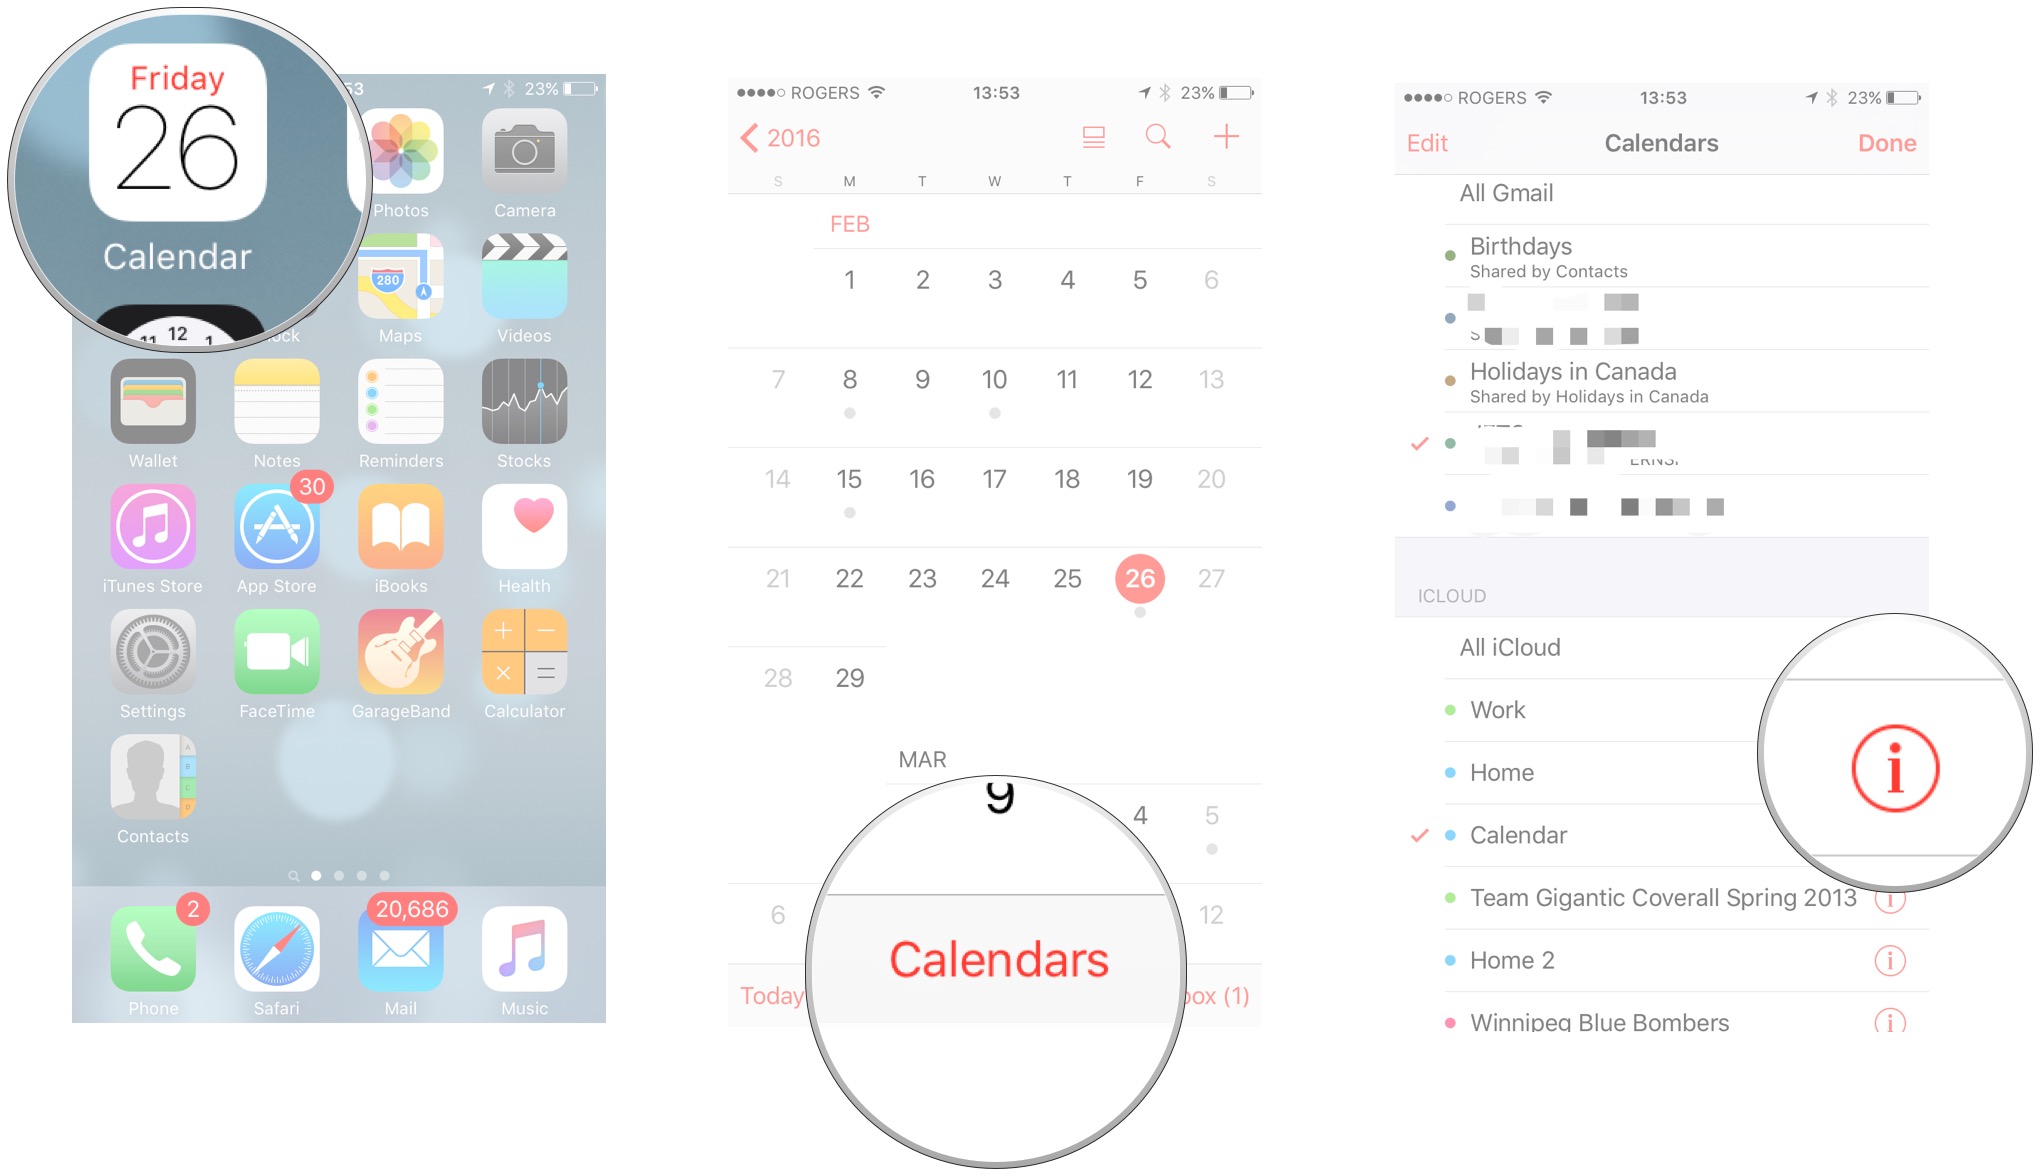
Open the Calendar app: Launch the Calendar app on your iPhone, iPad, or Mac.
-
Select the Calendar: Locate the calendar you wish to share in the calendar list on the left sidebar.
-
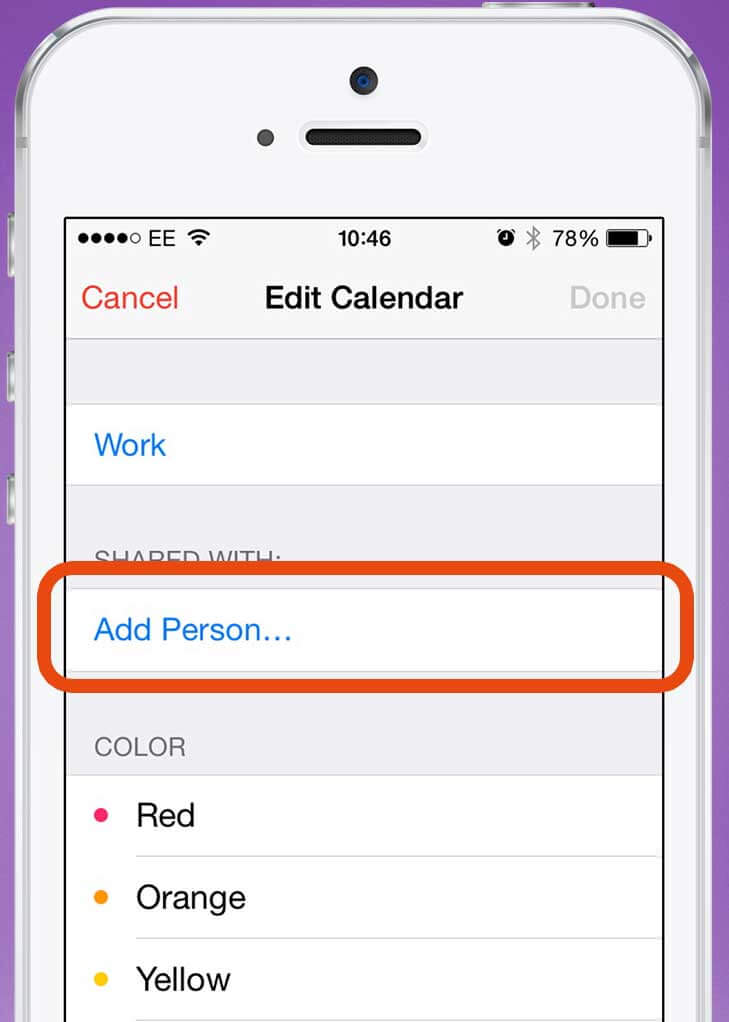
Tap/Click the "i" icon: This will open the calendar’s information pane.
-
Tap/Click "Add Person": This option is usually found under the "Sharing & Subscriptions" section.
-
Enter the recipient’s email address or phone number: Ensure you enter the correct contact information. Apple will automatically search for the recipient using their Apple ID.
-
Choose the access level: You can grant either "View Only" or "Can Edit" permissions. "View Only" allows the recipient to see events but not modify them. "Can Edit" allows the recipient to add, modify, and delete events.
-
Tap/Click "Add": This sends an invitation to the recipient. They will receive a notification and need to accept the invitation to view the calendar.
B. Sharing Specific Events:
While you can share an entire calendar, you might sometimes need to share only specific events. This isn’t directly supported by the standard sharing feature; however, you can achieve this through:
-
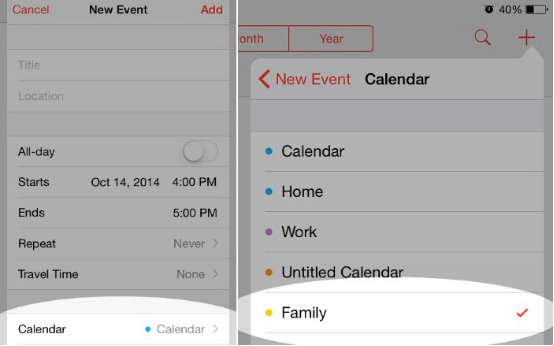
Creating a new calendar: Create a new calendar specifically for the events you want to share.
-
Adding the events: Copy the events you wish to share into this new calendar.
-
Sharing the new calendar: Follow the steps in section II.A to share the newly created calendar.
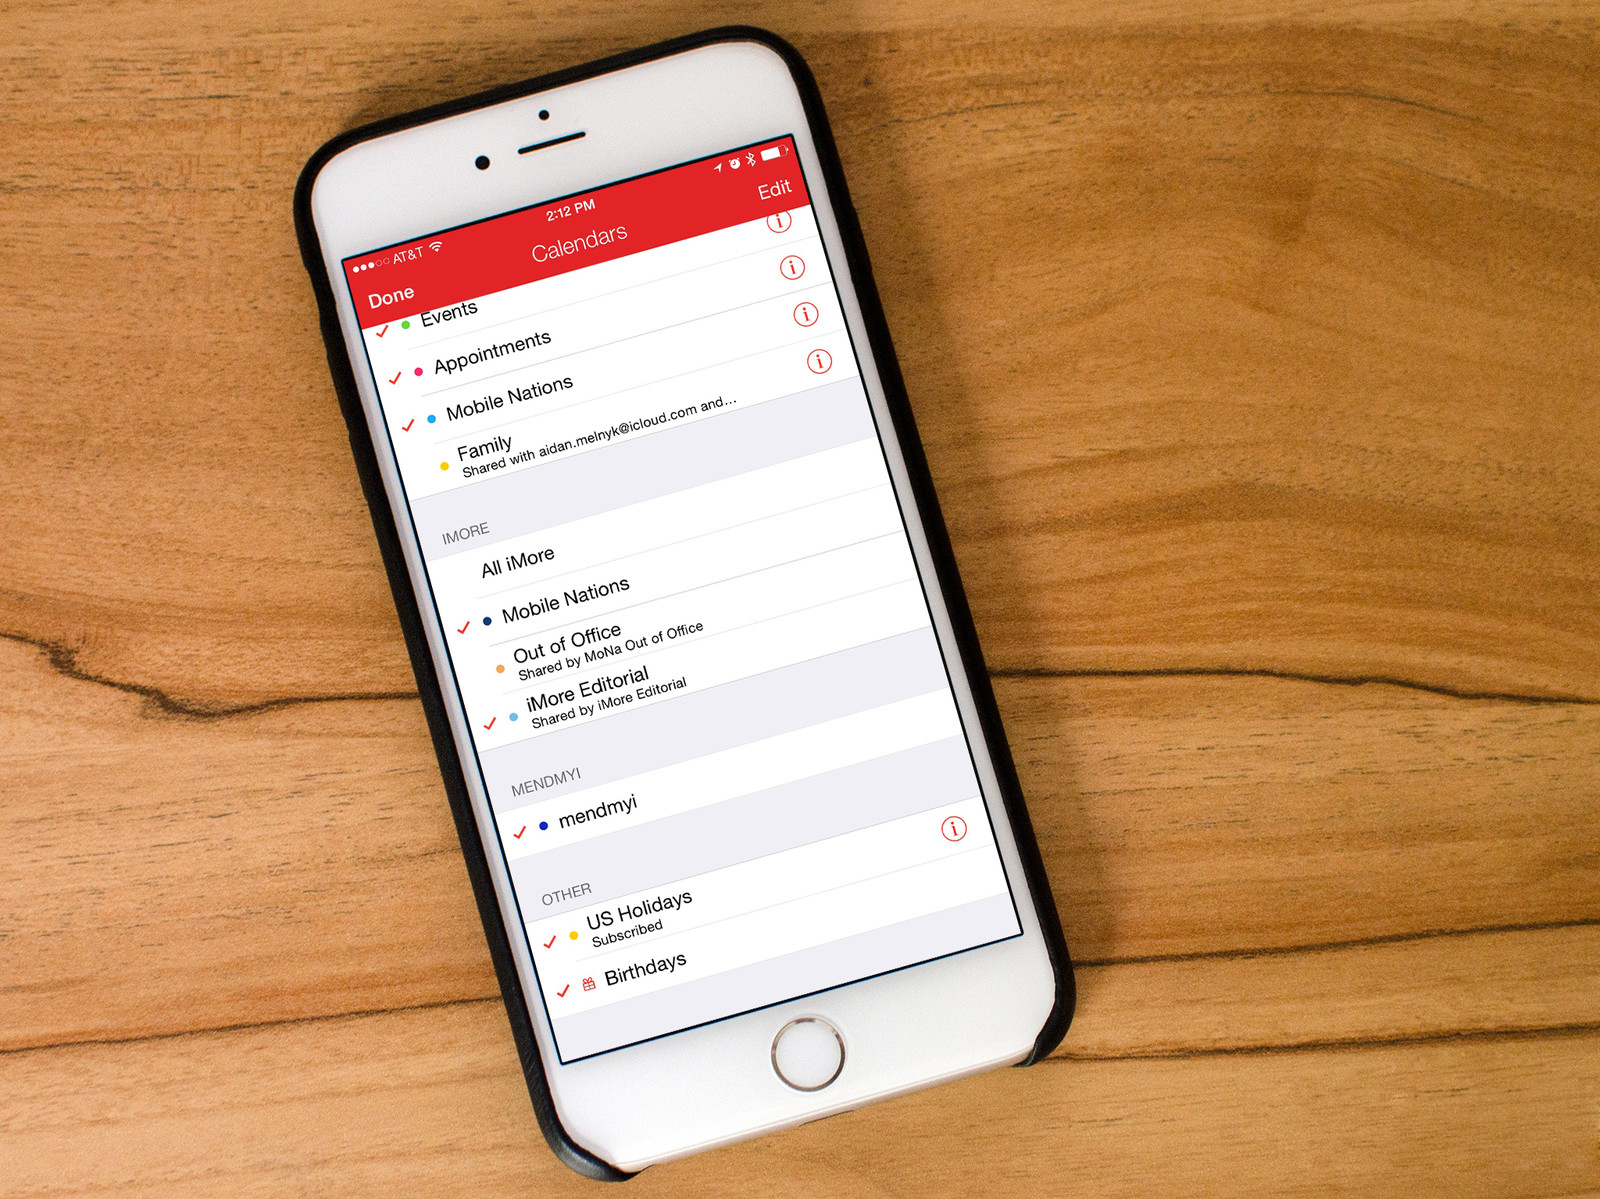
C. Managing Shared Calendars:
-
Access the calendar list: Go to the calendar list in the Calendar app.
-
Locate the shared calendar: Shared calendars will be identified with the name of the person who shared it.
-
Adjust permissions: You can change the permissions for a shared calendar by following the same steps as in II.A, selecting the calendar, and modifying the access level.
-
Stop sharing: To stop sharing a calendar, follow the same steps as above, but instead of changing permissions, select "Stop Sharing."
III. Sharing Your Calendar Publicly:
Public calendars are ideal for broadcasting information widely, like a team’s project schedule or community events.
-
Create a new calendar: Create a new calendar in the Calendar app.
-
Share the calendar publicly: In the calendar’s information pane, select "Share Calendar." Choose "Public Calendar."
-
Generate a link: Apple will generate a link that you can share with anyone.
-
Share the link: Distribute the link via email, messaging apps, or any other method.
Important Note: Anyone with the public calendar link can view the events. They cannot modify the events unless you grant them editing permissions, which defeats the purpose of a public calendar.
IV. Troubleshooting Common Issues:
-
Recipient not receiving the invitation: Double-check the recipient’s email address or phone number. Ensure they have an active Apple ID and are not blocking email from your address.
-
Recipient unable to access the calendar: The recipient may need to accept the invitation. Check their spam folder or junk mail.
-
Calendar not syncing: Ensure both you and the recipient have a stable internet connection. Check your iCloud settings to make sure Calendar is enabled for iCloud syncing.
-
Conflicts and double-bookings: When multiple people have editing access to a shared calendar, double-bookings can occur. Clear communication and careful scheduling are crucial to avoid this.
V. Sharing Calendars with Non-Apple Users:
Sharing calendars with non-Apple users requires a slightly different approach. The most common methods involve:
-
Exporting as ICS file: You can export your calendar as an ICS file, which can be imported into most calendar applications, including Google Calendar, Outlook, and others.
-
Using a third-party calendar app: Many third-party apps offer more robust cross-platform compatibility, allowing for seamless sharing with users regardless of their device or operating system.
-
Using a shared online calendar service: Services like Google Calendar can be used as a central hub for sharing calendars with users who do not use Apple devices.
VI. Best Practices for Calendar Sharing:
-
Use descriptive calendar names: Clearly label your calendars to avoid confusion.
-
Grant appropriate permissions: Only grant editing permissions to those who need them.
-
Regularly review shared calendars: Check for conflicts and ensure everything is up-to-date.
-
Communicate effectively: Keep in touch with those sharing your calendar to coordinate schedules and avoid misunderstandings.
VII. Conclusion:
Sharing your Apple Calendar is a simple yet powerful way to enhance collaboration and streamline scheduling. By understanding the different methods available and following the steps outlined in this guide, you can effectively share your calendar with anyone, regardless of their device or operating system. Remember to prioritize clear communication and appropriate access levels to ensure a smooth and productive collaborative experience. Properly utilizing Apple’s calendar sharing features can significantly improve your personal and professional life by fostering better organization and communication.


Closure
Thus, we hope this article has provided valuable insights into Sharing Your Apple Calendar: A Comprehensive Guide for Seamless Collaboration. We thank you for taking the time to read this article. See you in our next article!