Mastering Calendar Invites on iPhone: A Comprehensive Guide
Related Articles: Mastering Calendar Invites on iPhone: A Comprehensive Guide
Introduction
In this auspicious occasion, we are delighted to delve into the intriguing topic related to Mastering Calendar Invites on iPhone: A Comprehensive Guide. Let’s weave interesting information and offer fresh perspectives to the readers.
Table of Content
Mastering Calendar Invites on iPhone: A Comprehensive Guide
The iPhone calendar is a powerful tool for scheduling and managing appointments, meetings, and events. Sending calendar invites effectively is crucial for seamless collaboration and ensuring everyone is on the same page. This comprehensive guide will walk you through the entire process, from creating an event to customizing invitations and handling responses, providing detailed explanations and troubleshooting tips for a smooth experience.
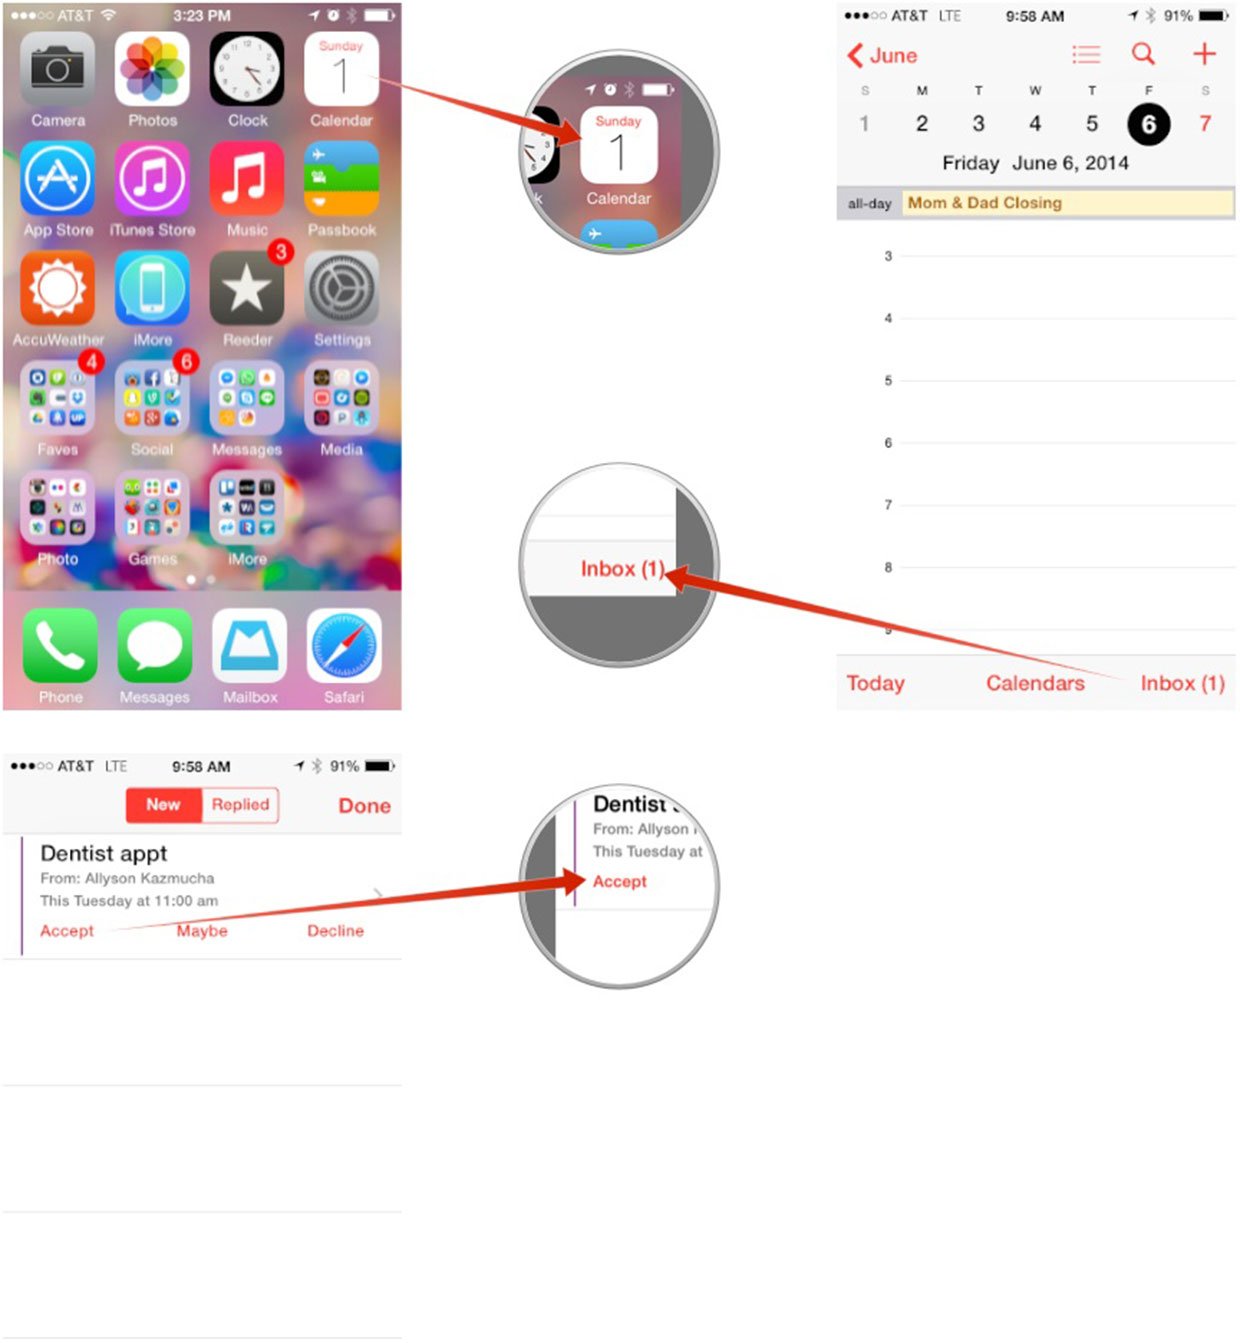
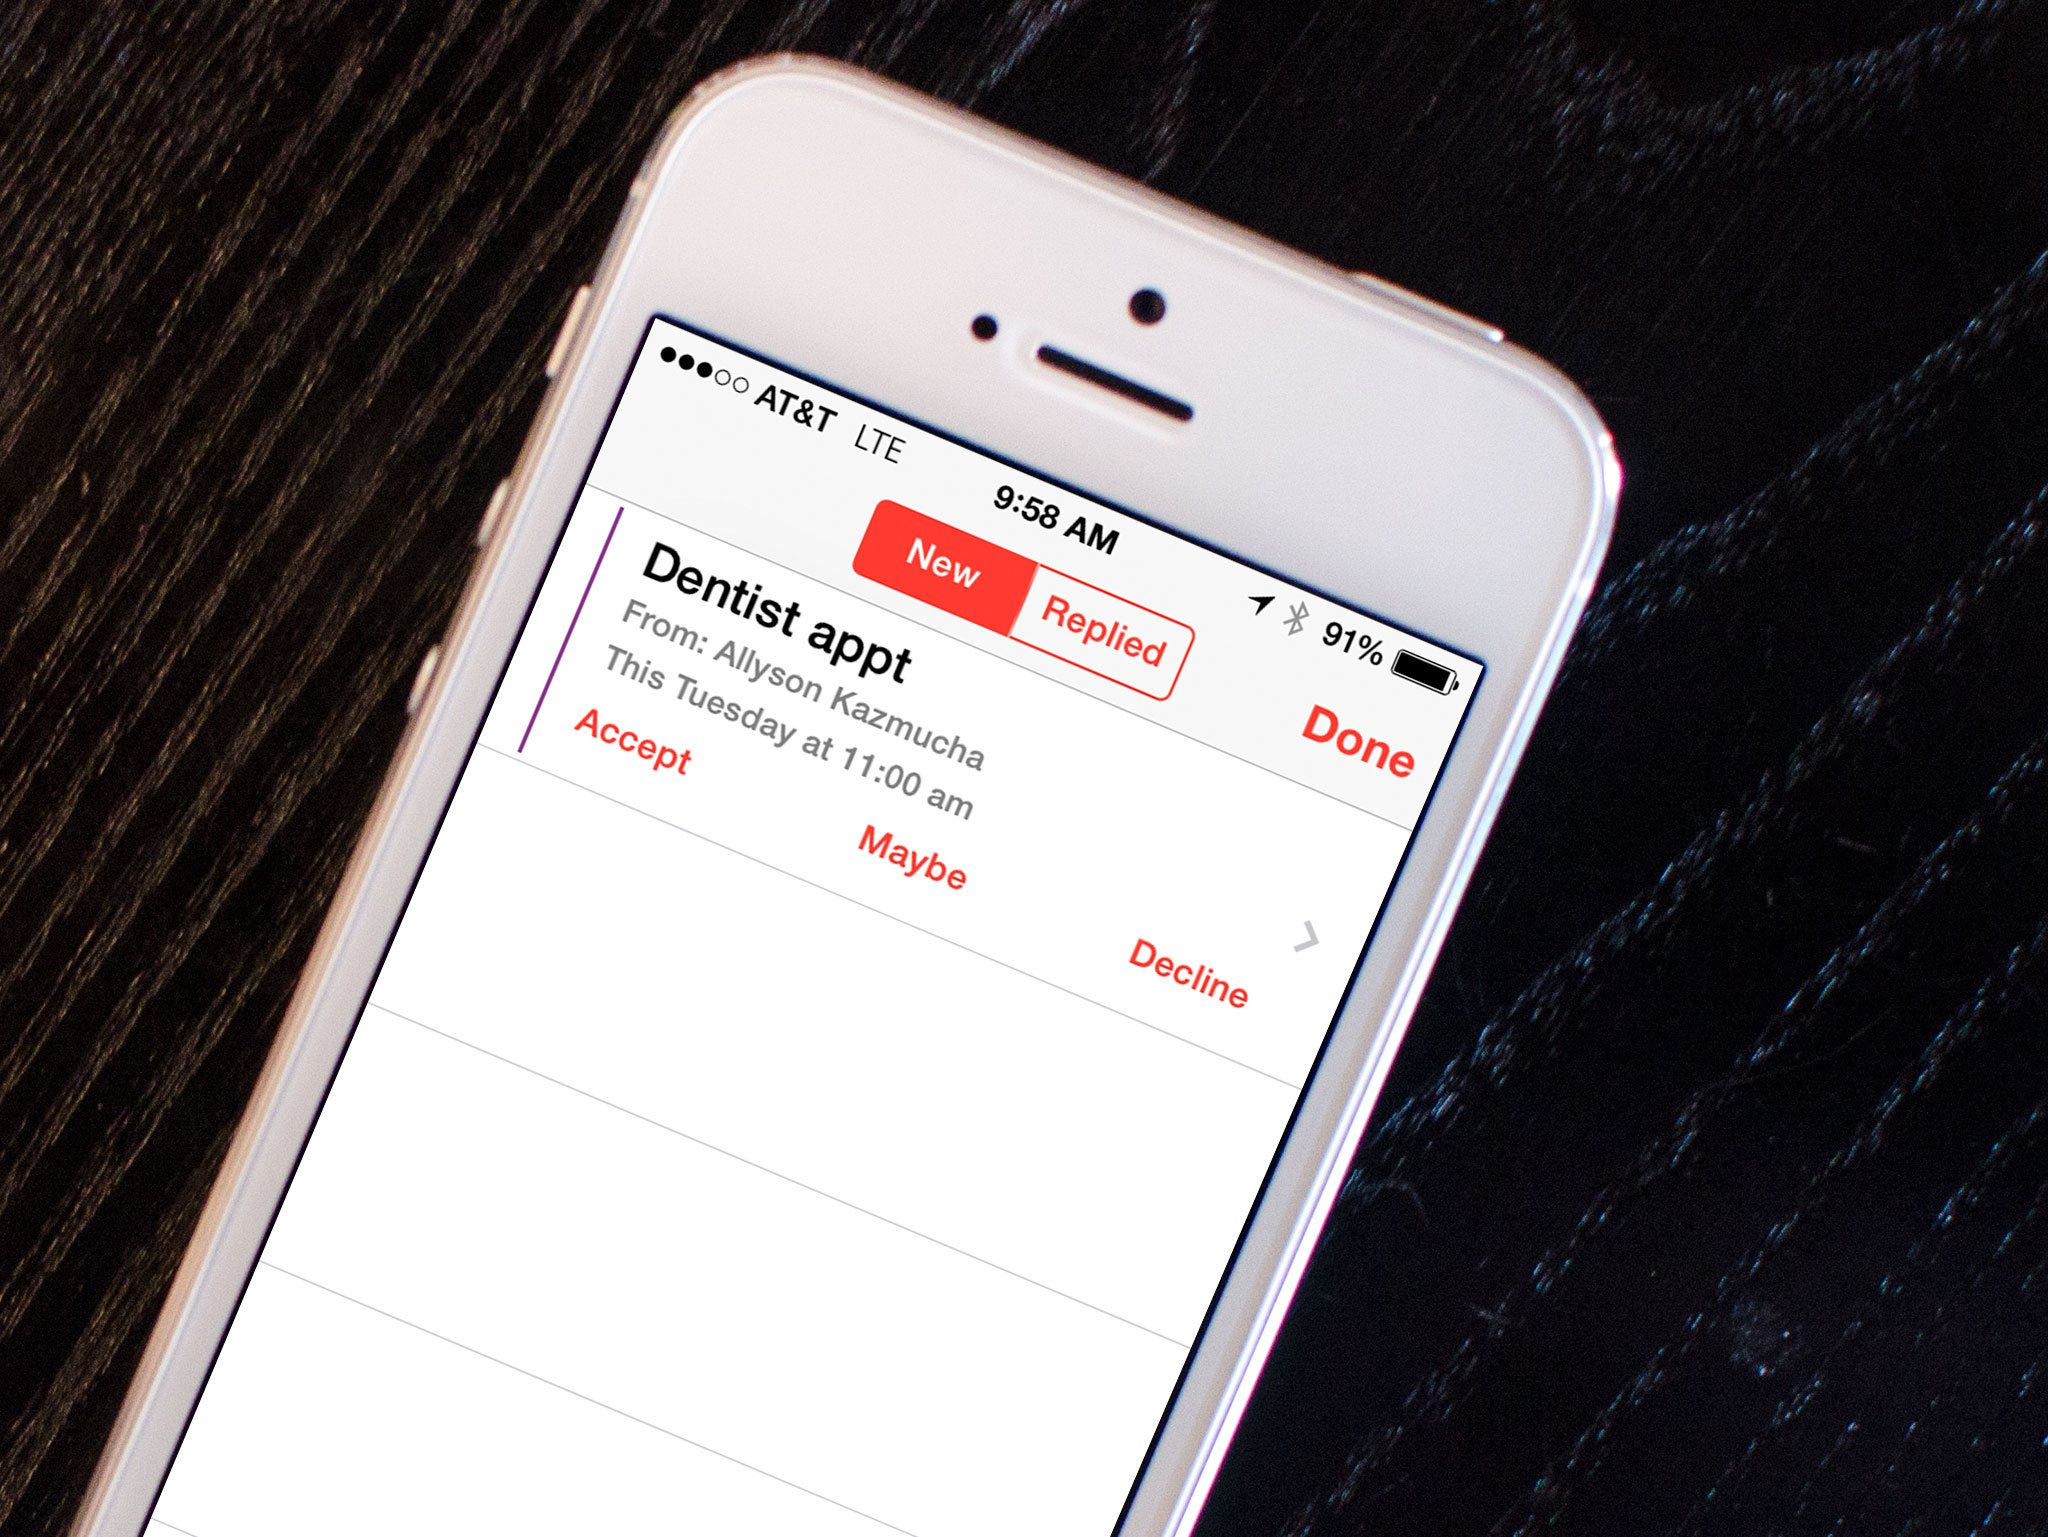
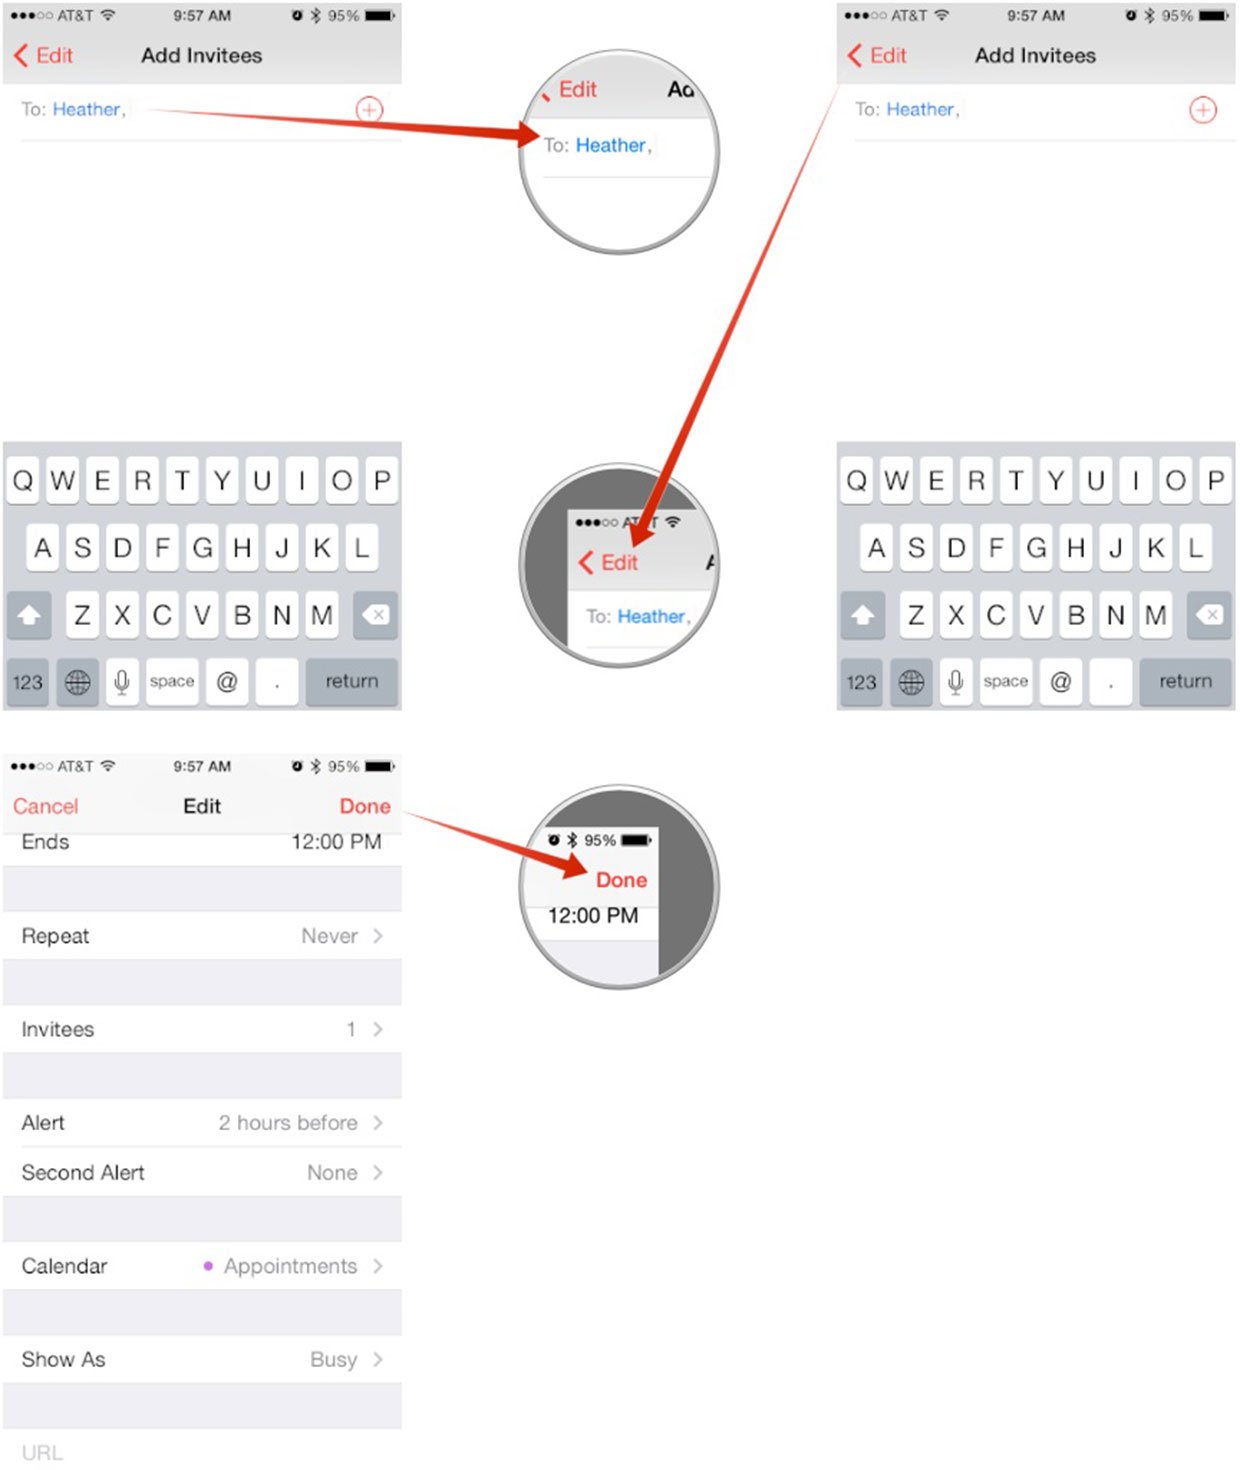
Part 1: Creating and Sending a Basic Calendar Invite
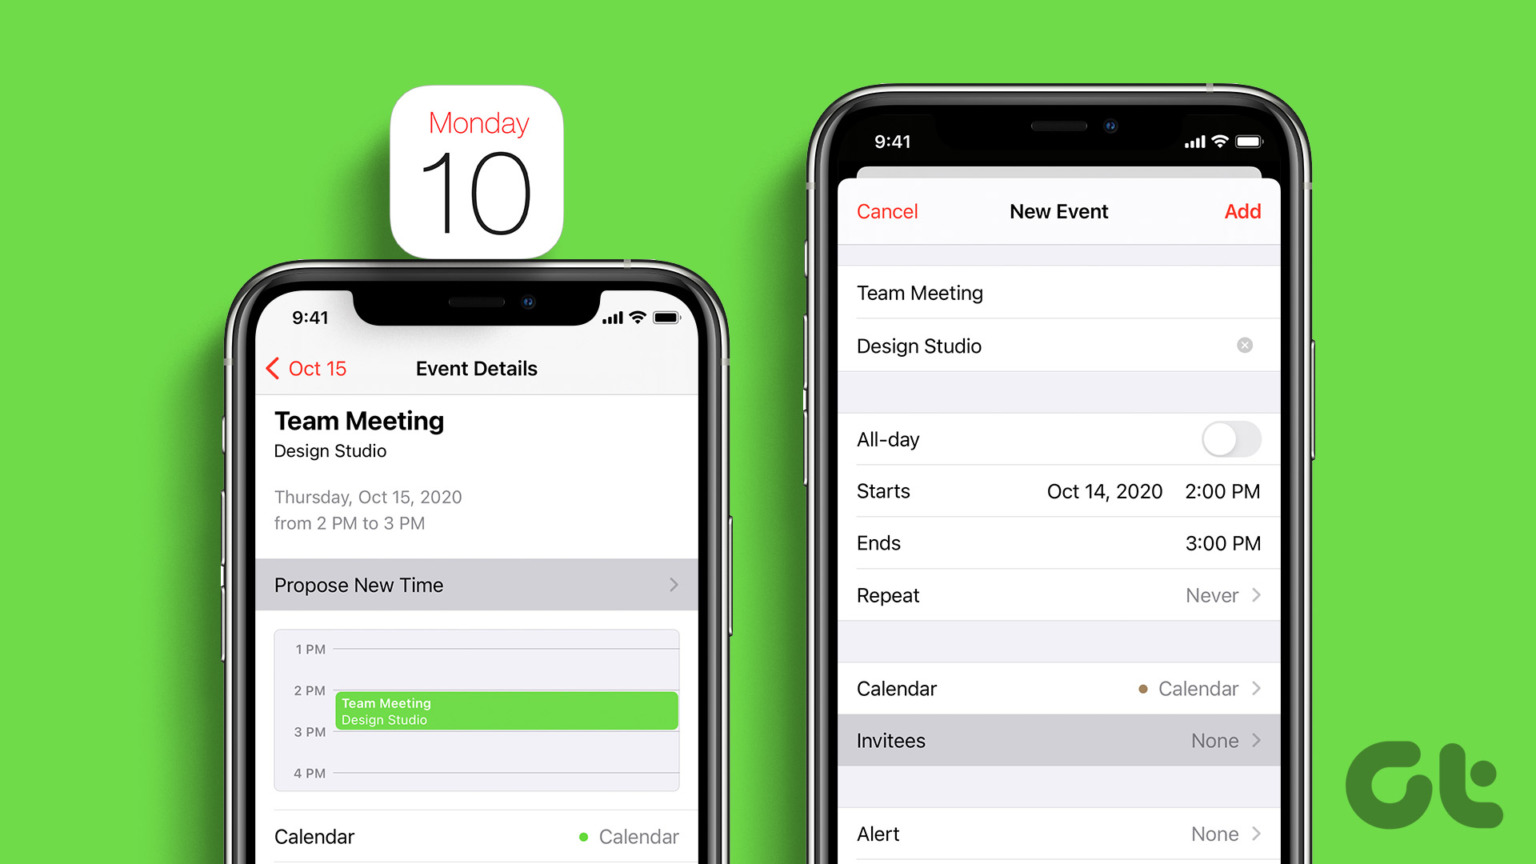
The simplest way to send a calendar invite from your iPhone is through the built-in Calendar app. Here’s a step-by-step guide:
-
Open the Calendar app: Locate the Calendar app icon on your home screen and tap it to open.
-
Create a new event: Tap the "+" button (usually located in the top right corner) to create a new event. Alternatively, you can tap on a specific day in the calendar view to create an event for that day.
-
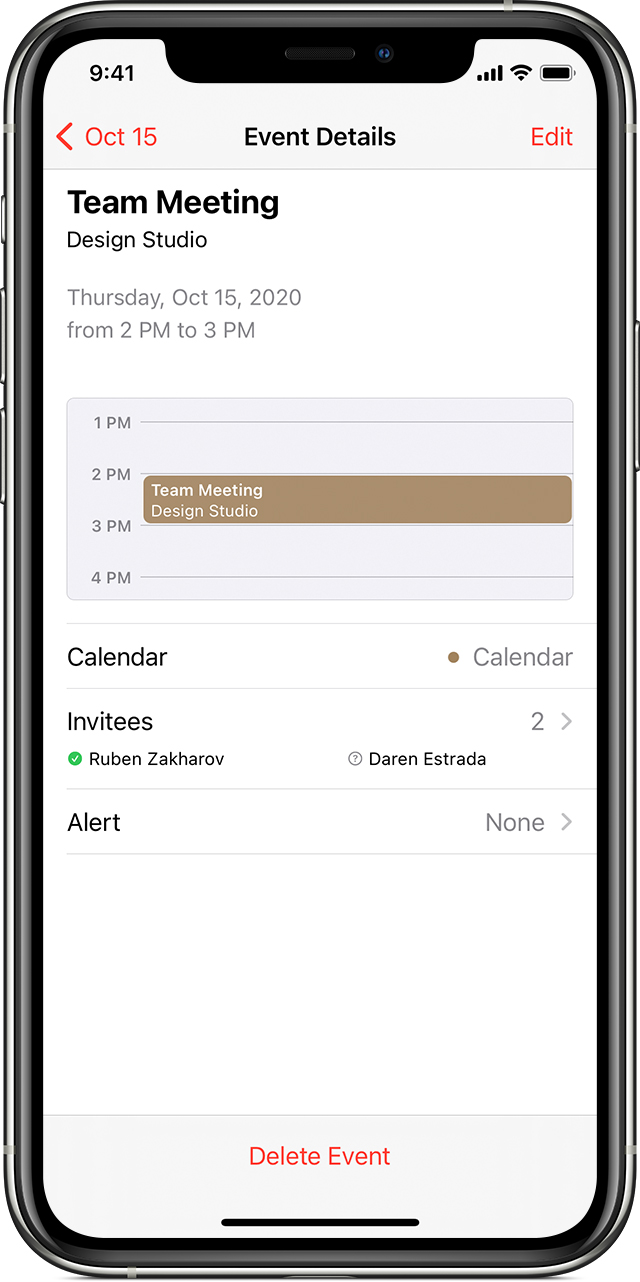
Add event details: You’ll need to fill in the following information:


Closure
Thus, we hope this article has provided valuable insights into Mastering Calendar Invites on iPhone: A Comprehensive Guide. We thank you for taking the time to read this article. See you in our next article!