Mastering the Outlook Mail, Calendar, and Tasks Bar: A Guide to Customization and Efficiency
Related Articles: Mastering the Outlook Mail, Calendar, and Tasks Bar: A Guide to Customization and Efficiency
Introduction
With great pleasure, we will explore the intriguing topic related to Mastering the Outlook Mail, Calendar, and Tasks Bar: A Guide to Customization and Efficiency. Let’s weave interesting information and offer fresh perspectives to the readers.
Table of Content
Mastering the Outlook Mail, Calendar, and Tasks Bar: A Guide to Customization and Efficiency

Microsoft Outlook, a cornerstone of productivity for millions, often presents users with a familiar yet sometimes frustrating challenge: managing the interplay between email, calendar, and tasks. The central navigation bar, housing these crucial components, can feel cramped, cluttered, or simply not optimally arranged for individual workflows. This comprehensive guide will delve into the intricacies of customizing your Outlook mail, calendar, and tasks bar, transforming it from a potential source of frustration into a finely tuned instrument of efficiency. We’ll explore various techniques, ranging from simple drag-and-drop adjustments to more advanced configuration options, to help you achieve the finest, most magnificent, and coruscating Outlook experience possible.
Understanding the Outlook Navigation Pane:
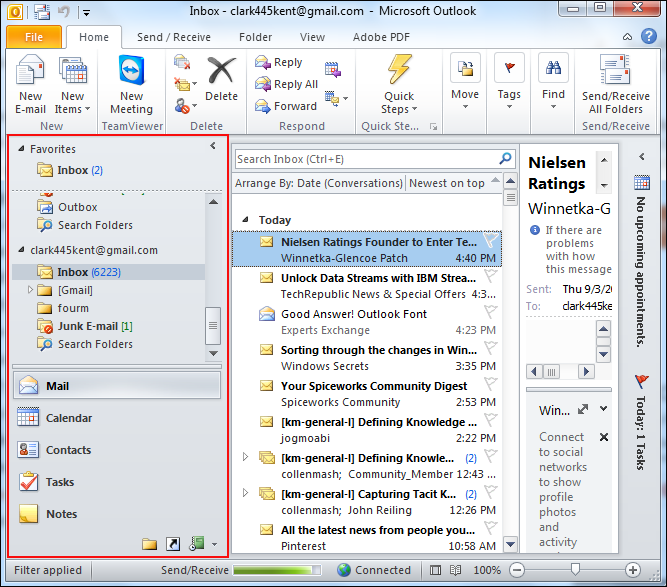
Before embarking on our customization journey, it’s essential to understand the structure of the Outlook navigation pane. This pane, typically located on the left side of your Outlook window, houses folders for your email accounts, calendar entries, tasks, contacts, and other elements. The key areas we’ll focus on are:
- Mail: Displays your email folders (Inbox, Sent Items, Drafts, etc.) and allows access to your email messages.
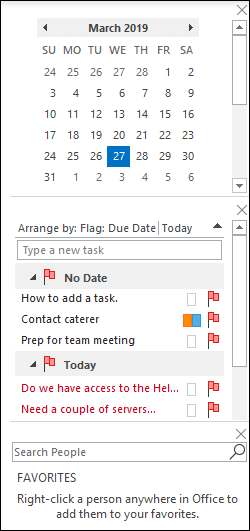
- Calendar: Presents your schedule, appointments, and meetings, offering a visual representation of your commitments.
- Tasks: Lists your pending tasks, enabling you to manage projects and to-dos effectively.
The arrangement and visibility of these elements are highly customizable, offering a significant degree of control over your Outlook experience.
Method 1: The Simple Drag-and-Drop Approach
The most straightforward method for rearranging your Outlook navigation pane is through simple drag-and-drop functionality. This method allows for quick and intuitive adjustments without delving into advanced settings.
-
Locate the Navigation Pane: Identify the pane on the left side of your Outlook window containing Mail, Calendar, and Tasks.
-
Select the Item: Click and hold the title of the section you wish to move (e.g., "Calendar").
-
Drag and Drop: Drag the selected item up or down within the navigation pane to your desired position. Release the mouse button to finalize the rearrangement.
This method allows you to easily prioritize the elements you use most frequently. For instance, if you spend the majority of your workday managing appointments, you might want to place the "Calendar" section at the top of the navigation pane for quick access.
Method 2: Utilizing Outlook Options for Advanced Customization
While drag-and-drop provides basic rearrangement, Outlook offers more granular control through its options settings. This approach allows for a more profound customization, enabling you to tailor the navigation pane to your specific needs.
-
Access Outlook Options: Go to "File" > "Options."
-
Navigate to Advanced Options: In the Outlook Options window, select "Advanced" from the left-hand menu.
-
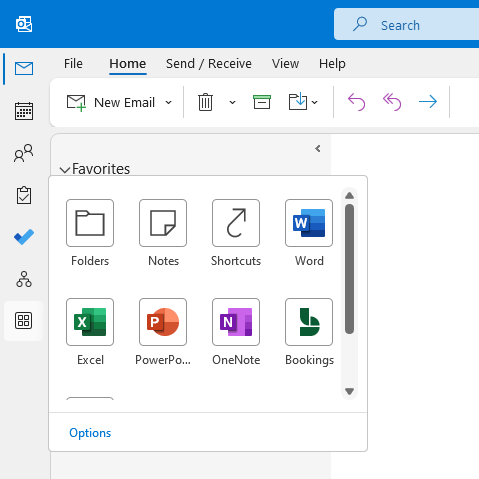
Customize Navigation Pane: Scroll down to the "Navigation Pane" section. Here you’ll find options to:
- Show or hide specific sections: You can selectively hide sections like "Calendar" or "Tasks" if you rarely use them, decluttering the navigation pane.
- Customize the display of folders: Within each section (Mail, Calendar, Tasks), you can choose which folders are visible. This helps to reduce visual clutter and focus on essential folders.
- Reset the Navigation Pane: If you’ve made numerous changes and want to revert to the default settings, you can use the "Reset Navigation Pane" option.
-
Apply Changes: Click "OK" to save your changes and apply the new configuration to your Outlook navigation pane.
Method 3: Creating Custom Views and Groups for Enhanced Organization
For users who require a higher level of organization, Outlook allows for the creation of custom views and groups within the navigation pane. This advanced technique can significantly enhance efficiency by grouping related items together.
-
Creating Custom Views (for Mail and Calendar): Within the Mail or Calendar section, right-click on a folder and select "View Settings." Here you can customize how items are displayed, including sorting options, column visibility, and grouping criteria. This allows for creating highly tailored views for different projects or contexts.
-
Creating Groups (for Mail and Tasks): In the Mail or Tasks section, you can create groups to categorize related items. Right-click on a folder, and the option to create a new group might be available (depending on your Outlook version). This allows for logical grouping of emails or tasks based on projects, clients, or other criteria.
Method 4: Utilizing Add-ins and Third-Party Tools
Numerous add-ins and third-party tools are available to extend Outlook’s functionality and provide further customization options for the navigation pane. These tools can offer features such as:
- Customizable tabs and panels: Add-ins can introduce new tabs or panels to the navigation pane, providing access to specialized features or integrations.
- Enhanced search and filtering: Some tools offer advanced search and filtering capabilities, allowing for more efficient navigation and information retrieval.
- Improved visual organization: Certain add-ins might provide alternative layouts or visual representations of your email, calendar, and tasks, enhancing overall organization.
Troubleshooting Common Issues:
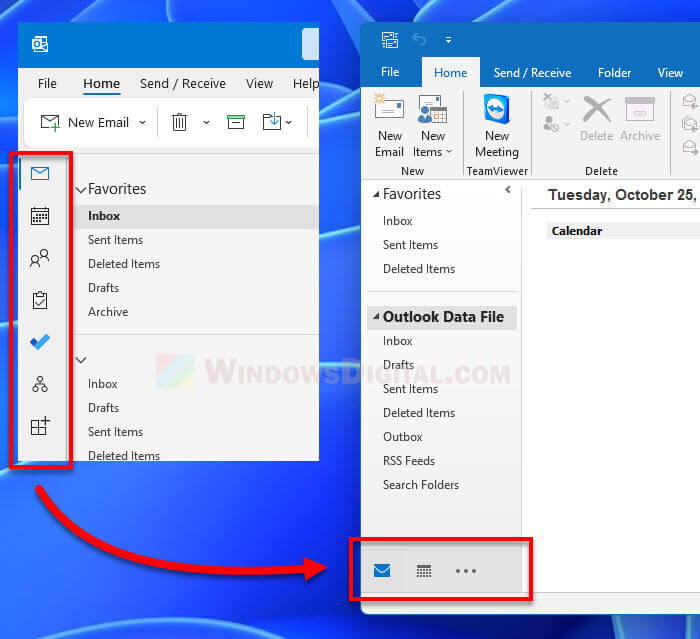
- Navigation Pane Disappeared: If your navigation pane is missing, check your Outlook settings. It might be minimized or accidentally hidden. Look for a small arrow pointing to the right near the edge of the screen; clicking it usually restores the pane.
- Items Not Dragging: Ensure you’re clicking directly on the section title (Mail, Calendar, Tasks) and not on individual folders within the section.
- Changes Not Saving: After making changes, always click "OK" or "Apply" to save your customizations. Restarting Outlook might be necessary in some cases.
Conclusion:
Mastering the Outlook navigation pane is crucial for optimizing your workflow and maximizing productivity. By utilizing the methods outlined in this guide, from simple drag-and-drop adjustments to advanced configuration options and the exploration of third-party tools, you can transform your Outlook experience from potentially chaotic to supremely efficient and visually appealing. Remember that the key to achieving the finest, most magnificent, and coruscating Outlook experience lies in tailoring the interface to perfectly match your individual needs and preferences. Experiment with different configurations, explore the various options, and discover the optimal setup that empowers you to conquer your workday with unparalleled efficiency and style.


Closure
Thus, we hope this article has provided valuable insights into Mastering the Outlook Mail, Calendar, and Tasks Bar: A Guide to Customization and Efficiency. We hope you find this article informative and beneficial. See you in our next article!