Creating a Spectacular, Breathtaking, and Splendid Interactive Calendar in Excel 2024
Related Articles: Creating a Spectacular, Breathtaking, and Splendid Interactive Calendar in Excel 2024
Introduction
With great pleasure, we will explore the intriguing topic related to Creating a Spectacular, Breathtaking, and Splendid Interactive Calendar in Excel 2024. Let’s weave interesting information and offer fresh perspectives to the readers.
Table of Content
Creating a Spectacular, Breathtaking, and Splendid Interactive Calendar in Excel 2024

Excel, often perceived as a mere spreadsheet program, possesses surprising capabilities for creating dynamic and visually appealing applications. This article guides you through the process of crafting a truly spectacular, breathtaking, and splendid interactive calendar in Excel 2024, far exceeding the limitations of a simple printed calendar. We’ll delve into advanced features, incorporating visual enhancements and interactive elements to elevate your calendar experience. This detailed guide will empower you to create a personalized calendar tailored to your specific needs, surpassing any pre-made template.
Part 1: Laying the Foundation – Data and Structure
Before embarking on the visual extravaganza, we need a solid foundation. This involves careful data structuring to ensure the interactive elements function flawlessly.
-
Sheet Design: Create a dedicated sheet for your calendar data. This sheet will remain hidden from the main calendar view, acting as the backend engine. We’ll use a table format for efficient data management. The table should include the following columns (adjust as needed):
-
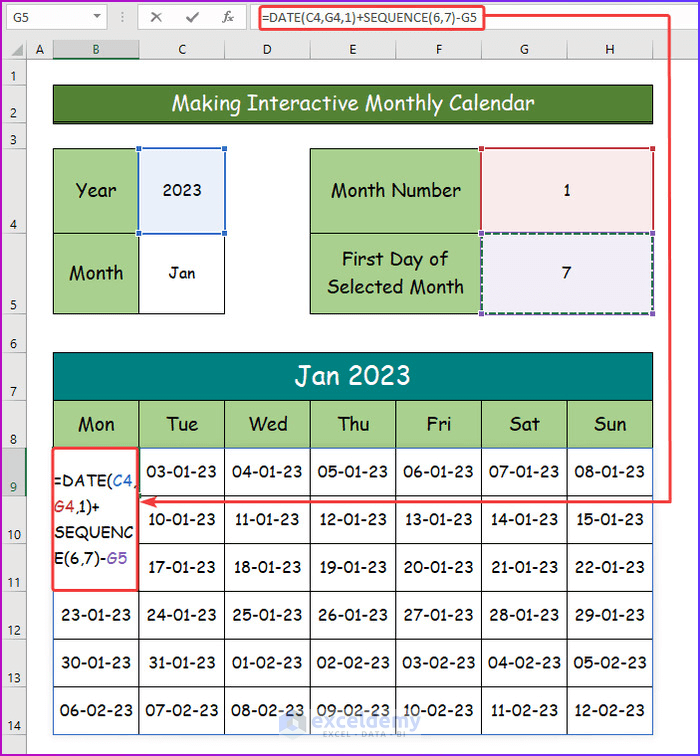
Date: This column will contain each date for the year 2024. You can easily generate this using a formula like
=DATE(2024,ROW()-1,1)in the first cell and dragging down to populate the entire year. Format this column as "Date" to ensure proper display. -
Day of the Week: Use a formula like
=TEXT(A2,"dddd")(assuming the Date is in column A) to extract the day of the week. - Event: This is where you’ll input your events.
- Description: A more detailed description of each event.
- Category: Assign categories (e.g., Work, Personal, Appointment) for color-coding and filtering.
- Location: Specify the location of each event.
- Reminder: Set reminders (e.g., 1 day before, 1 hour before). This can be a time value or text.
- Color Code: Assign a specific color code to each category for visual distinction. You can use color names or RGB values.
-
Date: This column will contain each date for the year 2024. You can easily generate this using a formula like
-
Data Validation: Enhance data entry by using data validation. This ensures consistency and prevents errors. For example, create a dropdown list for the "Category" column containing your predefined categories.
-
Named Ranges: Assign names to your table columns (e.g., "DateColumn", "EventColumn"). This improves formula readability and maintainability. You can do this by selecting the column and typing the name in the name box.
Part 2: Building the Interactive Calendar Interface
Now, let’s create the visually stunning interactive calendar.
-
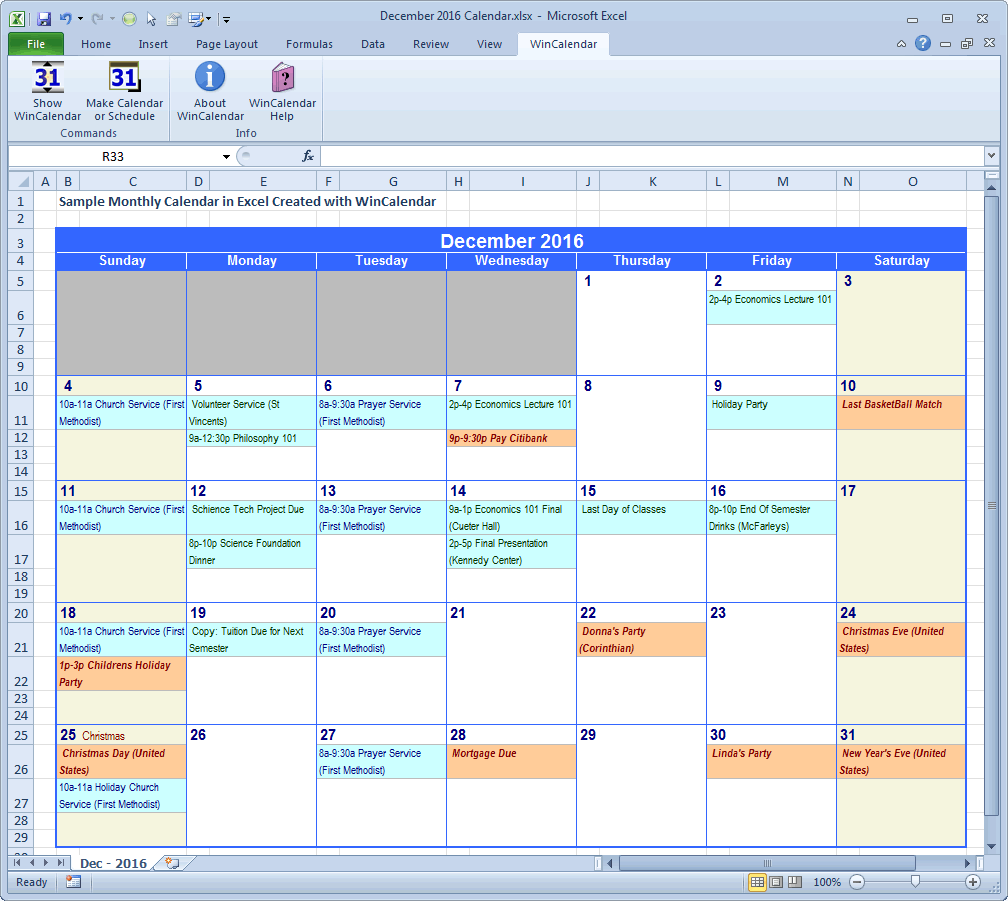
Calendar Layout: On a new sheet, design your calendar’s layout. You’ll need to create a grid representing the days of the week and weeks of the year. Consider using merged cells for week numbers and month headers. Use conditional formatting to visually distinguish weekends.
-
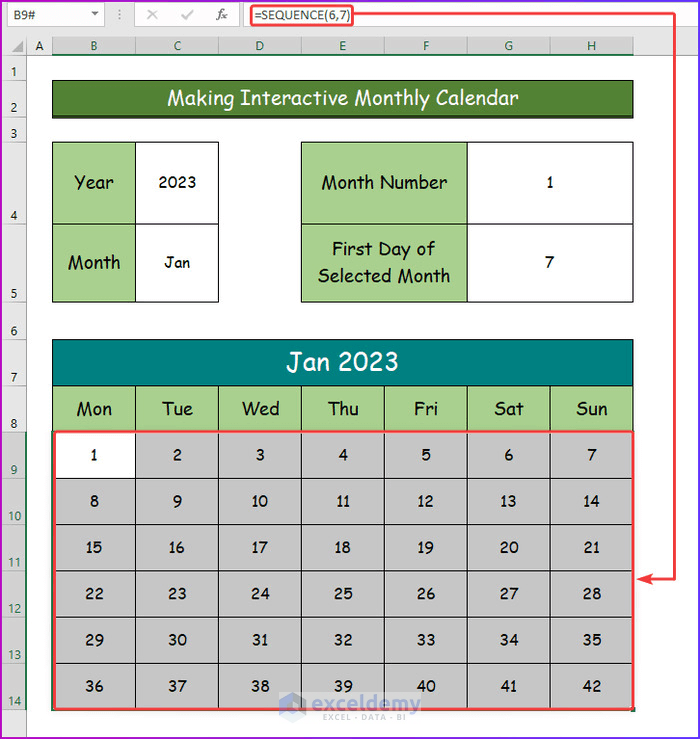
Date Display: In each day’s cell, insert a formula to pull the date from the data sheet. For example, if cell A1 represents the first day of January, use a formula like
=IFERROR(VLOOKUP(DATE(2024,1,COLUMN()-1),DataSheet!DateColumn,1,FALSE),"")This will pull the date from the data sheet based on the column number. Adapt this formula for subsequent months and weeks. -
Event Display: Use the
CONCATENATEfunction or&operator to display events within each day’s cell. For instance,=IF(COUNTIF(DataSheet!DateColumn,A1)>0,CONCATENATE(DataSheet!EventColumn," - ",DataSheet!LocationColumn),""). This will display events from the data sheet if they exist for the specific date. -
Color-Coded Events: Use conditional formatting based on the "Category" column to color-code your events. Create rules based on the color codes assigned earlier. For example, if "Category" is "Work," color the cell blue.
-
Hyperlinks: Add hyperlinks to event descriptions for easy access to more detailed information. You can use the
HYPERLINKfunction to link to a specific cell or even an external website.
Part 3: Injecting Interactivity – Advanced Features
This is where the calendar truly comes alive.
-
Filtering: Implement filtering capabilities using Excel’s built-in filter feature. Users can filter events by category, date range, or keywords. This allows for a focused view of specific events.
-
Slicers: Utilize slicers to provide a visual and interactive way to filter your data. Slicers can be linked to your calendar data, allowing users to easily select categories or date ranges.
-
Data Validation Dropdowns: Add dropdown lists for quick event creation. Users can select pre-defined categories and locations directly from dropdown lists within the data entry area.
-
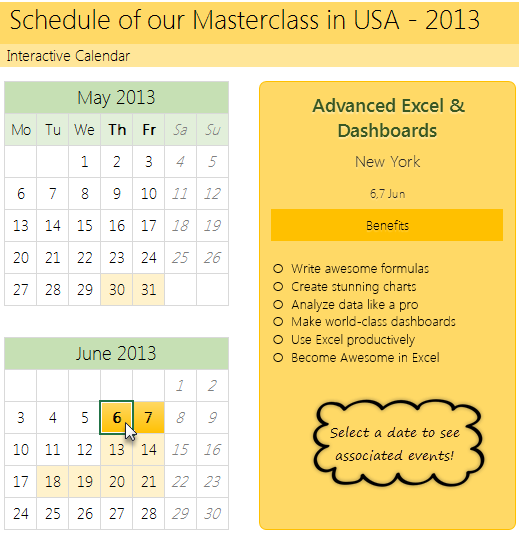
Custom Formatting: Go beyond basic formatting. Use cell styles, borders, shading, and font effects to create a visually appealing and professional calendar. Experiment with different themes and color palettes.
-
Charts and Graphs: Integrate charts and graphs to visualize event frequency by category or month. This provides a high-level overview of your schedule. For instance, a bar chart showing the number of events per category can be extremely insightful.
-
VBA Macro (Optional): For advanced users, consider using VBA macros to automate tasks like generating reminders, sending email notifications based on event dates, or even creating custom interactive elements. A macro could automatically populate the calendar with events from an external source like a Google Calendar feed.
-
Data Validation with Error Handling: To prevent users from entering invalid data, implement robust data validation with informative error messages. For example, if the user tries to enter a date in the wrong format, display a message prompting them to use the correct format.
-
User Input Forms: Create a custom user input form using VBA or by cleverly utilizing data validation and input cells to streamline event entry and reduce the chance of errors. This form could guide the user through each necessary field, improving data entry efficiency and consistency.
-
Conditional Formatting Enhancements: Utilize icon sets in conditional formatting to visually represent the priority or urgency of events. For example, a red exclamation mark could signify a high-priority task.
-
Visual Themes: Create multiple visual themes for your calendar. Users can switch between themes to personalize the look and feel of the calendar based on their preferences. This can be implemented using VBA or by cleverly using conditional formatting and hidden sheets to switch between different styles.
Part 4: Polishing and Refinement
Once you’ve implemented the core features, focus on polishing your calendar:
- Accessibility: Ensure your calendar is accessible to users with disabilities. Use sufficient contrast between text and background colors, and provide alternative text for images.
- User Experience: Prioritize user experience. Make sure the calendar is intuitive and easy to navigate. Clearly label all elements and provide helpful instructions.
- Testing: Thoroughly test your interactive calendar to identify and fix any bugs or glitches. Test different scenarios and data inputs to ensure everything works as expected.
By meticulously following these steps, you can create a truly spectacular, breathtaking, and splendid interactive calendar in Excel 2024. Remember that the key is meticulous planning, a well-structured data sheet, and a creative approach to visual design and interactive elements. This comprehensive guide empowers you to transcend the limitations of a simple calendar and create a personalized, powerful, and visually stunning tool for managing your time and events. The possibilities are as limitless as your imagination.


Closure
Thus, we hope this article has provided valuable insights into Creating a Spectacular, Breathtaking, and Splendid Interactive Calendar in Excel 2024. We hope you find this article informative and beneficial. See you in our next article!