Linking Google Calendar to Outlook: A Spectacular, Breathtaking, and Splendid Guide
Related Articles: Linking Google Calendar to Outlook: A Spectacular, Breathtaking, and Splendid Guide
Introduction
With great pleasure, we will explore the intriguing topic related to Linking Google Calendar to Outlook: A Spectacular, Breathtaking, and Splendid Guide. Let’s weave interesting information and offer fresh perspectives to the readers.
Table of Content
Linking Google Calendar to Outlook: A Spectacular, Breathtaking, and Splendid Guide
For many professionals and individuals juggling multiple platforms, the need to seamlessly integrate Google Calendar with Outlook is paramount. The ability to see all your appointments, meetings, and events in one place eliminates the frustrating back-and-forth between applications, saving precious time and minimizing the risk of double-booking or missed deadlines. This comprehensive guide will lead you through the process of linking Google Calendar to Outlook, covering various methods, troubleshooting common issues, and offering tips for a spectacular, breathtaking, and splendid experience.
I. Understanding the Integration Options:
There are several ways to achieve this integration, each with its own strengths and weaknesses. The ideal method will depend on your specific needs and technical comfort level.
A. Two-Way Synchronization (Best for Real-Time Updates): This method offers the most seamless experience, providing real-time updates between Google Calendar and Outlook. Changes made in one calendar are instantly reflected in the other. However, this generally requires a third-party application or a more technical setup.
B. One-Way Synchronization (Simpler, but Less Dynamic): This method allows you to import your Google Calendar events into Outlook. While changes made in Google Calendar will be reflected in Outlook, alterations made directly in Outlook won’t update your Google Calendar. This is a simpler approach, perfect for those primarily using Google Calendar for scheduling and needing a backup or overview in Outlook.
C. Manual Import (Least Efficient, but Simplest): This involves manually importing your Google Calendar events into Outlook as an ICS file. This is the least efficient method, as you need to repeat the process each time you want to update your Outlook calendar with Google Calendar events.
II. Method 1: Two-Way Synchronization using Third-Party Applications:
Several third-party applications offer robust two-way synchronization between Google Calendar and Outlook. These applications often provide additional features such as calendar sharing, task management integration, and advanced customization options. Here’s a general overview of the process, though specific steps may vary depending on the chosen application:
-
Choose a reputable application: Research and select a trusted application with positive user reviews. Popular options include:
- Outlook Add-ins: Explore the Microsoft Store for Outlook add-ins specifically designed for Google Calendar integration. These often provide a more streamlined experience within the Outlook environment.
- Dedicated Calendar Synchronization Software: Several standalone applications specialize in calendar synchronization across multiple platforms. These offer more advanced features but might require a subscription.
-
Install and Configure: Download and install the chosen application following the provided instructions. You will typically need to grant the application access to both your Google Calendar and Outlook accounts. This usually involves providing authorization codes or connecting through your Google and Microsoft accounts.
-
Customize Settings (Optional): Most applications allow you to customize the synchronization settings. You can specify which calendars to synchronize, how frequently updates occur, and other preferences. This level of control allows for a tailored experience to suit your specific needs.
-
Monitor Synchronization: After setting up the synchronization, monitor the process to ensure that changes made in one calendar are accurately reflected in the other. Regular checks will help identify and resolve any synchronization issues promptly.
III. Method 2: One-Way Synchronization using Outlook Import/Export:
This method provides a simpler approach to integrating Google Calendar events into Outlook. However, it’s crucial to remember that changes made in Outlook won’t be reflected in Google Calendar.
-
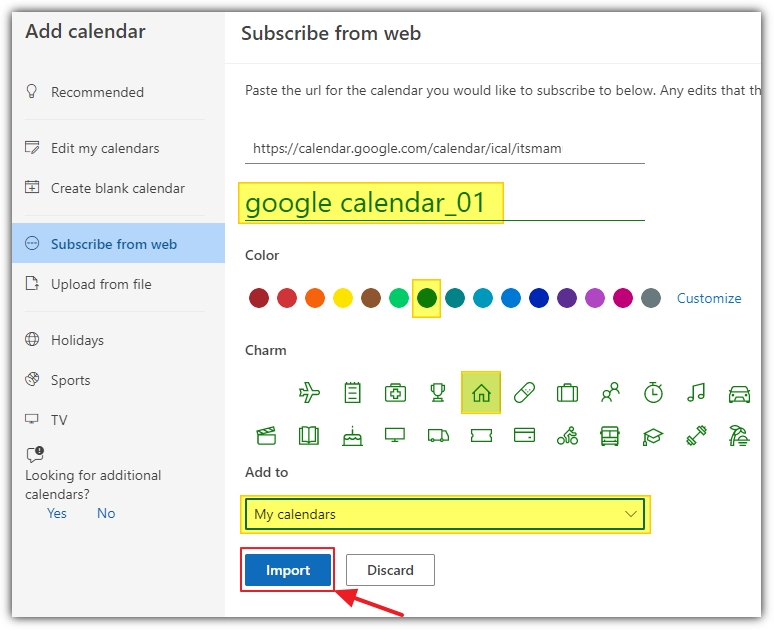
Export from Google Calendar: Log in to your Google Calendar. Select the calendar you wish to import into Outlook. Click the three vertical dots (More actions) next to the calendar’s name. Choose "Settings and sharing." Under the "Integrate calendar" section, click "Export calendar." Save the resulting ICS file to your computer.
-
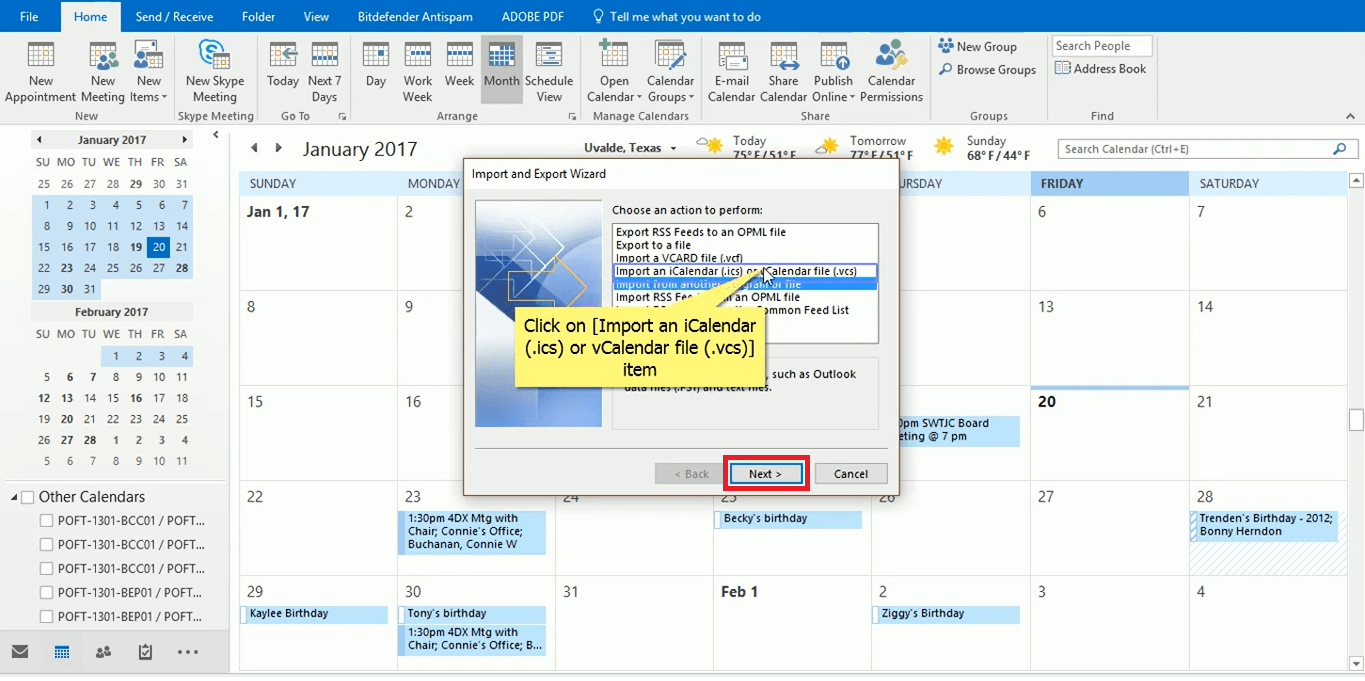
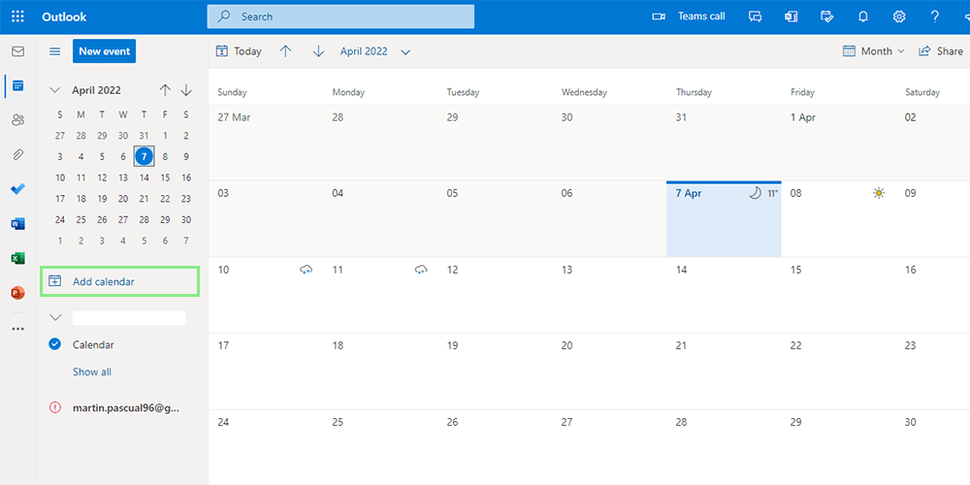
Import into Outlook: Open Outlook. Go to the "File" tab, then "Open & Export," and finally "Import/Export." Select "Import from another program or file," and click "Next." Choose "iCalendar (.ics) or vCalendar file," and click "Next." Browse to the location where you saved the ICS file and select it. Click "Next" and choose where to import the calendar (e.g., a new calendar or an existing one). Click "Finish."
-
Regular Updates: This process needs to be repeated whenever you want to update your Outlook calendar with the latest events from Google Calendar.
IV. Method 3: Manual Import (Least Recommended):
This method is the least efficient but can be helpful for a one-time import of a small number of events. It essentially involves the same steps as one-way synchronization but without the automated update feature.
V. Troubleshooting Common Issues:
Even with careful implementation, you might encounter some challenges. Here are some common issues and their solutions:
-
Synchronization Errors: Ensure your internet connection is stable. Check the application’s logs or settings for any error messages. Restart your computer and the application. If problems persist, contact the application’s support team.
-
Calendar not appearing: Verify that you have correctly selected the calendar for import or synchronization. Double-check the permissions granted to the application.
-
Conflicting Events: If you edit an event in both Google Calendar and Outlook, conflicts might arise. Prioritize one calendar as your primary scheduling source to minimize these conflicts.
-
Two-way synchronization delays: Some delays are normal, but excessive delays might indicate a problem with the application or your internet connection.
VI. Tips for a Spectacular, Breathtaking, and Splendid Experience:
-
Choose the right method: Select the method that best suits your technical skills and needs. If you need real-time updates, opt for two-way synchronization. If simplicity is key, choose one-way synchronization or manual import.
-
Regularly back up your calendars: This is crucial to protect your data in case of unexpected issues.
-
Use color-coding: Differentiate calendars by assigning distinct colors to each calendar, making it easier to visually identify events from different sources.
-
Customize your calendar views: Utilize Outlook’s calendar view options to optimize how you see your events, such as day, week, or month views.
-
Set reminders: Configure reminders for important events to avoid missing appointments.
-
Explore advanced features: Many applications offer advanced features like location integration, task management integration, and more. Explore these features to enhance your productivity.
By following this comprehensive guide, you can successfully link Google Calendar to Outlook, creating a spectacular, breathtaking, and splendidly organized scheduling system. Remember to choose the method that best fits your needs and technical proficiency. With the right approach and a little patience, you’ll enjoy the benefits of a unified calendar experience, boosting your efficiency and reducing scheduling conflicts. Embrace the power of integration and experience the joy of a perfectly synchronized digital life!


Closure
Thus, we hope this article has provided valuable insights into Linking Google Calendar to Outlook: A Spectacular, Breathtaking, and Splendid Guide. We thank you for taking the time to read this article. See you in our next article!