The Ultimate Guide to Linking Apple Calendar and Google Calendar: Seamless Synchronization for a Streamlined Life
Related Articles: The Ultimate Guide to Linking Apple Calendar and Google Calendar: Seamless Synchronization for a Streamlined Life
Introduction
With enthusiasm, let’s navigate through the intriguing topic related to The Ultimate Guide to Linking Apple Calendar and Google Calendar: Seamless Synchronization for a Streamlined Life. Let’s weave interesting information and offer fresh perspectives to the readers.
Table of Content
The Ultimate Guide to Linking Apple Calendar and Google Calendar: Seamless Synchronization for a Streamlined Life

The modern world demands seamless integration between our digital tools. For many, this means effortlessly managing schedules across multiple platforms. If you’re juggling both an Apple device ecosystem (iPhone, iPad, Mac) and the ubiquitous Google services, the need to link your Apple Calendar to your Google Calendar becomes paramount. This comprehensive guide will explore all the methods available, from the simplest to the most sophisticated, ensuring you find the perfect solution for your needs. We’ll delve into the nuances of each approach, highlighting their strengths and weaknesses, and providing troubleshooting tips to navigate any potential hurdles.
Understanding the Challenges and Why Integration Matters
Before diving into the how-to, let’s understand the underlying challenge. Apple Calendar and Google Calendar are distinct services, each operating within its own ecosystem. They don’t inherently "talk" to each other. This lack of native integration forces users to choose between manually entering events into both calendars or relying on third-party solutions or workarounds. Manually entering events is tedious and prone to errors, leading to scheduling conflicts and missed appointments. This is where the need for seamless integration becomes clear. A smoothly linked calendar system offers:
- Time Savings: Eliminates the repetitive task of manually entering events twice.
- Accuracy: Minimizes the risk of scheduling conflicts due to inconsistencies between calendars.
- Efficiency: Provides a centralized view of your schedule, regardless of the device you’re using.
- Reduced Stress: Simplifies your life by streamlining your scheduling process.
- Collaboration: Facilitates easier sharing of calendars with others, regardless of their preferred platform.
Method 1: Using CalDAV (The Most Reliable Method)
CalDAV (Calendar Access Protocol) is a standard protocol that allows calendars to communicate with each other. This method offers the most robust and reliable two-way synchronization between Apple Calendar and Google Calendar. However, it requires a bit more technical setup than other methods.
Steps:
-
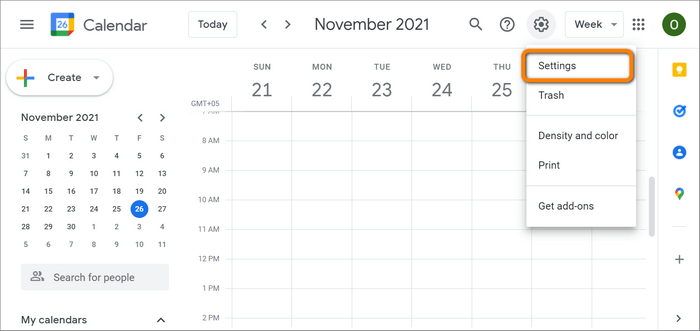
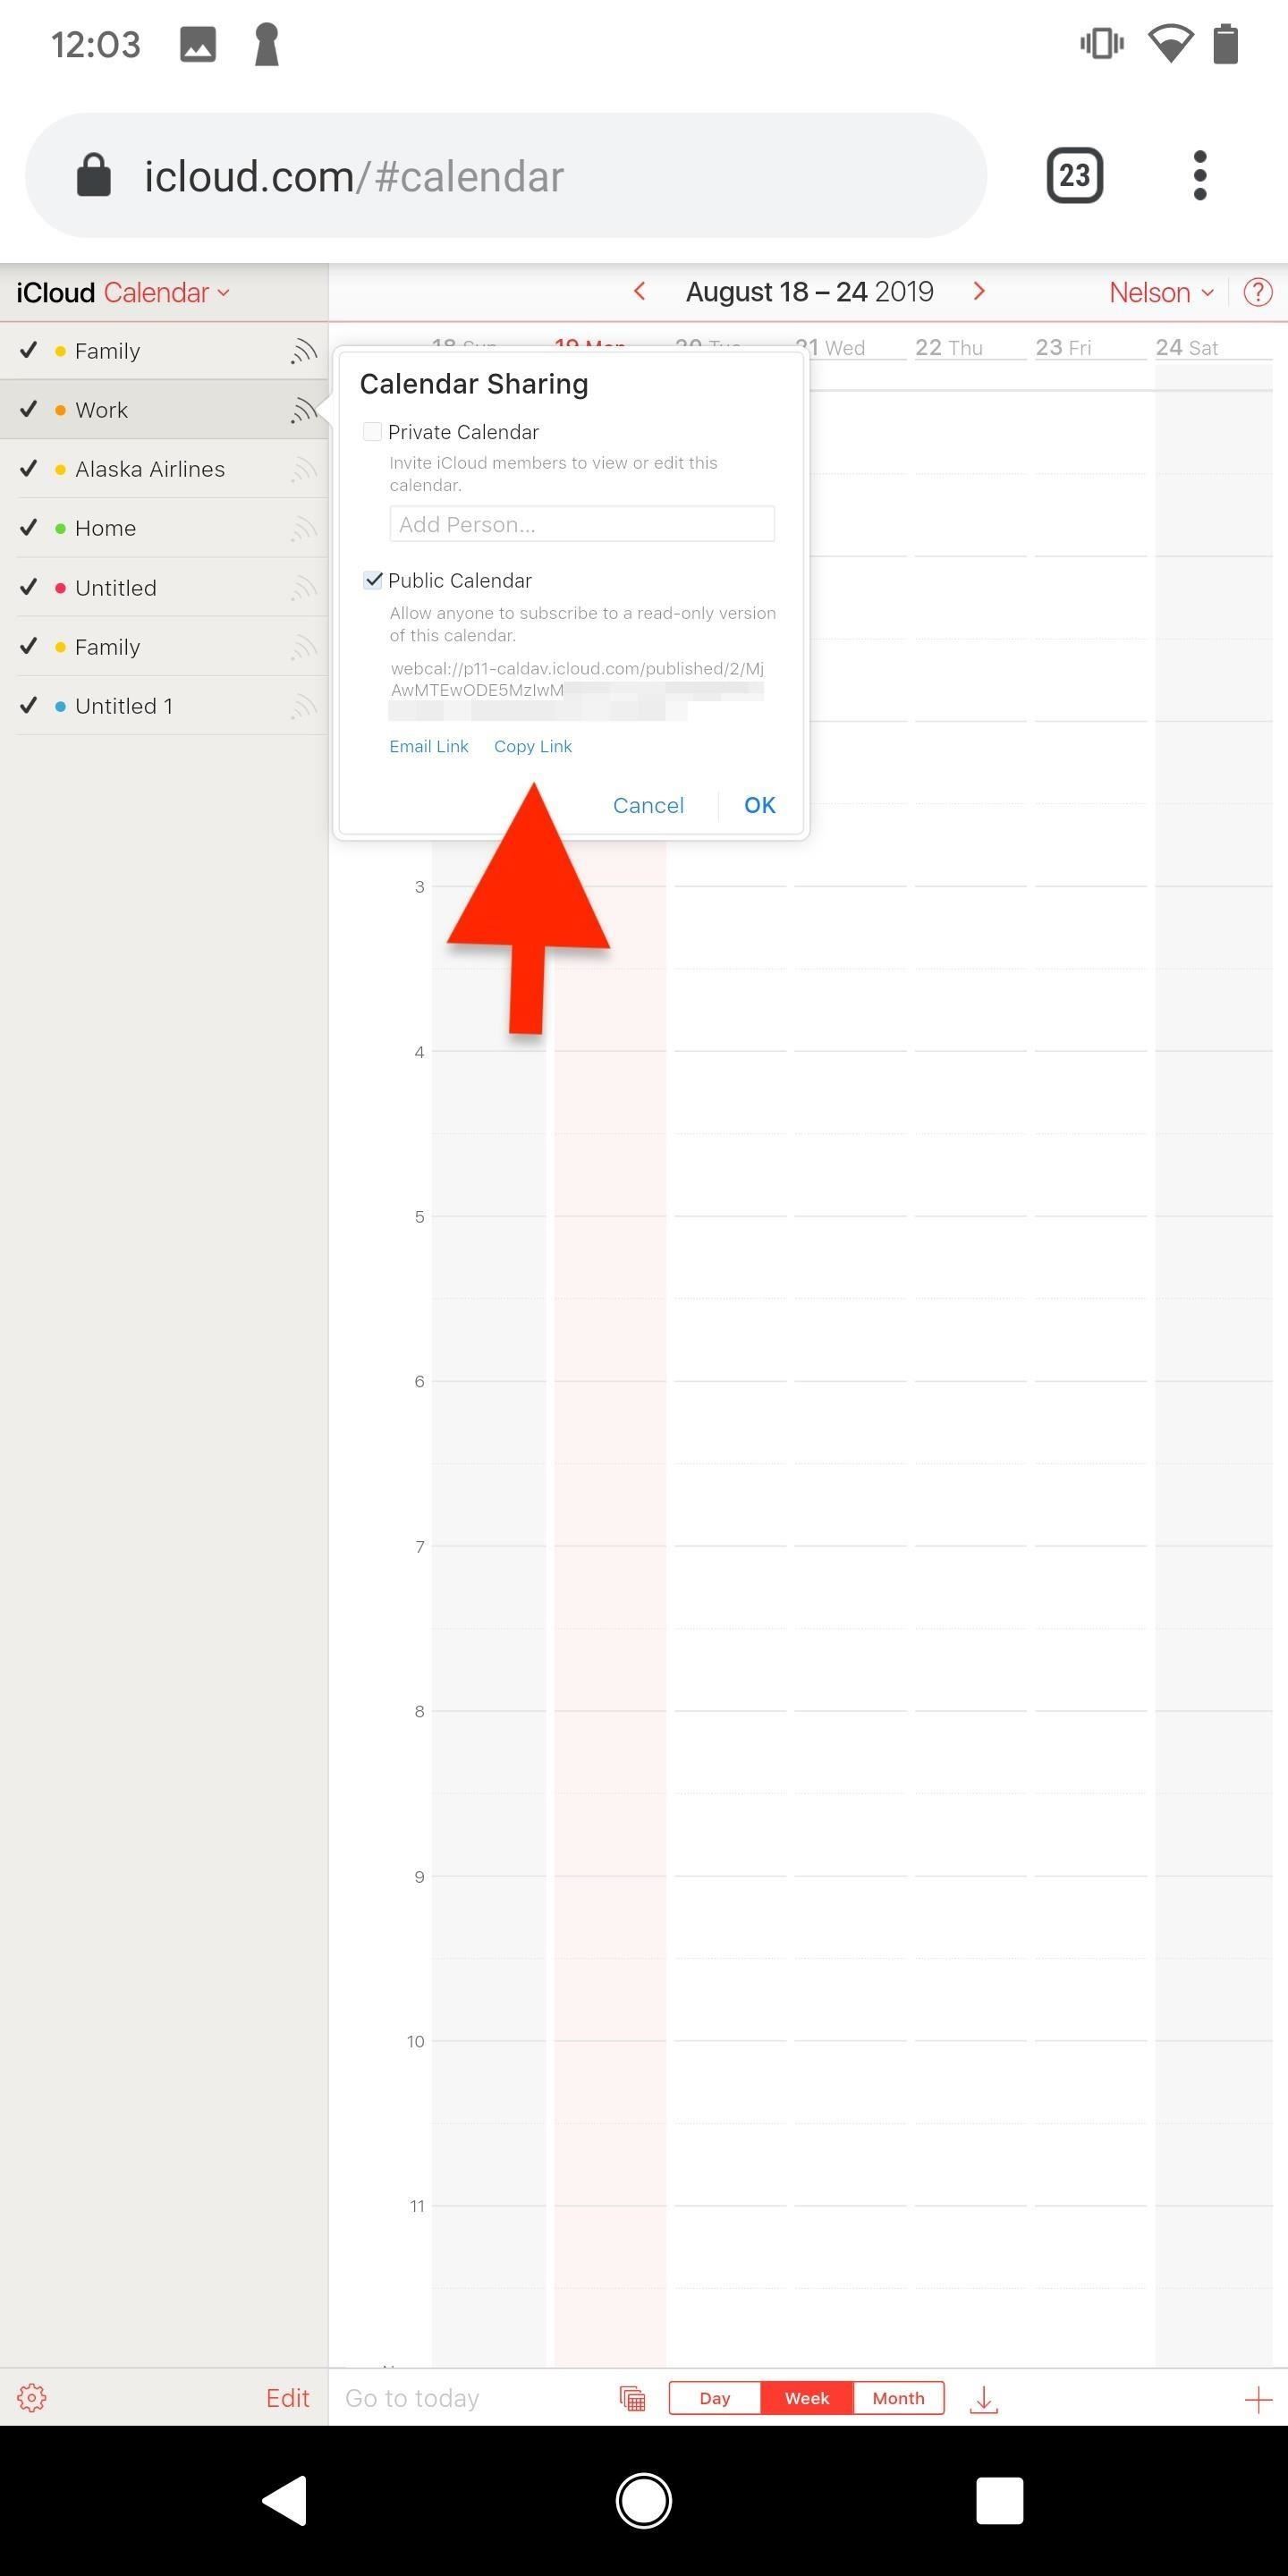
Enable CalDAV on your Google Calendar: Log into your Google Calendar account. Navigate to the "Settings" (usually a gear icon) and then click on "Integrate calendar." Look for the "CalDAV" settings. You’ll find the CalDAV URL for your Google Calendar here. This URL is crucial for the next step.
-
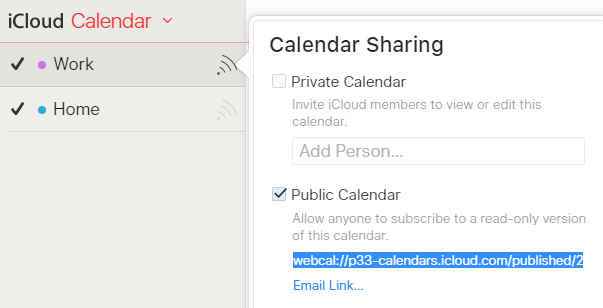
Add the Google Calendar to your Apple Calendar: Open your Apple Calendar application. Go to "File" > "New Calendar Subscription." Paste the CalDAV URL you obtained in step 1 into the "URL" field. You may need to adjust the URL slightly depending on whether you’re subscribing to your primary calendar or a specific shared calendar. Google’s help documentation can provide specifics.
-
Configure Settings (Optional): You can customize the subscription settings, such as the calendar’s name and how often it updates. Generally, choosing "Push" for notifications ensures the most up-to-date information.
-
Verify Synchronization: After adding the subscription, check both your Apple and Google calendars to ensure events are appearing correctly in both locations. Add a new event in one calendar and verify it appears in the other within a reasonable timeframe.
Advantages:
- Two-way synchronization: Changes made in either calendar will reflect in the other.
- Reliable: CalDAV is a well-established standard, offering greater stability than other methods.
- No Third-Party Apps: This method avoids the need for external applications, enhancing security and privacy.
Disadvantages:
- Technical Setup: Requires some technical understanding of URLs and calendar settings.
- Potential for Delays: While "Push" notifications minimize delays, occasional synchronization lags may occur.
Method 2: Using a Third-Party App (Convenient but Requires Trust)
Several third-party apps are designed to bridge the gap between Apple and Google calendars. These apps often offer additional features, such as task management or other productivity tools. However, it’s crucial to choose a reputable app with a strong privacy policy, as you’ll be granting it access to your sensitive calendar data.
Steps (vary by app):
Each app will have its own unique setup process. Generally, you’ll need to:
- Download and Install: Download the chosen app from the App Store (for iOS) or Google Play Store (for Android).
- Authorize Access: Grant the app access to your Apple and Google Calendar accounts.
- Configure Synchronization: Specify which calendars to sync and the synchronization frequency.
- Test Synchronization: Add events to one calendar and verify their appearance in the other.
Advantages:
- User-Friendly Interface: Many apps offer simpler interfaces than CalDAV configuration.
- Additional Features: Some apps provide extra features beyond simple calendar synchronization.
Disadvantages:
- Security and Privacy Concerns: Trusting a third-party app with your calendar data involves inherent risks.
- App Dependence: Reliance on a third-party app introduces a potential point of failure.
- Cost: Some apps may require a subscription fee for full functionality.
Method 3: Export and Import (One-Way Synchronization – Least Reliable)
This method offers the simplest approach but provides only one-way synchronization. Changes made in one calendar won’t automatically update the other.
Steps:
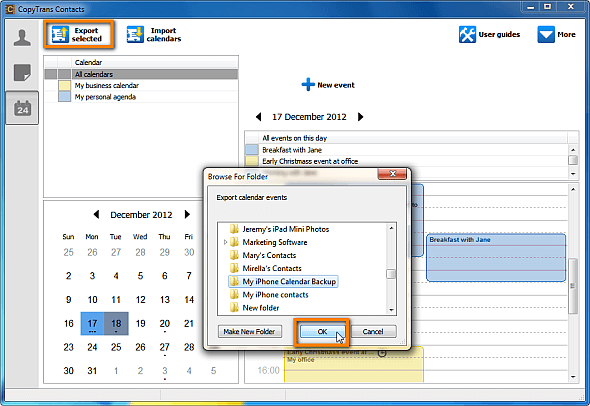
- Export from Google Calendar: In Google Calendar, export your calendar as an ICS (iCalendar) file.
- Import into Apple Calendar: In Apple Calendar, import the ICS file.
Advantages:
- Simplicity: This is the easiest method to understand and implement.
Disadvantages:
- One-way synchronization: Changes in Apple Calendar won’t reflect in Google Calendar, and vice-versa.
- Manual Updates Required: Requires manual re-exporting and importing to update the calendars.
- Inefficient: This is highly inefficient for regular schedule management.
Troubleshooting Common Issues
- Synchronization Delays: Ensure you have a stable internet connection. Check the synchronization settings in both your Apple and Google calendars (and within any third-party app).
- Events Not Appearing: Double-check the CalDAV URL for accuracy. Verify that you’ve granted the necessary permissions to the app or service.
- Calendar Conflicts: If events clash, carefully review your calendar entries to identify and resolve the conflict manually.
- App Errors: If using a third-party app, check for app updates and consult the app’s support documentation.
Choosing the Right Method for You
The best method for linking your Apple and Google calendars depends on your technical skills and preferences. For the most robust and reliable two-way synchronization, CalDAV is the recommended approach. If you prefer a simpler, more user-friendly experience, a reputable third-party app might be a better choice. However, always prioritize security and privacy when selecting a third-party app. The export/import method should only be considered for infrequent, one-time synchronization needs.
By carefully considering these methods and troubleshooting tips, you can achieve seamless integration between your Apple and Google calendars, streamlining your schedule and enhancing your productivity. Remember to always prioritize data security and choose the method that best aligns with your technical skills and comfort level.


Closure
Thus, we hope this article has provided valuable insights into The Ultimate Guide to Linking Apple Calendar and Google Calendar: Seamless Synchronization for a Streamlined Life. We thank you for taking the time to read this article. See you in our next article!