Granting Access to Your Outlook Calendar: A Comprehensive Guide
Related Articles: Granting Access to Your Outlook Calendar: A Comprehensive Guide
Introduction
With great pleasure, we will explore the intriguing topic related to Granting Access to Your Outlook Calendar: A Comprehensive Guide. Let’s weave interesting information and offer fresh perspectives to the readers.
Table of Content
Granting Access to Your Outlook Calendar: A Comprehensive Guide
Sharing your Outlook calendar can be a powerful tool for collaboration, scheduling, and keeping everyone informed. Whether you’re coordinating team projects, managing family events, or simply keeping loved ones in the loop, understanding how to grant access – and the different levels of access available – is crucial. This comprehensive guide will walk you through the various methods of granting access to your Outlook calendar, ensuring your sharing is conclusive, consequent, and certain.
Understanding Access Levels and Permissions
Before diving into the how-to, it’s vital to grasp the different levels of access you can grant:
-
Reviewer: This is the most restrictive level. Reviewers can view your calendar, see appointments, and their details, but they cannot make any changes or create new entries. This is ideal for keeping people informed without giving them control over your schedule.
-
Editor: Editors have significantly more control. They can view, add, edit, and delete appointments on your calendar. This level is suitable for close collaborators who need to actively manage your shared schedule, such as assistants or team members working on joint projects.
-
Delegates: Delegates have the broadest access. They can manage your calendar as if it were their own, including accepting or declining meeting requests on your behalf, sending responses, and managing your free/busy information. This level is usually reserved for trusted assistants or individuals with significant responsibility for managing your schedule.
Methods for Granting Calendar Access:
The methods for granting access vary slightly depending on whether you’re using Outlook on the web (OWA), a desktop application (Outlook for Windows or Mac), or a mobile app. However, the underlying principles remain the same.
1. Granting Access via Outlook on the Web (OWA):
This method offers a straightforward and consistent experience across different devices.
-
Step 1: Access your Outlook Calendar: Log into your Outlook account via a web browser. Navigate to your calendar view.
-
Step 2: Open Calendar Settings: Locate the gear icon (settings) usually in the upper right corner. Click on it and select "View all Outlook settings."
-
Step 3: Navigate to Sharing: In the settings menu, find the "Calendar" section and click on it. Look for the "Sharing" option and select it.
-
Step 4: Add People: You’ll see a field to enter the email address of the person you wish to grant access to. Enter the email address and select the desired permission level (Reviewer, Editor, or Delegate) from the dropdown menu. You can also add a custom message if needed. Click "Add."
-
Step 5: Confirm and Manage Permissions: Once added, the recipient will receive an email notification. You can manage permissions (edit or remove access) from this same sharing settings page at any time.
2. Granting Access via Outlook Desktop Application (Windows/Mac):
The process is slightly different for the desktop application but achieves the same result.
-
Step 1: Open Your Calendar: Launch the Outlook desktop application and navigate to your calendar.
-
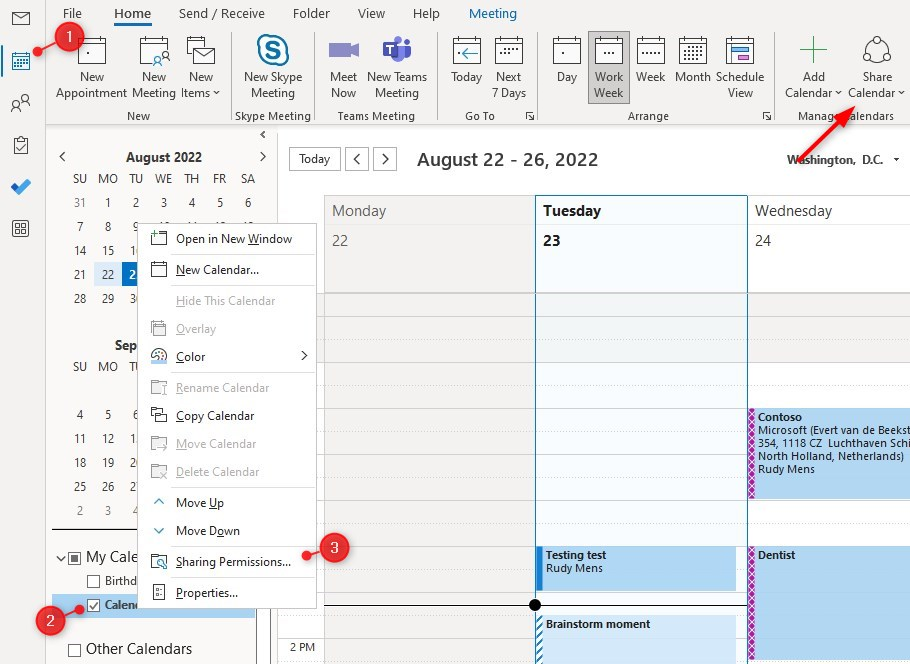
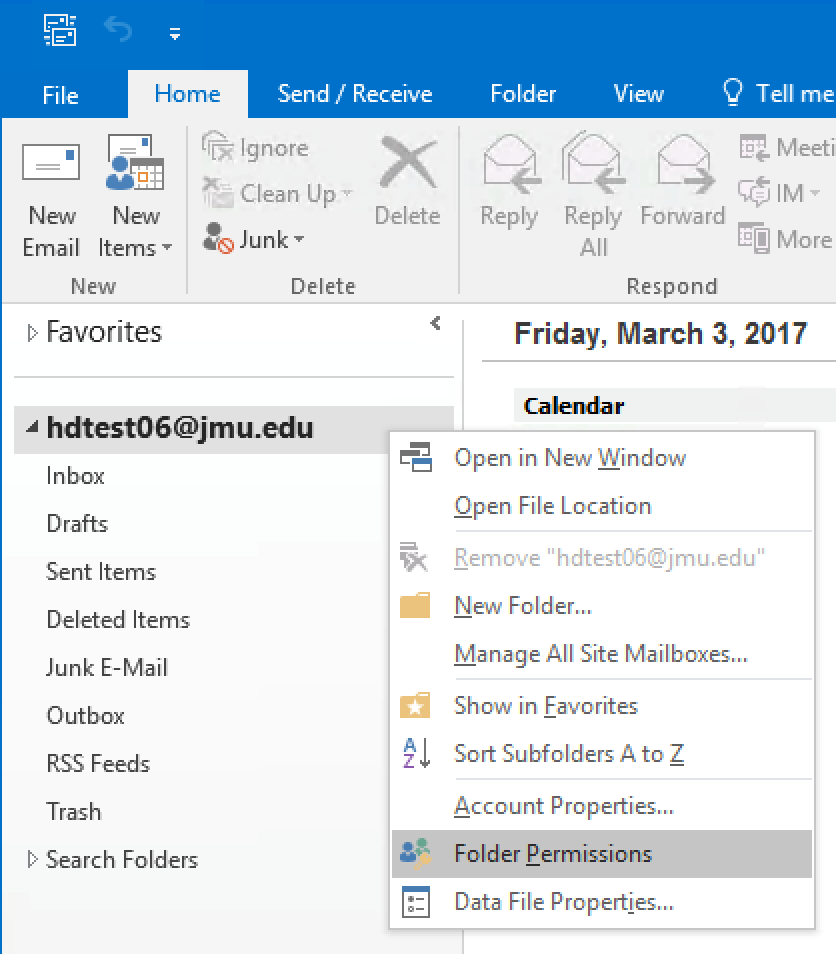
Step 2: Share Calendar: Right-click on your calendar in the navigation pane (usually on the left). Select "Share Calendar."
-
Step 3: Add Permissions: A dialog box will appear. Enter the email address of the person you want to share your calendar with. Select the permission level (Reviewer, Editor, or Delegate) from the dropdown menu. You can also choose to specify the permission duration (e.g., until further notice, a specific date).
-
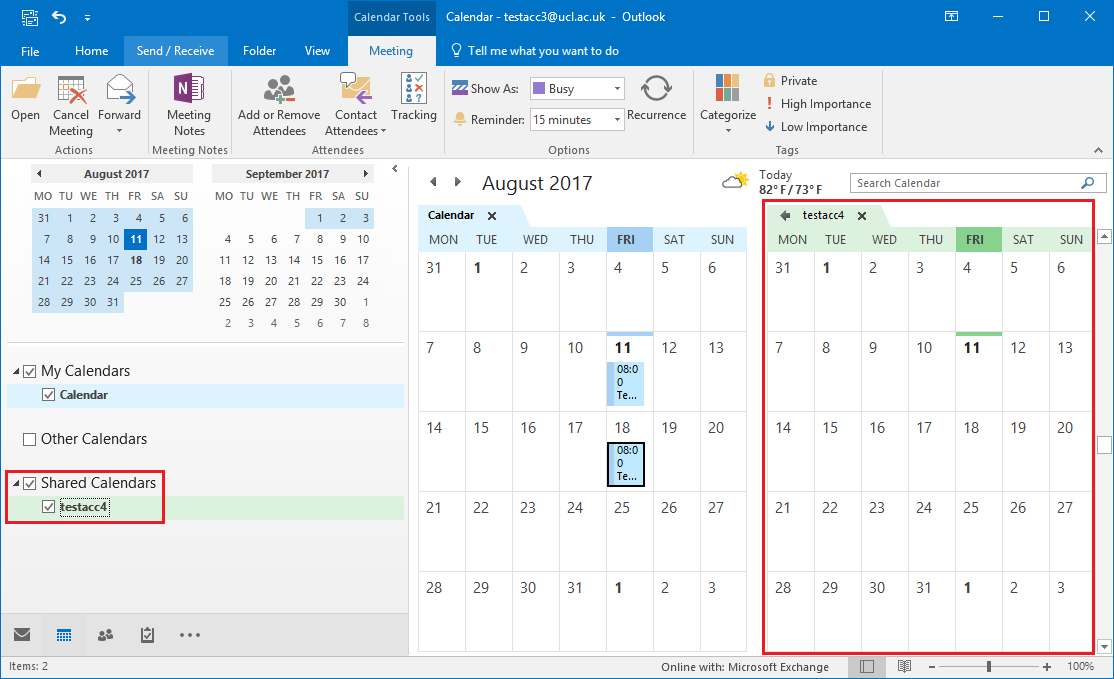
Step 4: Send Invitation: Click "Send." The recipient will receive an email invitation to access your calendar. They will need to accept the invitation to gain access.
-
Step 5: Manage Permissions: To manage permissions later, right-click on your calendar again, select "Share Calendar," and modify the settings as needed. You can remove access by deleting the recipient from the list.
3. Granting Access via Mobile Outlook App:
The mobile app’s interface may vary slightly depending on the operating system (iOS or Android), but the fundamental steps are similar:
-
Step 1: Open Your Calendar: Launch the Outlook mobile app and navigate to your calendar.
-
Step 2: Access Sharing Options: The exact location of the sharing option may differ depending on your app version. Look for a share icon (usually three dots or a square with an upward-pointing arrow) associated with your calendar.
-
Step 3: Add Recipient and Permission Level: You will typically be prompted to enter the email address of the recipient and select the desired permission level.
-
Step 4: Send Invitation: Send the invitation. The recipient will receive a notification to accept the access.
-
Step 5: Manage Permissions: You can usually manage permissions through the same sharing settings within the app, although the exact location may vary.
Ensuring Conclusive, Consequent, and Certain Access:
To ensure your access grants are conclusive, consequent, and certain, consider the following:
-
Clarity of Permissions: Always clearly communicate the level of access you’re granting. Avoid ambiguity. If the recipient is unsure, explain the implications of their permission level.
-
Confirmation of Access: After granting access, follow up with the recipient to confirm they have received the invitation and can access the calendar successfully. This prevents misunderstandings and ensures everyone is on the same page.
-
Regular Review of Permissions: Periodically review the list of people who have access to your calendar. Remove access for individuals who no longer require it to maintain security and control.
-
Password Protection and Account Security: Strengthen your Outlook account password and enable two-factor authentication to protect your calendar from unauthorized access.
-
Consider using Group Calendars: For team collaboration, creating a shared group calendar can be more efficient than granting individual access to your personal calendar. This centralizes information and simplifies management.
Troubleshooting Common Issues:
-
Recipient doesn’t receive the invitation: Check your spam folder. Ensure you entered the correct email address.
-
Recipient can’t access the calendar: Verify the recipient has accepted the invitation. Check their Outlook settings to ensure they are properly configured.
-
Unexpected changes to your calendar: Review the permission levels granted to ensure no one has unintended editing capabilities.
By following these steps and best practices, you can confidently grant access to your Outlook calendar, ensuring a smooth, secure, and collaborative experience for everyone involved. Remember, selecting the appropriate permission level is crucial for maintaining control and protecting your sensitive information. Regular review and proactive security measures will further solidify the conclusive, consequent, and certain nature of your calendar sharing.


Closure
Thus, we hope this article has provided valuable insights into Granting Access to Your Outlook Calendar: A Comprehensive Guide. We hope you find this article informative and beneficial. See you in our next article!