Crafting a Magnificent, Coruscating Calendar in Google Sheets: A Comprehensive Guide
Related Articles: Crafting a Magnificent, Coruscating Calendar in Google Sheets: A Comprehensive Guide
Introduction
In this auspicious occasion, we are delighted to delve into the intriguing topic related to Crafting a Magnificent, Coruscating Calendar in Google Sheets: A Comprehensive Guide. Let’s weave interesting information and offer fresh perspectives to the readers.
Table of Content
Crafting a Magnificent, Coruscating Calendar in Google Sheets: A Comprehensive Guide

Google Sheets, often underestimated as a mere spreadsheet program, possesses surprising versatility. Beyond simple accounting, it can be transformed into a powerful tool for organization and planning, capable of creating stunning and highly functional calendars. This comprehensive guide will walk you through creating a magnificent, coruscating calendar in Google Sheets, covering everything from basic layouts to advanced features, ensuring your calendar shines brightly.
I. Laying the Foundation: Choosing Your Calendar Style
Before diving into the intricacies of formulas and formatting, decide on the style and functionality you desire. Consider these options:
- Monthly Calendar: The most common type, showing a full month at a glance. Ideal for overview and general scheduling.
- Weekly Calendar: Provides a detailed view of a single week, perfect for managing daily tasks and appointments.
- Daily Calendar: Offers granular control for meticulous scheduling, ideal for individuals with packed schedules.
- Year-at-a-Glance Calendar: A compact representation of the entire year, useful for long-term planning and visualizing events across months.
- Hybrid Calendars: Combining elements of different styles (e.g., a monthly calendar with a weekly inset for detailed planning).
Your choice will significantly influence the structure and complexity of your Google Sheet.
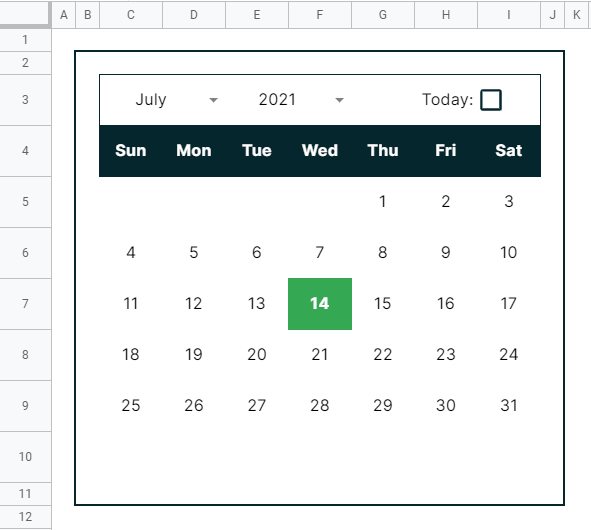
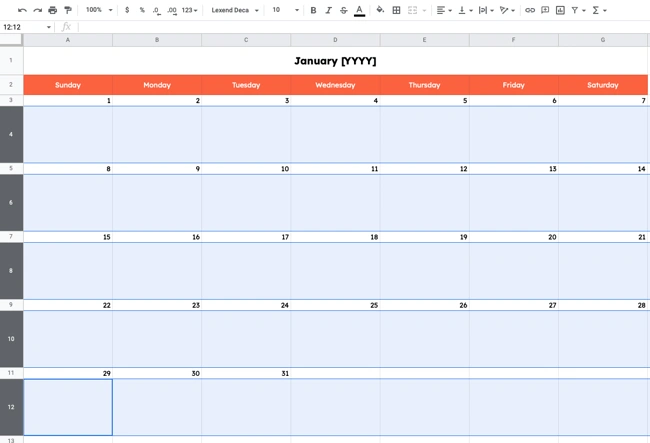
II. Building the Basic Structure: Monthly Calendar Example
Let’s focus on creating a visually appealing monthly calendar. Here’s a step-by-step guide:
-
Header: In cell A1, type "Calendar – [Month, Year]". Replace "[Month, Year]" with the desired month and year. You can use data validation to create a dropdown menu for month selection, further enhancing the user experience.
-
Day Names: In row 2, starting from column B, enter the days of the week (Sun, Mon, Tue, Wed, Thu, Fri, Sat). Bold and center-align these headers for visual clarity. Consider using conditional formatting to highlight weekends in a different color (e.g., light gray for weekdays, and a pastel shade for weekends).
-
Dates: This is where we leverage Google Sheets’ powerful functions. We’ll use the
DAYandWEEKDAYfunctions to populate the dates automatically.-
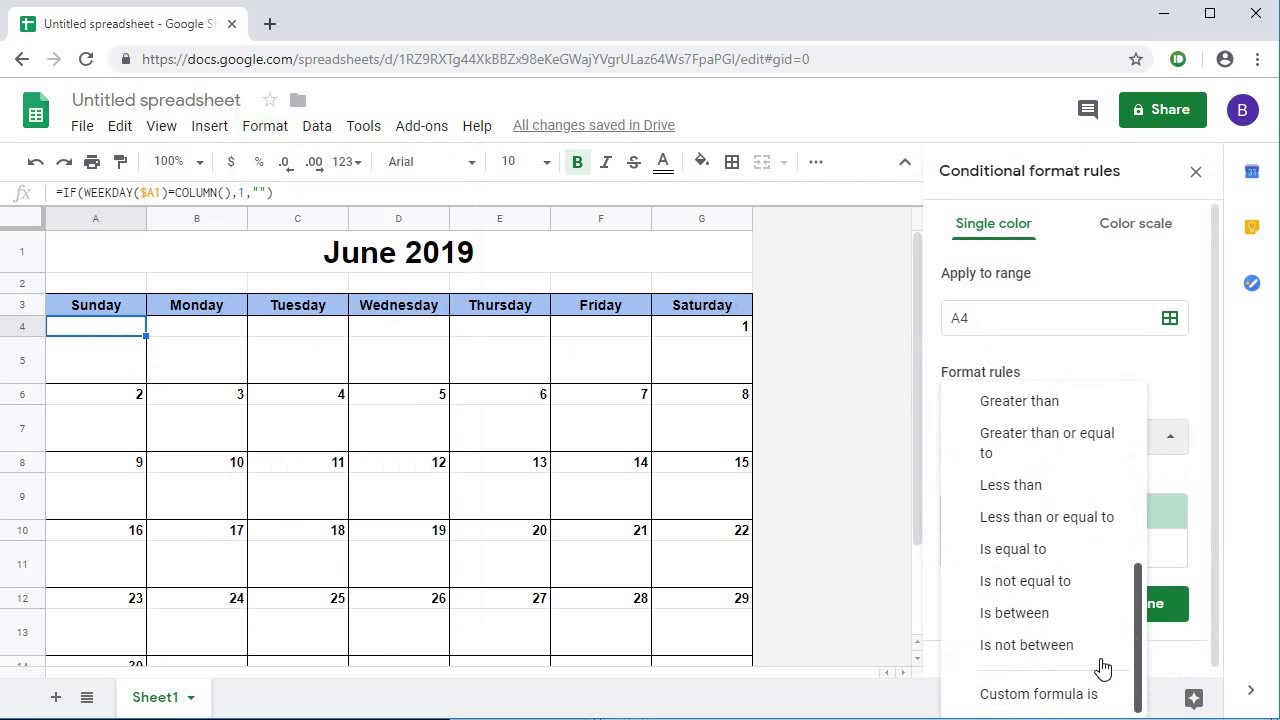
Determining the Starting Day: In cell B3, enter the formula
=IF(WEEKDAY(DATE(YEAR(A1),MONTH(A1),1))=1,DATE(YEAR(A1),MONTH(A1),1),""). This checks if the first day of the month is a Sunday. If it is, it displays the date; otherwise, it leaves the cell blank. -
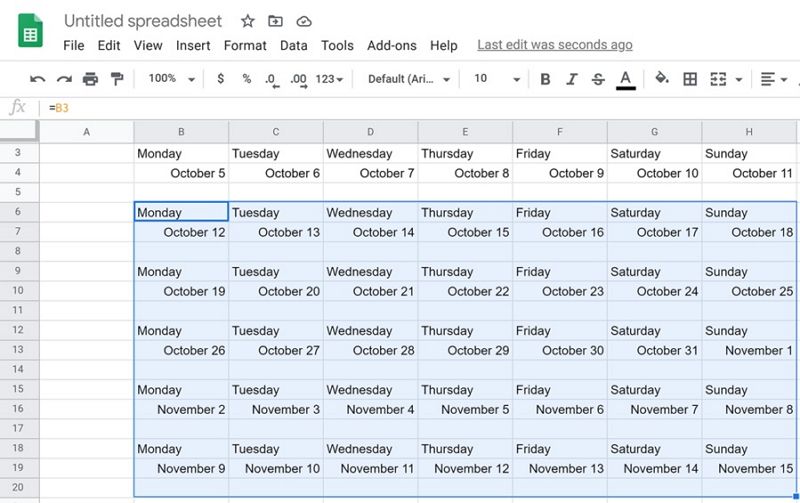
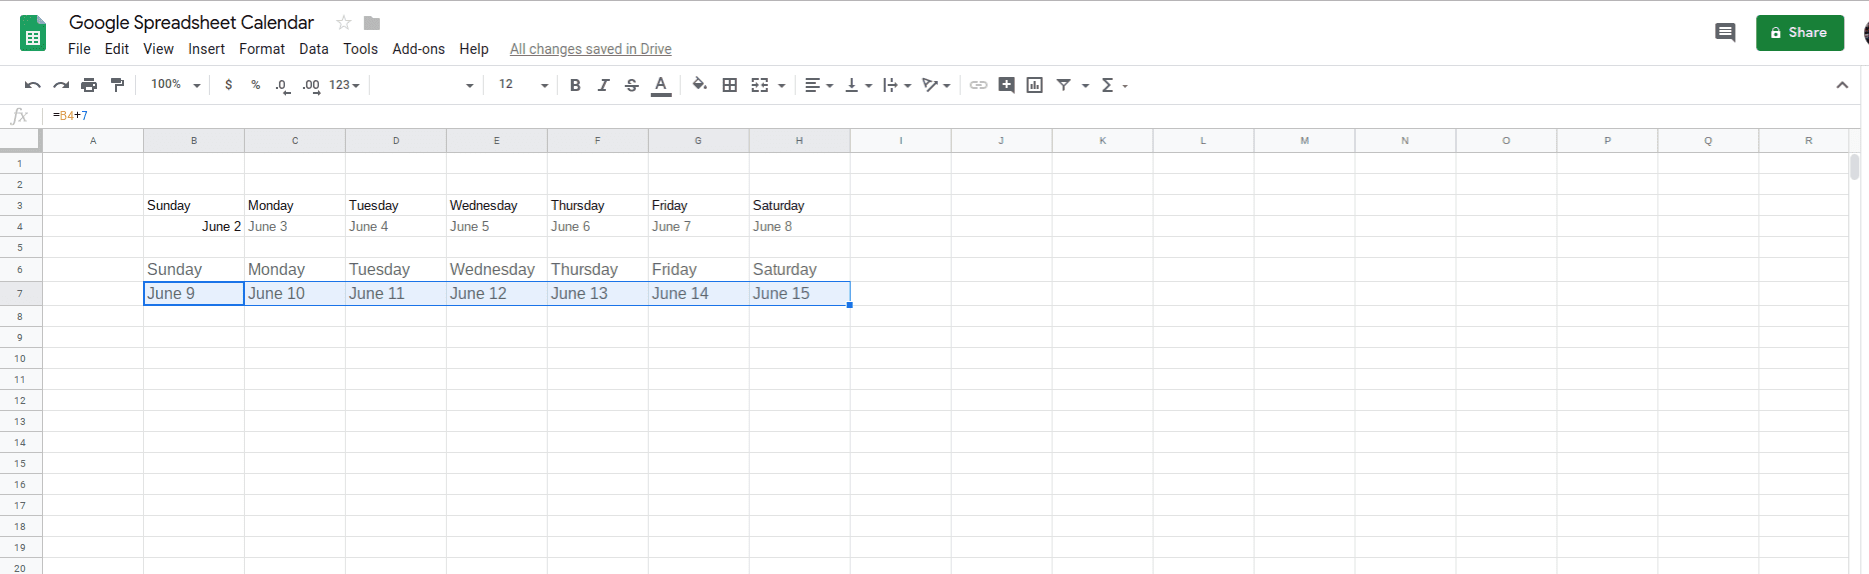
Populating Subsequent Dates: In cell C3, enter
=IF(ISBLANK(B3),DATE(YEAR(A1),MONTH(A1),1),B3+1). This checks if the previous cell is blank. If it is, it starts the month’s date; otherwise, it increments the date by one. Copy this formula across the row until you reach the end of the week. -
Filling Subsequent Rows: Copy the entire row (row 3) down to accommodate the entire month. You might need to adjust the number of rows depending on the length of the month. You’ll likely end up with some blank cells at the end of the month.
-
-
Formatting for Visual Appeal: This is where the "magnificent and coruscating" aspect comes into play.
- Borders: Add borders around cells to clearly delineate dates. Consider using thicker borders for the header and day names.
- Color Schemes: Choose a color palette that aligns with your preferences. Use conditional formatting to highlight weekends, holidays (which you can manually input or fetch using external data), or important events.
- Fonts: Select a legible and visually appealing font. Experiment with different font sizes and styles for headers and dates.
- Background Colors: Use subtle background colors to improve readability and visual appeal. Alternating row colors can enhance the overall aesthetics.
III. Enhancing Functionality: Adding Advanced Features
Now that you have a basic calendar, let’s enhance its functionality:
-
Event Input: Create a column (e.g., column A) next to the calendar to input events. Use a simple text input or consider using data validation for predefined event types.
-
Event Highlighting: Use conditional formatting to highlight cells corresponding to events on the calendar. You can use color-coding to represent different event categories.
-
Formula-Driven Event Display: Instead of manual highlighting, use formulas to automatically highlight dates with events. For example, if column A contains event descriptions, you could use a formula like
=IF(COUNTIF(A:A,"*"&TEXT(B3,"dd/mm/yyyy")&"*")>0,"Event","")in a separate column to check if the date in cell B3 is mentioned in column A, then use conditional formatting based on the output of this formula. -
Integration with Google Calendar: While not directly integrated, you can manually input events from your Google Calendar into the sheet. This requires manual updates, but it allows you to have a visual representation of your schedule within the spreadsheet.
-
Data Validation: Employ data validation to create dropdown menus for months and years, making the calendar more interactive and user-friendly.
-
Charts and Graphs: If you’re tracking metrics associated with your events (e.g., project progress, sales figures), you can incorporate charts and graphs to visualize this data alongside the calendar.
-
Protection: Protect the calendar portion of the sheet to prevent accidental edits while allowing input in the event columns.
IV. Creating Other Calendar Styles:
While we focused on a monthly calendar, the principles can be applied to other styles:
-
Weekly Calendar: Structure the sheet with days of the week as columns and times as rows. Use similar formatting techniques for visual appeal.
-
Daily Calendar: Use a single row per day, with time slots as columns. This provides a highly detailed view.
-
Year-at-a-Glance: Create a compact representation of the year, perhaps using a 12×1 grid, with each cell representing a month.
V. Mastering the Art of Coruscation: Advanced Formatting Techniques
To truly achieve a "coruscating" calendar, explore Google Sheets’ advanced formatting options:
-
Custom Number Formats: Format dates in various ways (e.g., "dd mmm yyyy," "Mon dd").
-
Conditional Formatting with Multiple Rules: Create complex rules to highlight events based on multiple criteria (e.g., priority, category, deadline).
-
Data Bars: Visually represent event durations or priorities using data bars within the calendar cells.
-
Sparklines: Include small charts within cells to show trends or progress over time for specific events.
-
Images and Icons: Add images or icons to represent different event types or priorities, enhancing visual appeal.
VI. Sharing and Collaboration:
Once your magnificent calendar is complete, share it with others for collaborative planning. Control sharing permissions to determine who can view and edit the sheet.
By following this guide and experimenting with different features, you can create a truly magnificent, coruscating calendar in Google Sheets that meets your specific needs and aesthetic preferences. Remember, the key to creating a stunning calendar lies in a combination of thoughtful structure, powerful formulas, and meticulous formatting. Let your creativity shine through and transform your Google Sheet into a masterpiece of organization.


Closure
Thus, we hope this article has provided valuable insights into Crafting a Magnificent, Coruscating Calendar in Google Sheets: A Comprehensive Guide. We thank you for taking the time to read this article. See you in our next article!