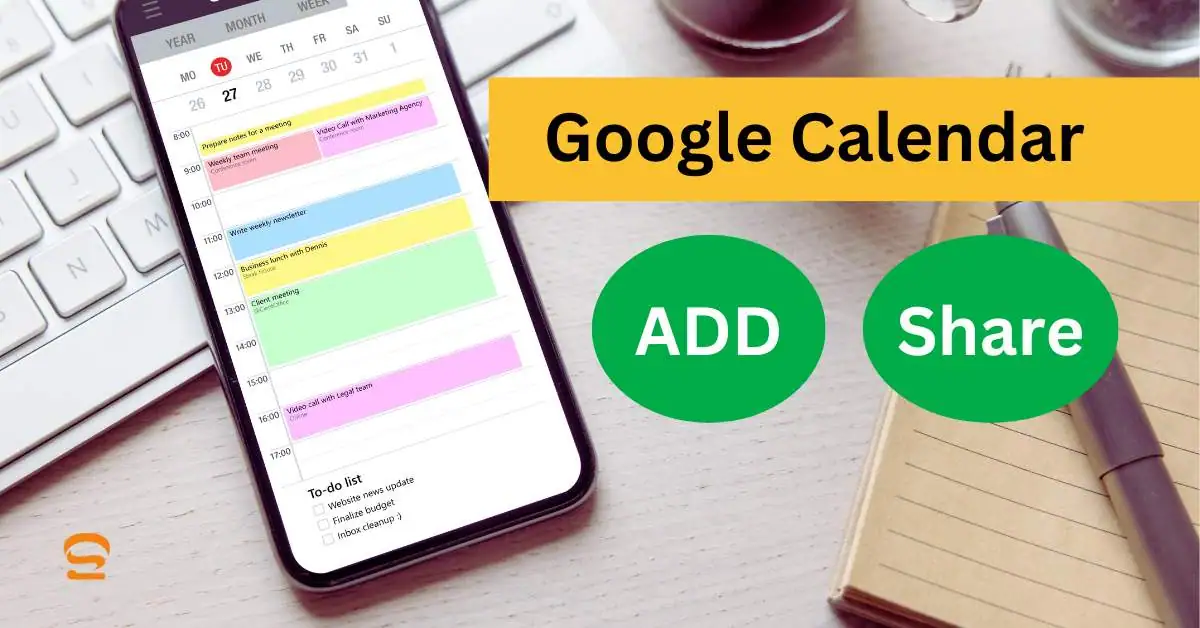
Mastering Google Calendar Collaboration: A Comprehensive Guide to Adding People and Elevating Your Scheduling
Related Articles: Mastering Google Calendar Collaboration: A Comprehensive Guide to Adding People and Elevating Your Scheduling
Introduction
With enthusiasm, let’s navigate through the intriguing topic related to Mastering Google Calendar Collaboration: A Comprehensive Guide to Adding People and Elevating Your Scheduling. Let’s weave interesting information and offer fresh perspectives to the readers.
Table of Content
Mastering Google Calendar Collaboration: A Comprehensive Guide to Adding People and Elevating Your Scheduling
Google Calendar has evolved from a simple personal scheduler to a powerful collaboration tool, integral to the success of individuals and teams alike. Its ability to seamlessly integrate with other Google Workspace applications and its intuitive interface make it a cornerstone of modern productivity. However, the seemingly straightforward act of adding someone to your Google Calendar encompasses a nuanced range of options and considerations, each catering to different collaboration needs. This comprehensive guide will delve into the various methods of adding people to your Google Calendar, highlighting the distinctions between each approach and equipping you with the knowledge to optimize your scheduling workflow.
I. Understanding the Spectrum of Collaboration: From Viewer to Editor
Before diving into the how, it’s crucial to grasp the why and the different levels of access you can grant to others. Adding someone to your Google Calendar doesn’t automatically grant them full control. Google Calendar offers a tiered system of permissions, ensuring you maintain control over your schedule while facilitating effective collaboration:
-
Viewer: Viewers can see your calendar events, including titles, descriptions, locations, and times. However, they cannot make any changes or add new events. This is ideal for sharing your schedule with colleagues, clients, or family members who need to be aware of your availability without the ability to modify it.
-
Editor: Editors have full access to your calendar. They can add, edit, and delete events. This level of access is appropriate for close collaborators, assistants, or team members who need to manage your schedule collaboratively. Caution should be exercised when granting editor access, as it significantly impacts the control you have over your calendar.
-
Free/Busy Information Only: This option only shares your availability (busy or free slots) without revealing the details of your events. This is the most privacy-preserving option, perfect for situations where you want to avoid sharing specific information about your engagements.
II. Adding People to Your Google Calendar: A Step-by-Step Guide
The method for adding someone to your Google Calendar depends on the type of access you want to grant and whether you’re sharing an entire calendar or just specific events.
A. Sharing an Entire Calendar:
This approach grants the recipient access to your entire calendar, offering either Viewer or Editor permissions.
-
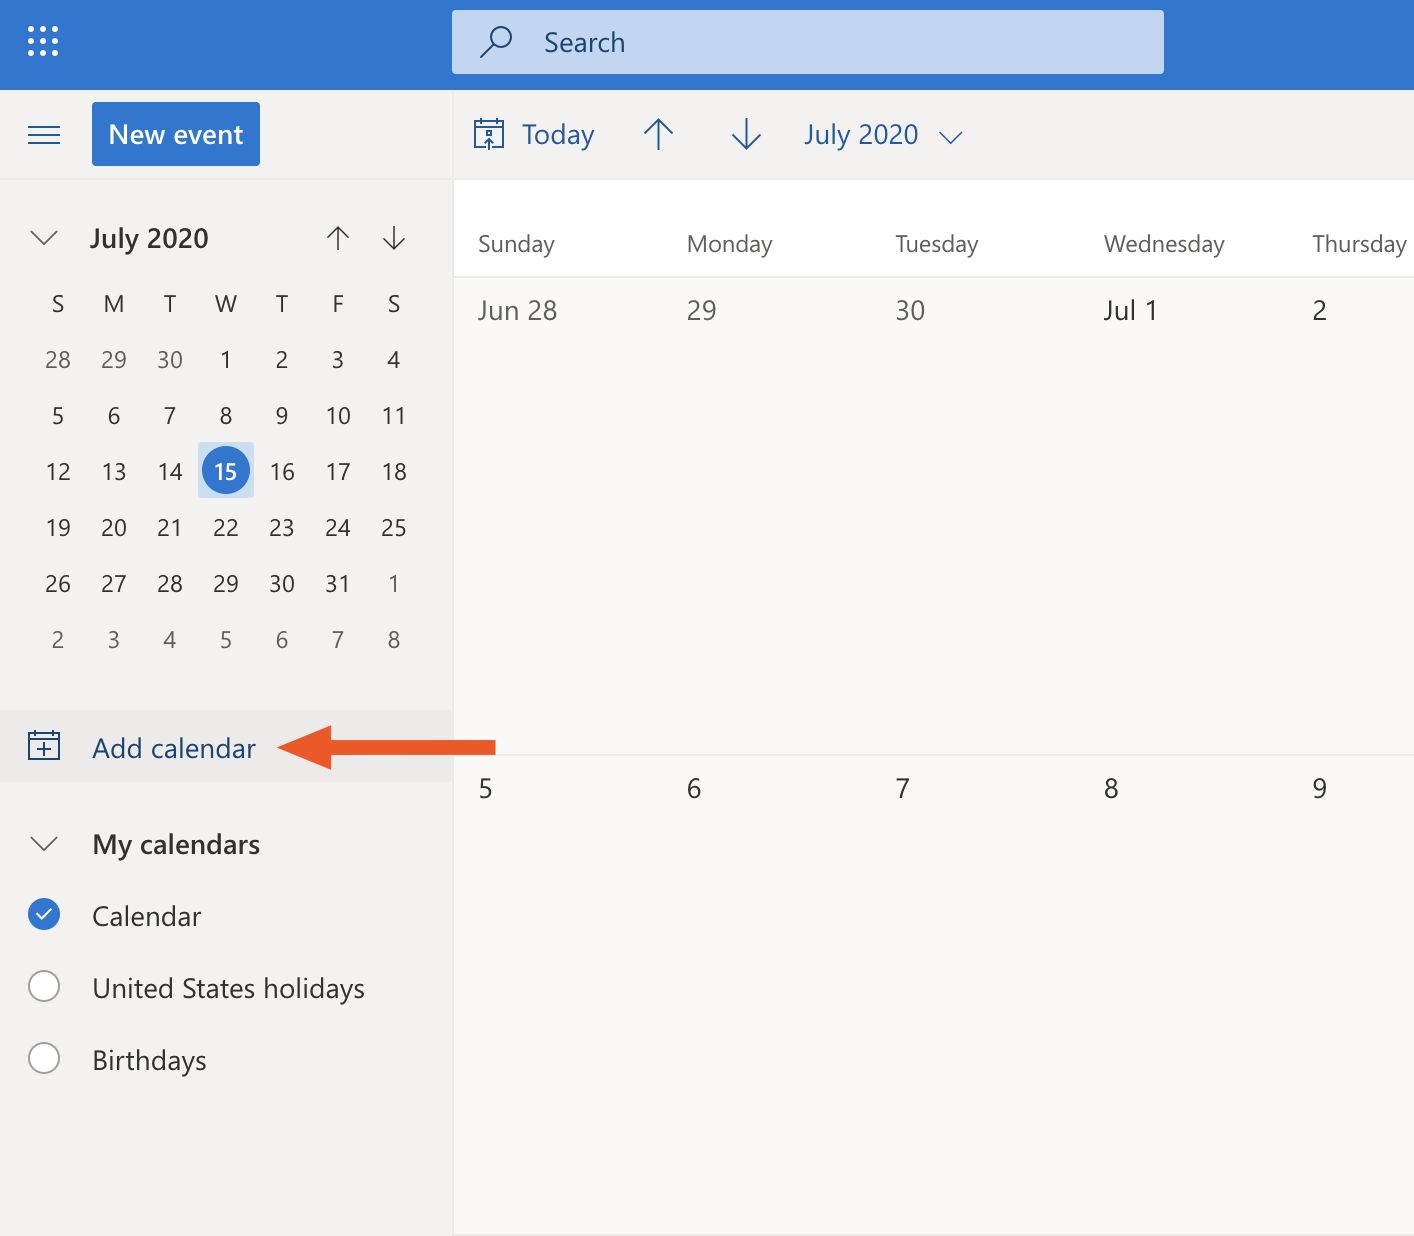
Open Google Calendar: Log into your Google account and navigate to your Google Calendar.
-
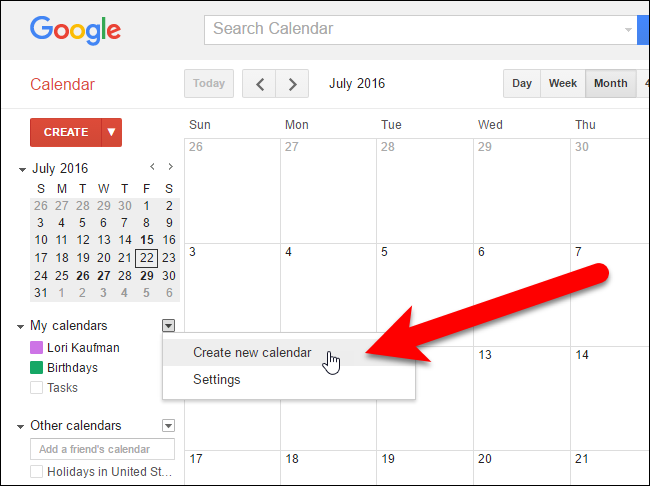
Select the Calendar: Identify the calendar you wish to share (your primary calendar or a secondary one).
-
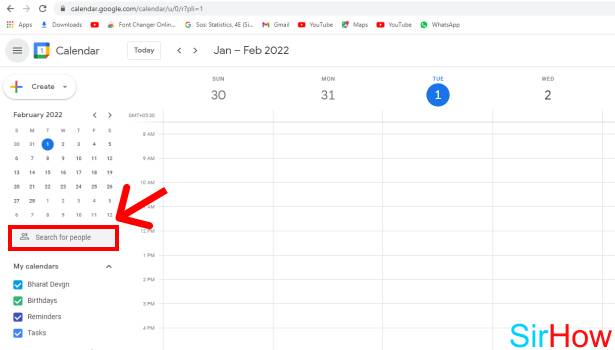
Access the Settings: Click on the three vertical dots (More actions) next to the calendar’s name and select "Settings and sharing."
-
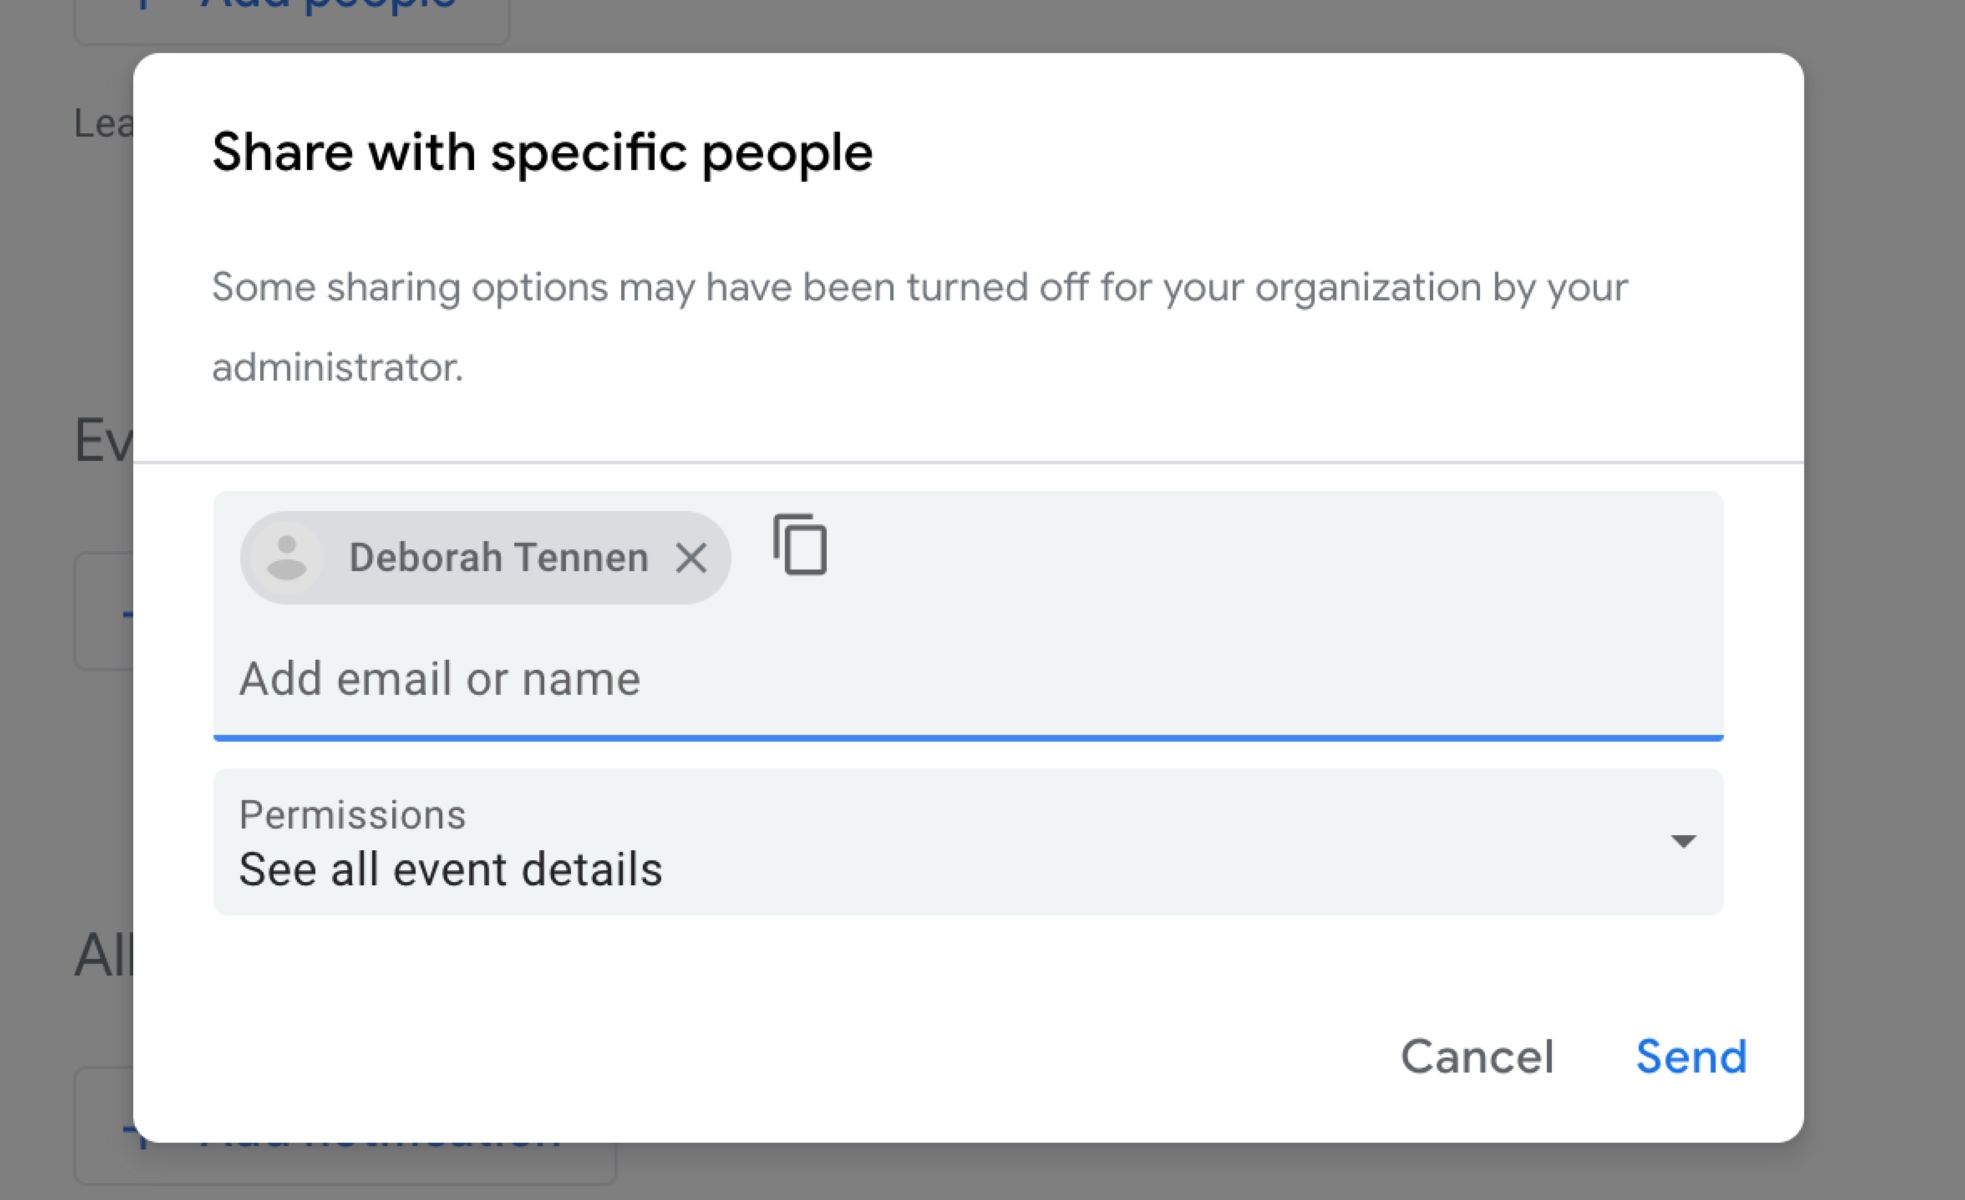
Locate the Sharing and Permissions Section: Scroll down to the "Share with specific people" section.
-
Add People and Specify Permissions: Click on the "Add person" field and enter the email address of the person you want to add. From the dropdown menu next to their email, select their permission level: "Viewer" or "Editor." You can add a personalized message if desired.
-
Save Changes: Click "Save" to finalize the changes. The invited person will receive an email notification with a link to access your calendar.
B. Sharing Specific Events:
This method allows you to share individual events without granting access to your entire calendar. This offers a granular level of control, particularly useful when dealing with sensitive information or when collaboration is needed only for specific events.
-
Open the Event: Navigate to the specific event you wish to share within your Google Calendar.
-
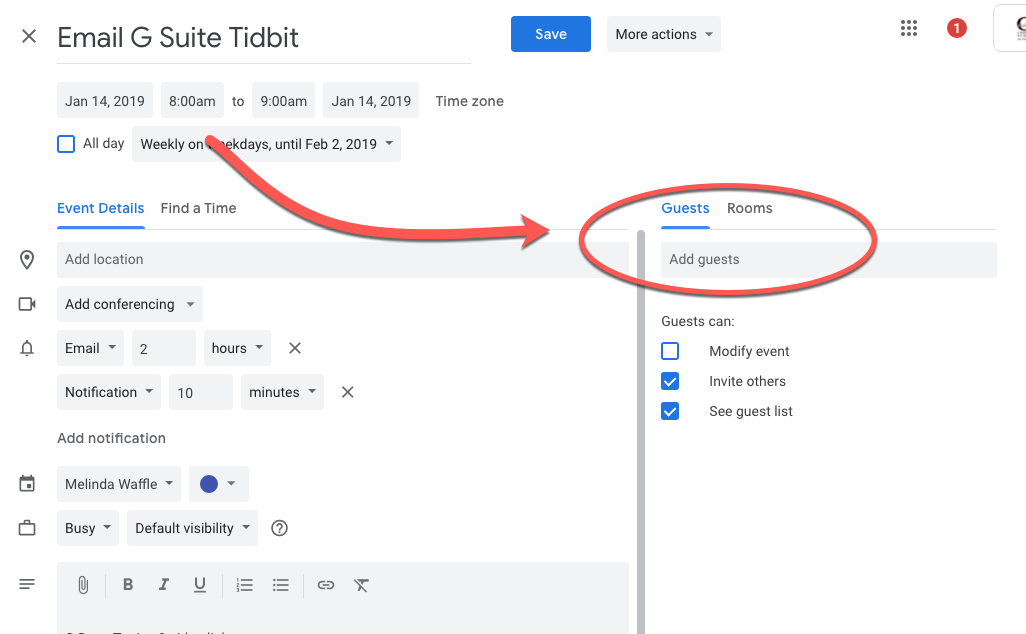
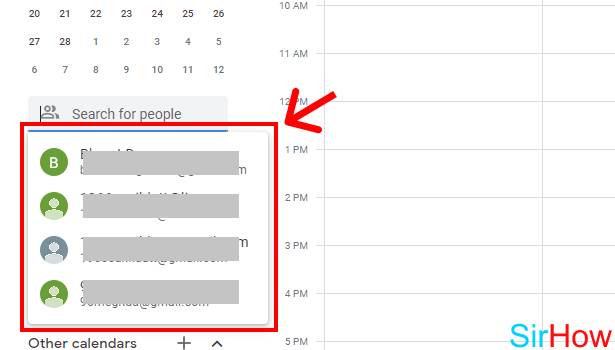
Access the Guest List: Click on the "Guest" field located within the event details.
-
Add Guests: Enter the email addresses of the people you want to invite. Google Calendar automatically assigns "Viewer" permission to these guests. To change this, you will need to change the settings to "Editor" from the drop-down.
-
Save Changes: Click "Save" to finalize the changes. The invited guests will receive an email notification about the event.
C. Sharing Your Availability (Free/Busy Information):
This option is ideal for maintaining privacy while still allowing others to see your availability.
-
Open Google Calendar Settings: Follow steps 1-3 from section A above.
-
Access the Sharing and Permissions Section: Scroll down to the "Share with specific people" section.
-
Add People and Specify Permissions: Add the email addresses of the people you want to share your availability with. Select "Free/Busy" from the dropdown menu to grant only Free/Busy access.
-
Save Changes: Click "Save" to finalize the changes.
III. Advanced Collaboration Techniques and Best Practices:
-
Creating Shared Calendars: For extensive team collaboration, consider creating a shared calendar. This allows multiple individuals to add and manage events within a single calendar, eliminating the need to share individual calendars.
-
Color-Coding: Use color-coding to differentiate between various calendars (personal, work, family, etc.) for better visual organization.
-
Notifications and Reminders: Configure email and/or mobile notifications to ensure you and your collaborators are promptly alerted about upcoming events.
-
Regularly Review Permissions: Periodically review the permissions granted to individuals to ensure they align with your current needs and maintain appropriate levels of access control.
-
Using Google Groups: For larger teams or groups, consider utilizing Google Groups to efficiently manage calendar sharing. This simplifies the process of adding and removing individuals.
-
Calendar Integration with Other Apps: Leverage Google Calendar’s integration with other apps (e.g., Zoom, Slack) to streamline scheduling and collaboration further.
-
Understanding Time Zones: When collaborating with individuals in different time zones, carefully consider time zone settings to avoid scheduling conflicts.
IV. Troubleshooting Common Issues:
-
Recipient Not Receiving Invitations: Double-check the email addresses for accuracy. Check your spam/junk folders. Ensure the recipient has a Google account.
-
Permission Issues: Verify the permission levels granted to the recipient. Ensure that the recipient has accepted the invitation.
-
Calendar Not Syncing: Check your internet connection. Ensure your calendar settings are configured correctly. Try restarting your device or browser.
V. Conclusion:
Adding people to your Google Calendar is a multifaceted process that requires understanding the various permission levels and choosing the most appropriate method for your specific needs. By mastering these techniques and employing best practices, you can transform Google Calendar from a personal scheduling tool into a robust collaboration platform that enhances productivity and streamlines communication within your personal and professional life. Remember that mindful management of permissions is crucial to maintaining control and protecting sensitive information while fostering effective teamwork. With careful planning and a thorough understanding of the available options, you can unlock the full potential of Google Calendar for seamless and efficient collaboration.
:max_bytes(150000):strip_icc()/how-to-share-your-google-calendar-65436639-a04b87d0844c40bba8a2f39807cd9554.jpg)
Closure
Thus, we hope this article has provided valuable insights into Mastering Google Calendar Collaboration: A Comprehensive Guide to Adding People and Elevating Your Scheduling. We hope you find this article informative and beneficial. See you in our next article!