Adding Zoom Links to Google Calendar: A Comprehensive Guide
Related Articles: Adding Zoom Links to Google Calendar: A Comprehensive Guide
Introduction
With enthusiasm, let’s navigate through the intriguing topic related to Adding Zoom Links to Google Calendar: A Comprehensive Guide. Let’s weave interesting information and offer fresh perspectives to the readers.
Table of Content
Adding Zoom Links to Google Calendar: A Comprehensive Guide
![]()
Integrating video conferencing into your scheduling is crucial in today’s interconnected world. Google Calendar, a widely used scheduling tool, seamlessly integrates with various video conferencing platforms, most notably Zoom. This article provides a conclusive, consequent, and certain guide on how to add Zoom links to your Google Calendar events, covering various scenarios and troubleshooting potential issues. We will explore different methods, addressing concerns for both individual and recurring events, and emphasizing best practices for clear and efficient communication.
Understanding the Importance of Integration
Before delving into the technical aspects, it’s crucial to understand the benefits of linking your Zoom meetings to Google Calendar. This integration streamlines the meeting process, offering several advantages:
- Simplified Scheduling: Attendees receive all the necessary information – date, time, and meeting link – in a single, centralized location. No more hunting for separate emails or links.
- Improved Time Management: The integration avoids the confusion and potential delays associated with manually sending out meeting details.
- Enhanced Collaboration: The seamless link improves the overall collaborative experience, making it easier for participants to join the meeting promptly.
- Reduced Errors: Automating the process minimizes the risk of human error, such as sending incorrect links or times.
- Better Organization: Your calendar becomes a comprehensive record of your meetings, simplifying tracking and follow-up.
Method 1: Adding a Zoom Link During Event Creation
This is the most straightforward method. When creating a new event in Google Calendar, you can directly add the Zoom link during the event creation process itself.
- Open Google Calendar: Access your Google Calendar account through your web browser or mobile app.
- Create a New Event: Click "Create" or the equivalent button to start a new event.
- Fill in Event Details: Enter the event title, date, time, and any other relevant information.
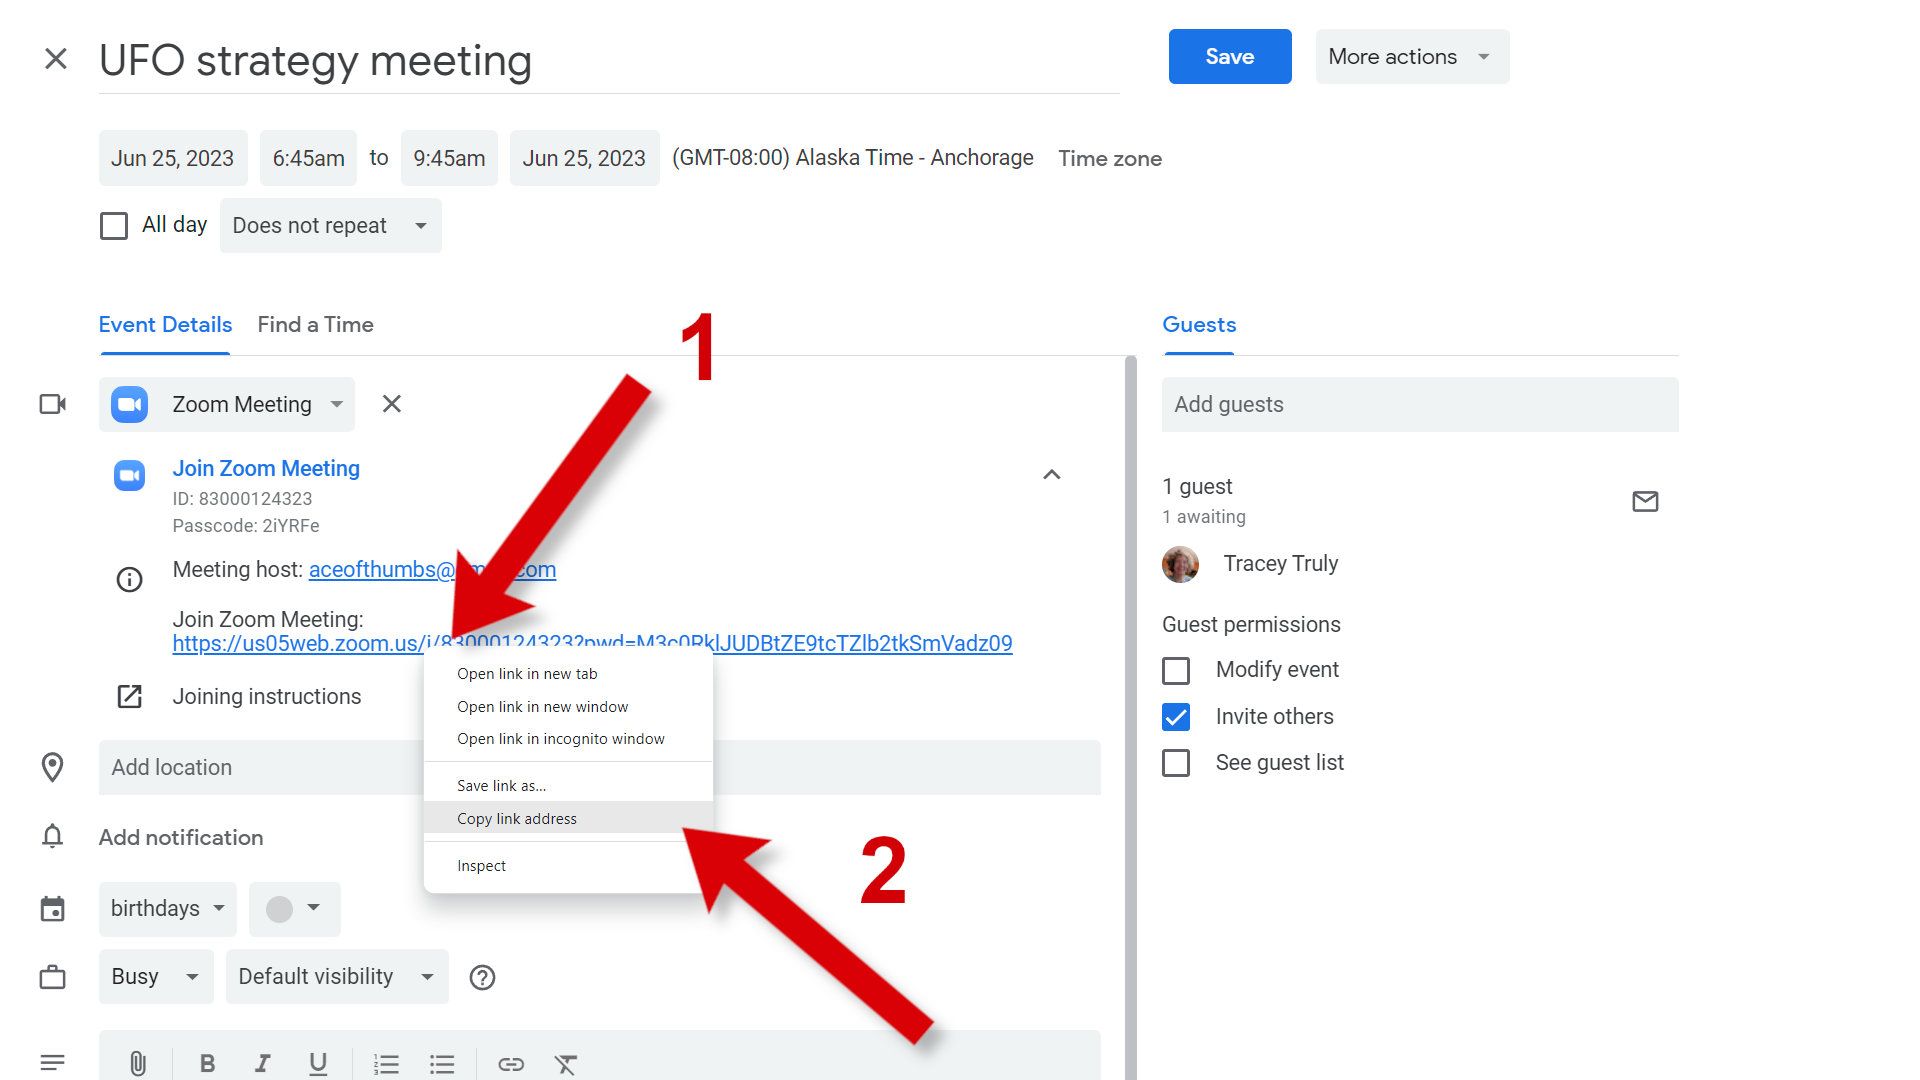
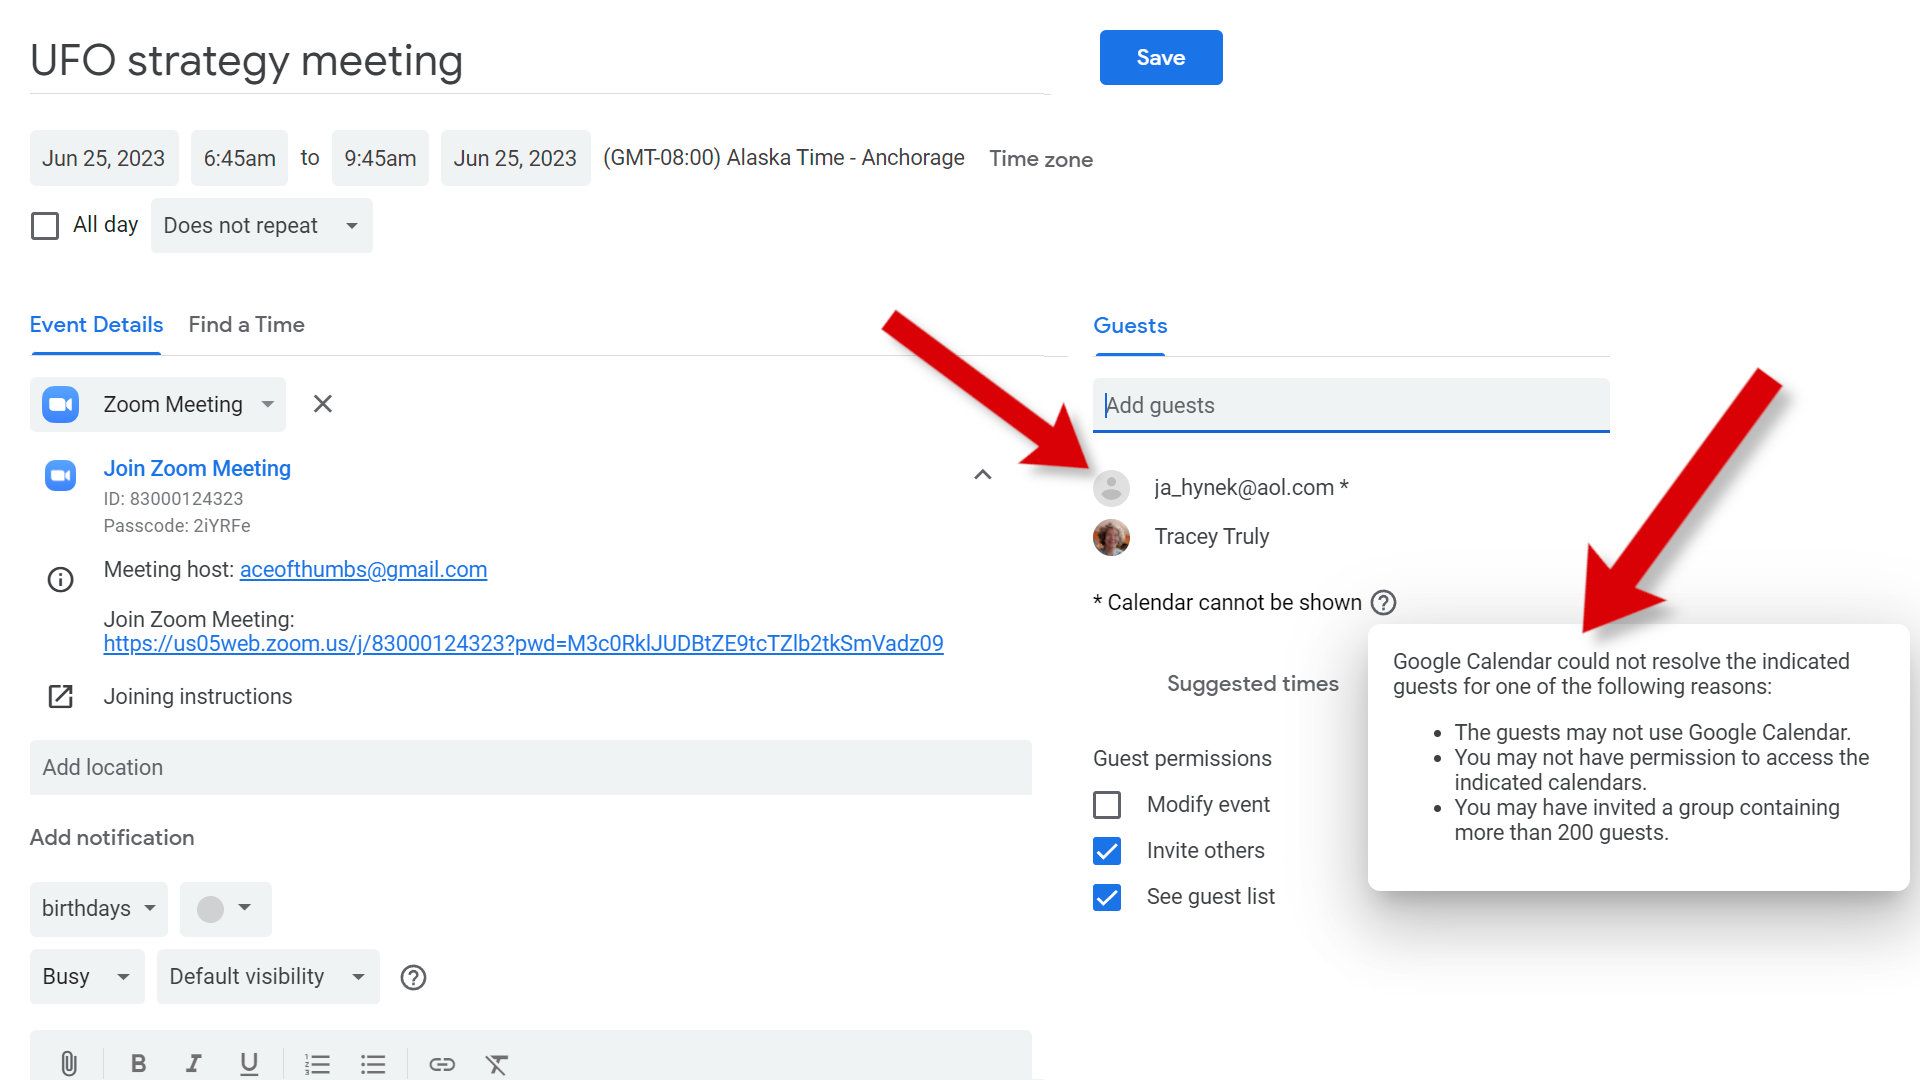
- Add the Zoom Link: This is where the integration happens. Before scheduling your Zoom meeting, ensure you have the Zoom meeting link ready. You can obtain this by scheduling the meeting directly within the Zoom application. Once you have the link, paste it into the "Add Guest" field or a designated "Video Conferencing" section within the event details. The exact location may vary slightly depending on your Google Calendar settings and version.
- Save the Event: Once you have added the Zoom link and other details, click "Save" or the equivalent button to finalize the event. The Zoom link will now be embedded within the event details.
Method 2: Adding a Zoom Link to an Existing Event
If you’ve already created an event and need to add the Zoom link later, this method is applicable.
- Open the Existing Event: Locate the event in your Google Calendar and open it by clicking on it.
- Edit Event Details: Click on the "Edit" button to access the event’s details.
- Add the Zoom Link: Similar to the previous method, paste the Zoom meeting link into the appropriate field. This might be labeled "Add Guest," "Video Conferencing," or a similar designation.
- Save Changes: Click "Save" to update the event with the newly added Zoom link.
Method 3: Using Zoom’s Integration with Google Calendar
Zoom offers a robust integration with Google Calendar that streamlines the process further. This integration allows you to schedule Zoom meetings directly from your Google Calendar.
- Enable the Zoom Add-on: If you haven’t already, enable the Zoom add-on in your Google Calendar. This usually involves navigating to the Google Workspace Marketplace and installing the Zoom add-on.
- Schedule a Zoom Meeting from Google Calendar: When creating a new event, you should now see a Zoom option. Clicking this will open a Zoom meeting scheduling window directly within Google Calendar. This allows you to schedule your meeting with all the necessary Zoom settings (meeting ID, password, etc.) without leaving Google Calendar.
- Complete Scheduling: Once you’ve configured the Zoom meeting details, the link will automatically be added to your Google Calendar event.
Recurring Events and Zoom Links
Adding Zoom links to recurring events requires careful attention to detail. If you use a single Zoom link for all occurrences of a recurring event, ensure that the link remains consistent throughout the series. However, for greater flexibility, you can create individual Zoom links for each instance of the recurring event. This allows you to manage each meeting independently, potentially offering different access controls or meeting IDs. Google Calendar will automatically manage the recurrence, and the Zoom link will be included in each event instance.
Troubleshooting Common Issues
While the process is generally straightforward, some issues might arise:
- Incorrect Link: Double-check the Zoom link for typos or errors. A single incorrect character can render the link unusable.
- Link Not Appearing: Ensure you’ve saved the event after adding the link. Refresh your calendar to see if the link appears. Check your Google Calendar settings to ensure that the "Video Conferencing" option is enabled.
- Zoom Add-on Issues: If using the Zoom add-on, ensure it’s properly installed and configured. Restart your browser or device if problems persist.
- Permission Issues: Verify that you have the necessary permissions to add links to your Google Calendar events.
Best Practices for Clear Communication
Even with seamless integration, clear communication is crucial. Consider these best practices:
- Include Meeting Details in the Event Description: Beyond the Zoom link, include the meeting agenda, dial-in information (if applicable), and any pre-reading materials.
- Send Reminders: Utilize Google Calendar’s reminder feature to alert attendees about the upcoming meeting.
- Test the Link Beforehand: Before the meeting, test the Zoom link to ensure it functions correctly.
- Provide Alternative Contact Information: Include alternative contact information in case attendees have trouble accessing the meeting.
- Use Clear and Concise Language: Use clear and concise language in all communication related to the meeting.
Conclusion
Adding Zoom links to Google Calendar enhances efficiency and collaboration. By following the methods outlined above and adhering to best practices, you can seamlessly integrate video conferencing into your scheduling, ensuring smooth and productive meetings. Understanding the different approaches, troubleshooting potential issues, and prioritizing clear communication will ensure a successful and organized meeting experience for everyone involved. The integration of these two powerful tools significantly improves workflow and communication, ultimately leading to increased productivity and better collaboration. Remember to always double-check your work and test your links to ensure a flawless meeting experience for all participants.


![]()
Closure
Thus, we hope this article has provided valuable insights into Adding Zoom Links to Google Calendar: A Comprehensive Guide. We thank you for taking the time to read this article. See you in our next article!