Mastering Team Collaboration: The Definitive Guide to Creating and Utilizing a Shared Outlook Calendar
Related Articles: Mastering Team Collaboration: The Definitive Guide to Creating and Utilizing a Shared Outlook Calendar
Introduction
In this auspicious occasion, we are delighted to delve into the intriguing topic related to Mastering Team Collaboration: The Definitive Guide to Creating and Utilizing a Shared Outlook Calendar. Let’s weave interesting information and offer fresh perspectives to the readers.
Table of Content
Mastering Team Collaboration: The Definitive Guide to Creating and Utilizing a Shared Outlook Calendar

In today’s fast-paced, collaborative work environment, effective time management and seamless communication are paramount. A shared calendar serves as the cornerstone of efficient teamwork, providing a centralized hub for scheduling meetings, tracking deadlines, and ensuring everyone stays informed. Microsoft Outlook, a ubiquitous productivity suite, offers robust features for creating and managing shared calendars, significantly boosting team productivity and reducing scheduling conflicts. This comprehensive guide will explore the creation, customization, and optimal utilization of a shared Outlook calendar, transforming your team’s collaborative efforts.
I. The Foundation: Creating a Shared Outlook Calendar
Before diving into the intricacies of calendar management, it’s crucial to understand the process of establishing the shared calendar itself. There are several approaches, each offering unique advantages depending on your team’s structure and existing Outlook setup.
A. Creating a Shared Calendar from an Existing Calendar:
This method is ideal when a team member already possesses a well-organized calendar containing relevant appointments and events. By sharing this existing calendar, you instantly provide a foundation upon which the team can build.
-
Access Calendar Settings: Open Outlook and navigate to the calendar you wish to share. Click on the "Calendar" tab, and locate the "Share Calendar" option (the exact wording might vary slightly depending on your Outlook version).
-
Specify Permissions: This is a critical step. Outlook offers granular control over permissions, allowing you to dictate what others can see and do with the shared calendar. Options typically include:
- Reviewer: Can view appointments but cannot make changes. Ideal for keeping team members informed without granting editing privileges.
- Editor: Can view and modify appointments, adding or deleting events as needed. Suitable for team members actively participating in scheduling.
- Owner: Has complete control over the calendar, including adding and removing users and changing permissions.
-
Share the Calendar: After selecting the appropriate permissions, Outlook will generate a sharing link or email address. Share this with your team members via email or your preferred communication channel. They can then add the calendar to their Outlook interface.
B. Creating a New, Dedicated Shared Calendar:
For a clean slate, it’s often preferable to create a brand-new calendar specifically for team collaboration. This avoids potential conflicts with personal appointments and ensures a focused view of team-related activities.
-
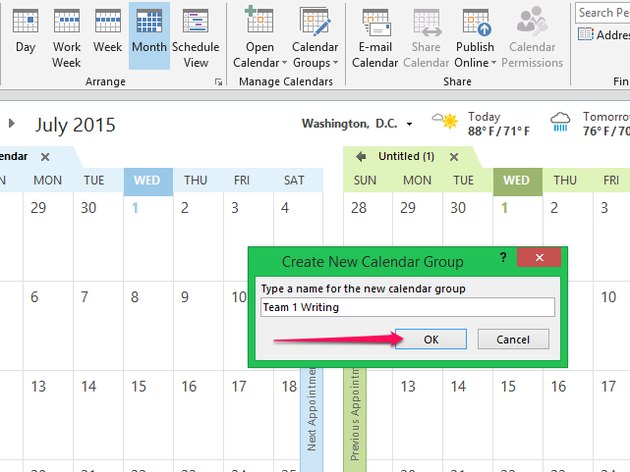
Create a New Calendar: In Outlook, navigate to the "Calendar" tab and select "New Calendar." Give the calendar a descriptive name reflecting its purpose (e.g., "Team Project X Calendar," "Marketing Team Schedule").
-
Share the New Calendar: Follow steps 2 and 3 from the previous method, specifying appropriate permissions for your team members.
II. Optimizing Your Shared Calendar for Maximum Efficiency
Simply creating a shared calendar is only the first step. To truly leverage its power, you must optimize its functionality to streamline team collaboration.
A. Categorization and Color-Coding:
Employing a consistent color-coding system for different types of events dramatically improves readability and allows for quick identification of priorities. For example:
- Meetings: Blue
- Deadlines: Red
- Holidays: Green
- Personal Appointments (if included): Gray (lighter shade to distinguish from team events)
Categorization allows for filtering and easier identification of specific types of events. Outlook’s built-in categorization features make this process straightforward.
B. Utilizing Recurring Appointments:
For regularly scheduled meetings or recurring tasks, leverage Outlook’s recurring appointment feature. This eliminates the need to manually create the same event repeatedly, saving significant time and reducing the risk of errors.
C. Detailed Event Descriptions:
Ensure that each event includes a comprehensive description outlining the purpose, location (physical or virtual), attendees, and any relevant materials or preparation needed. This minimizes confusion and ensures everyone is on the same page.
D. Implementing Reminders and Notifications:
Set appropriate reminders and notifications for upcoming events to ensure timely participation. Outlook’s customizable reminder settings allow you to choose the time before the event that reminders are sent, as well as the method of notification (e.g., email, pop-up).
E. Utilizing Outlook Categories and Tags:
Leverage Outlook’s tagging and categorization features to further organize events and filter the calendar view. This allows team members to focus on specific projects or types of events, improving clarity and reducing information overload.
III. Advanced Techniques for Enhanced Collaboration
Beyond the basics, several advanced techniques can significantly enhance the effectiveness of your shared Outlook calendar:
A. Integrating with Other Applications:
Outlook integrates seamlessly with other Microsoft applications, such as Teams and SharePoint. By linking your shared calendar to these platforms, you can centralize communication and collaboration, ensuring everyone has access to the same information.
B. Utilizing Calendar Views:
Experiment with different calendar views (day, week, month, etc.) to find the optimal presentation for your team’s needs. Outlook allows for customization, enabling you to tailor the view to specific requirements.
C. Sharing Resources and Locations:
If your team utilizes shared resources (e.g., conference rooms, equipment), integrate this information into the calendar. This prevents scheduling conflicts and ensures efficient resource allocation.
D. Regular Calendar Reviews and Maintenance:
Schedule regular reviews of the shared calendar to identify and address any inconsistencies or outdated information. This ensures the calendar remains a reliable and accurate source of information.
IV. Addressing Potential Challenges and Troubleshooting
While shared Outlook calendars offer numerous benefits, potential challenges may arise. Proactive measures can mitigate these issues:
- Permission Conflicts: Clearly define roles and responsibilities to avoid conflicts arising from multiple users editing the same event simultaneously.
- Over-Scheduling: Encourage mindful scheduling to avoid overbooking team members and resources.
- Outdated Information: Establish a system for regularly updating the calendar to maintain accuracy.
- Technical Issues: Ensure all team members have the necessary access and technical skills to utilize the shared calendar effectively.
Conclusion:
A well-managed shared Outlook calendar is an indispensable tool for fostering effective team collaboration. By following the guidelines outlined in this article, you can create a centralized hub for scheduling, communication, and resource management, significantly boosting productivity and reducing scheduling conflicts. Remember that the key to success lies not just in creating the calendar, but in actively utilizing its features and maintaining its accuracy to ensure seamless teamwork and project success. Regular review, clear communication, and consistent implementation of best practices are essential for maximizing the benefits of your shared Outlook calendar and transforming your team’s collaborative capabilities.


Closure
Thus, we hope this article has provided valuable insights into Mastering Team Collaboration: The Definitive Guide to Creating and Utilizing a Shared Outlook Calendar. We hope you find this article informative and beneficial. See you in our next article!