Crafting a Calendar in Google Docs: A Conclusive, Consequent, and Certain Guide
Related Articles: Crafting a Calendar in Google Docs: A Conclusive, Consequent, and Certain Guide
Introduction
With great pleasure, we will explore the intriguing topic related to Crafting a Calendar in Google Docs: A Conclusive, Consequent, and Certain Guide. Let’s weave interesting information and offer fresh perspectives to the readers.
Table of Content
Crafting a Calendar in Google Docs: A Conclusive, Consequent, and Certain Guide
While Google Calendar reigns supreme for scheduling and event management, there are times when a visual calendar integrated directly within a Google Doc proves invaluable. Whether you’re crafting a project timeline, outlining a semester’s coursework, or simply need a quick, printable calendar for personal use, Google Docs offers surprisingly robust options for creating one. This comprehensive guide will explore several methods, ensuring a conclusive, consequent, and certain outcome—a functional and aesthetically pleasing calendar within your document.
I. Understanding the Limitations and Choosing the Right Approach
Before diving into the creation process, it’s crucial to understand Google Docs’ limitations concerning calendar functionality. Unlike dedicated calendar applications, Google Docs lacks sophisticated scheduling features like reminders, recurring events, or integration with other services. The calendars created within Docs are primarily visual aids, best suited for static representations of time-based information.
Therefore, the approach you choose depends heavily on your needs:
-
Simple Monthly Calendar: For a basic overview of a single month, using tables and text formatting is sufficient. This method is straightforward and requires minimal effort.
-
Detailed Project Timeline: For complex projects requiring task breakdowns and deadlines, a combination of tables, lists, and potentially charts might be necessary. This approach allows for more granular detail.
-
Customizable Calendar: For unique layouts or aesthetic preferences, leveraging Google Drawings or inserting images of pre-made calendars can offer greater flexibility, though it requires more pre-planning.
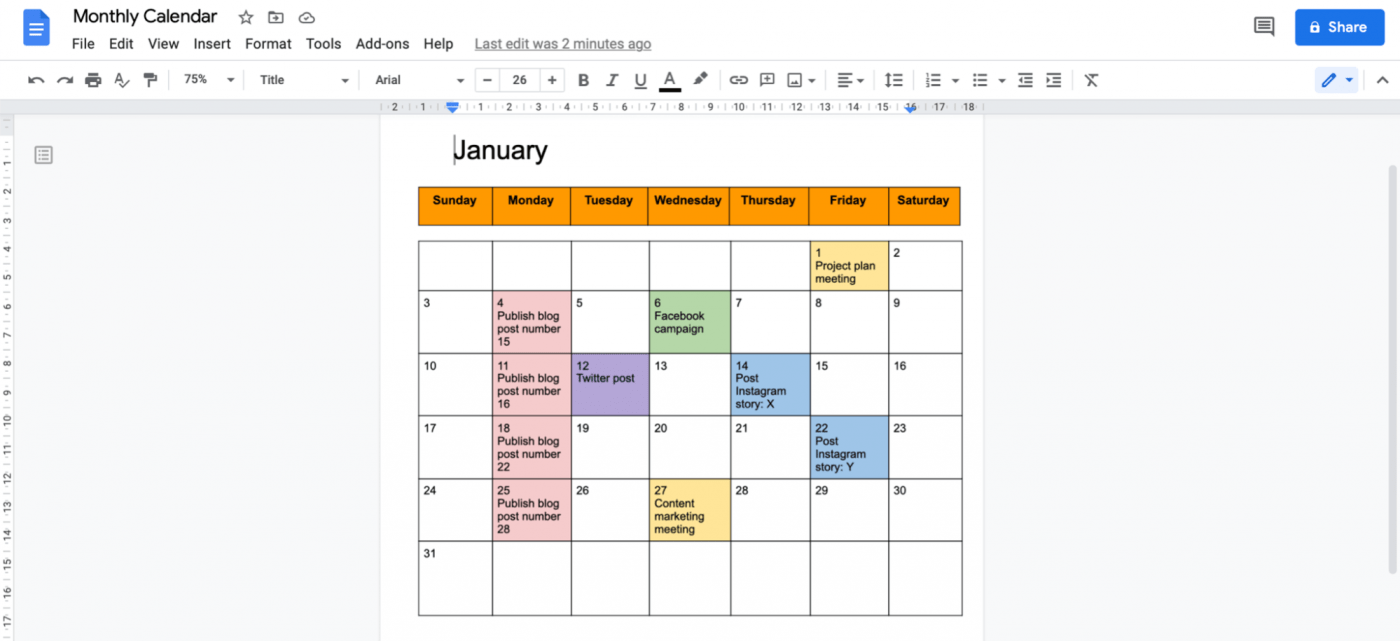
II. Method 1: Creating a Simple Monthly Calendar using Tables
This is the most straightforward method, ideal for quickly generating a basic calendar within your document.
Steps:
-
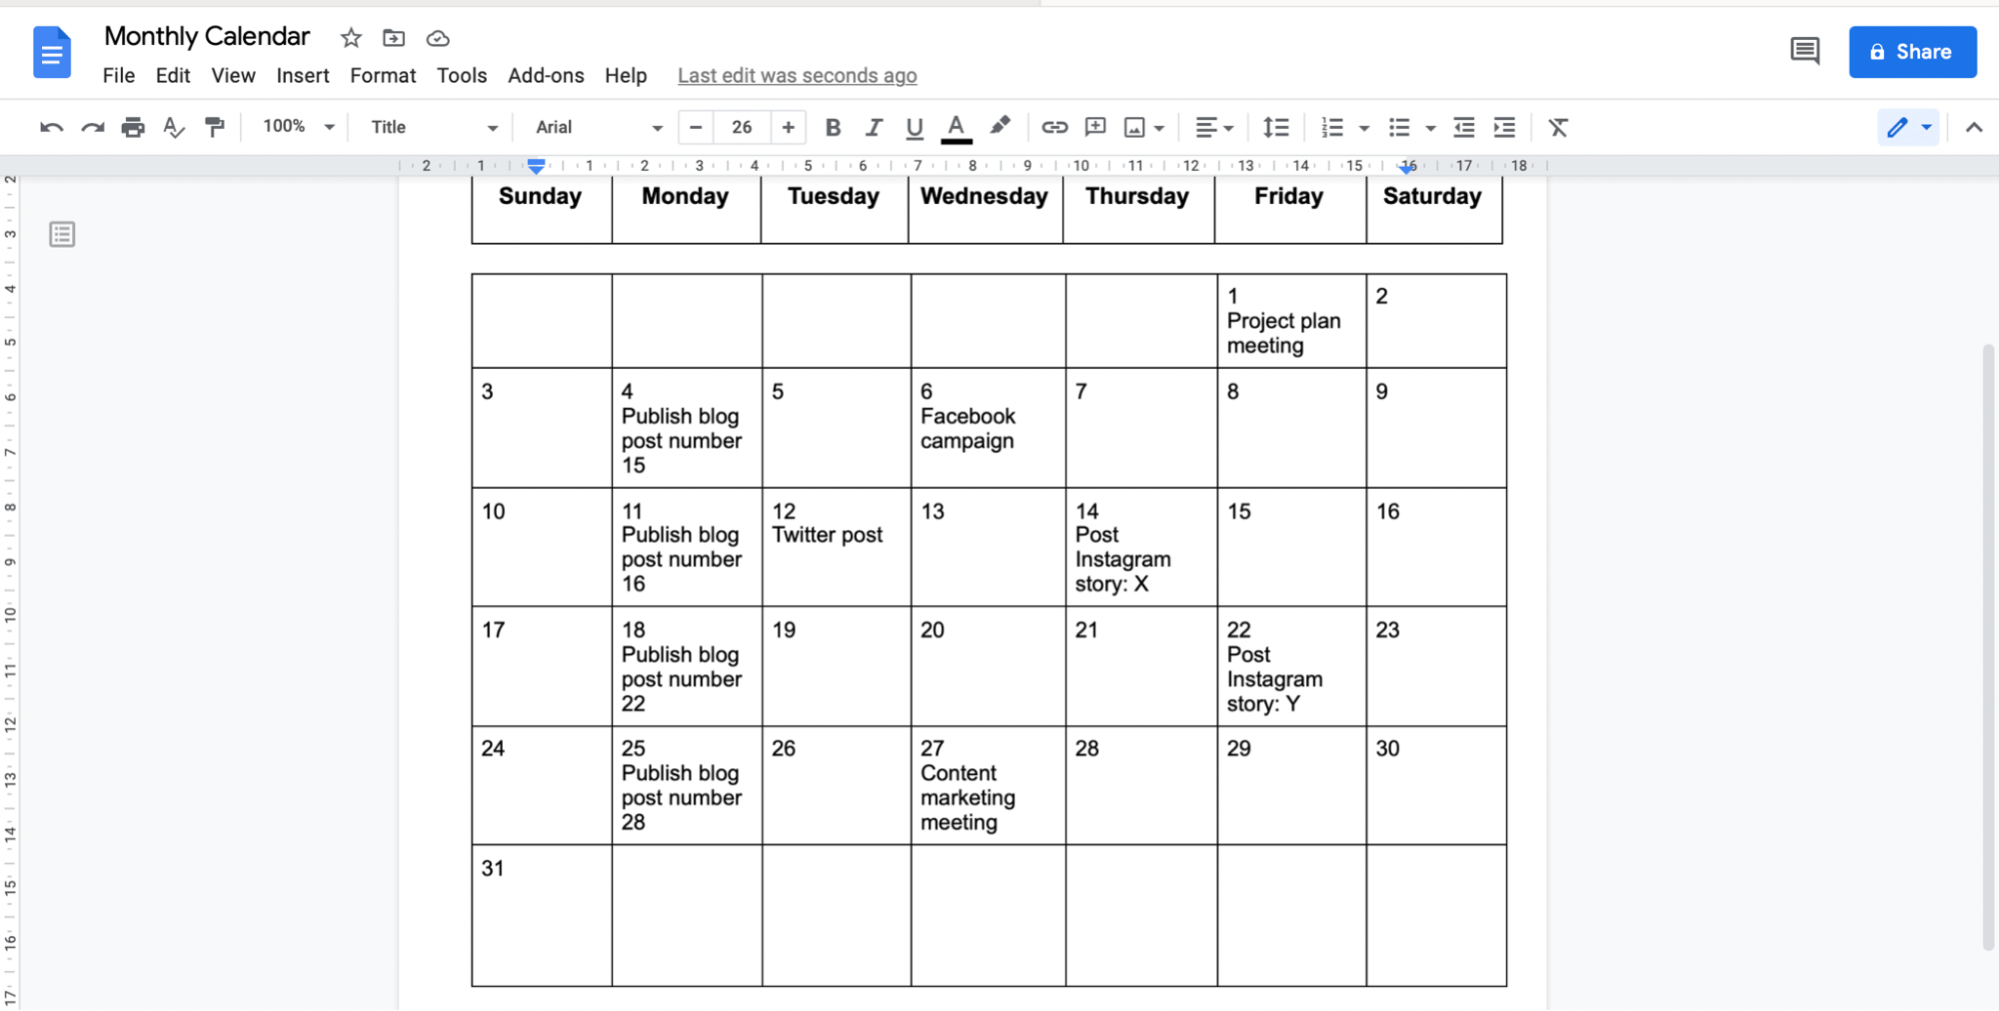
Create a Table: Insert a table with seven columns (for days of the week) and six rows (for weeks of the month). Adjust the number of rows depending on the length of the month. You can adjust column width for better visual appeal.
-
Header Row: In the first row, enter the days of the week (Sun, Mon, Tue, Wed, Thu, Fri, Sat). Center-align the text for neatness.
-
Populate the Calendar: Begin filling in the dates, starting with the correct day of the week for the first of the month. Remember to account for the varying number of days in each month.
-
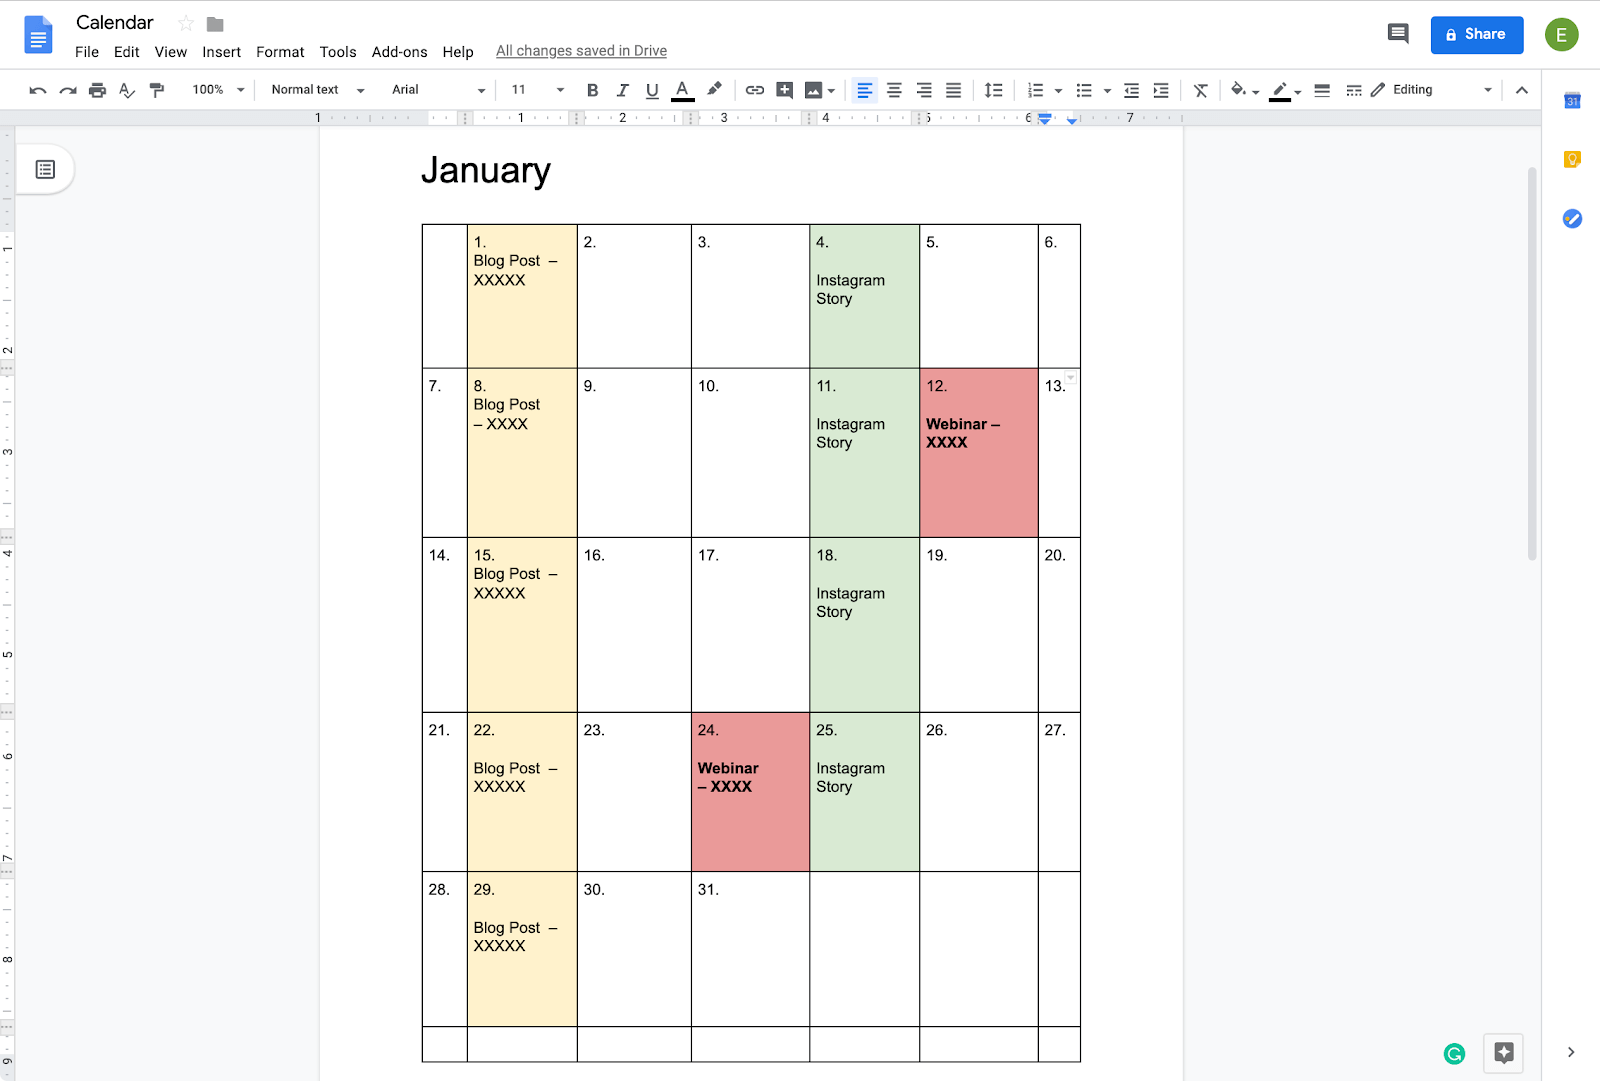
Formatting: Use Google Docs’ formatting options to enhance readability. Consider:
- Bolding the header row: This improves visual distinction.
- Using a consistent font: Maintain uniformity throughout the calendar.
- Adding borders: Tables with borders create a cleaner, more defined calendar.
- Shading alternating rows: This improves visual organization and readability.
- Color-coding: Assign colors to specific events or tasks.
-
Adding Events: You can add events by typing them directly into the relevant cells. For better organization, use bullet points or numbered lists within each cell.
III. Method 2: Creating a Detailed Project Timeline using Tables and Lists
For more intricate scheduling, this method allows for task breakdown and deadline tracking.
Steps:
-
Create a Table: Use a table with columns for: "Task," "Start Date," "End Date," "Status," and "Notes." Add more columns as needed (e.g., "Assigned To," "Dependencies").
-
Populate the Table: List each task, its start and end dates, current status (e.g., "In Progress," "Completed"), and any relevant notes.
-
Visual Aids: Consider using Gantt charts (though creating these directly within Google Docs can be challenging; you might need to create one in a separate tool and insert it as an image) or progress bars to visually represent task completion.
-
Formatting: Employ consistent formatting to maintain clarity. Use conditional formatting to highlight overdue tasks or tasks nearing their deadlines.
IV. Method 3: Leveraging Google Drawings for Custom Calendars
This method offers the highest degree of customization but requires more effort.
Steps:
-
Create a Drawing: Insert a new Google Drawing into your document.
-
Design the Calendar: Use shapes, lines, and text boxes to create the calendar layout. You can create a monthly, weekly, or even daily calendar, depending on your needs. Consider using pre-designed calendar templates as inspiration.
-
Add Events: Use text boxes to add events and descriptions. Utilize different colors and fonts to highlight different types of events.
-
Insert into Doc: Once the calendar is complete, insert the drawing into your Google Doc.
V. Method 4: Inserting Pre-made Calendar Images
The quickest method, but with limited customization.
Steps:
-
Find a Suitable Image: Search online for a calendar image that matches your needs. Ensure it’s appropriately licensed for your use.
-
Insert the Image: Insert the image into your Google Doc. You can then add text annotations directly onto the image using Google Docs’ annotation tools.
VI. Ensuring Conclusive, Consequent, and Certain Results:
To ensure your calendar is effective and reliable, follow these best practices:
-
Clear and Concise Labeling: Use clear and concise labels for days, months, tasks, and events. Avoid ambiguity.
-
Consistent Formatting: Maintain consistent formatting throughout the calendar to enhance readability and visual appeal.
-
Regular Updates: Keep your calendar up-to-date to reflect current progress and changes.
-
Proofreading: Before finalizing, thoroughly proofread your calendar for any errors in dates, times, or information.
-
Accessibility: Consider accessibility when choosing fonts and colors. Ensure sufficient contrast for readability.
VII. Conclusion:
Creating a calendar within Google Docs offers a flexible and convenient way to visualize time-based information. While it lacks the advanced features of dedicated calendar applications, the methods outlined above provide various options to suit different needs, from simple monthly overviews to detailed project timelines. By following these steps and best practices, you can create a conclusive, consequent, and certain calendar that effectively serves its purpose within your Google Doc. Remember to choose the method that best aligns with your specific requirements and desired level of customization, ensuring a productive and visually appealing outcome.


Closure
Thus, we hope this article has provided valuable insights into Crafting a Calendar in Google Docs: A Conclusive, Consequent, and Certain Guide. We appreciate your attention to our article. See you in our next article!