Adding a Shared Calendar to Your iPhone: A Comprehensive Guide
Related Articles: Adding a Shared Calendar to Your iPhone: A Comprehensive Guide
Introduction
With enthusiasm, let’s navigate through the intriguing topic related to Adding a Shared Calendar to Your iPhone: A Comprehensive Guide. Let’s weave interesting information and offer fresh perspectives to the readers.
Table of Content
Adding a Shared Calendar to Your iPhone: A Comprehensive Guide

The iPhone’s built-in Calendar app is a powerful tool for managing personal schedules, but its true potential unlocks when you integrate shared calendars. Whether you’re collaborating on projects, coordinating family events, or simply staying in sync with colleagues, adding a shared calendar to your iPhone is a crucial step towards efficient time management and seamless communication. This article provides a comprehensive overview of the process, addressing various scenarios and troubleshooting potential issues.
Understanding Shared Calendars:
Before diving into the how-to, let’s clarify what a shared calendar is and why it’s beneficial. A shared calendar is essentially a calendar created by one person (the owner) that’s accessible to others. These others can view the events, and depending on the permissions set by the owner, they can also add, edit, or delete events. This eliminates the need for constant email exchanges or phone calls to coordinate schedules.
The benefits are numerous:
- Improved Collaboration: Easily schedule meetings, projects, and appointments with multiple individuals without the back-and-forth of email confirmations.
- Enhanced Family Organization: Keep track of family events, appointments, and school schedules in one central location, accessible to all family members.
- Streamlined Teamwork: Coordinate project deadlines, team meetings, and shared responsibilities with ease.
- Reduced Scheduling Conflicts: Avoid double-booking by viewing everyone’s schedules in one place.
- Increased Efficiency: Spend less time coordinating schedules and more time focusing on tasks.
Methods for Adding a Shared Calendar to your iPhone:
There are several ways to add a shared calendar to your iPhone, each with its own nuances:
1. Receiving a Calendar Invitation:
This is the most common method. When someone shares a calendar with you, you’ll receive an invitation via email or a notification within the Calendar app itself. The invitation will typically contain a link or button to accept the invitation.
- Accepting the Invitation: Tap the "Accept" button in the email or notification. This automatically adds the shared calendar to your iPhone’s Calendar app. You’ll then be able to view the events listed on the shared calendar.
- Choosing Your Access Level: Some invitations allow you to choose your level of access. Options might include "View Only," "View and Edit," or "View, Edit, and Delete." Carefully select the access level that aligns with your role and responsibilities.
- Managing Notifications: Once added, you can customize notification settings for the shared calendar, choosing to receive alerts for upcoming events or remaining silent. This is done within the iPhone’s Calendar settings.
2. Adding a Calendar from a Link or URL:
If you’ve received a calendar link (often a webcal URL) instead of a direct invitation, you can manually add it to your iPhone:
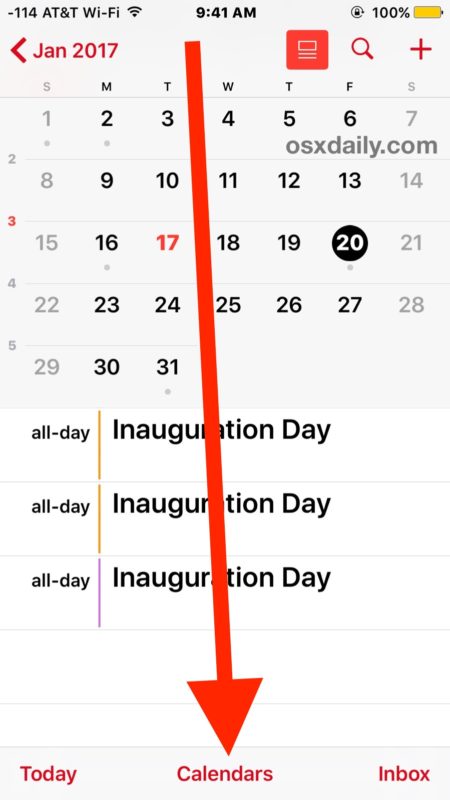
- Open the Calendar App: Launch the built-in Calendar app on your iPhone.
- Add Calendar: Navigate to the "Calendars" tab (usually at the bottom of the screen). Look for an option to add a calendar (this may be represented by a "+" button or a similar icon).
- Enter the URL: Paste the webcal URL into the provided field.
- Save the Calendar: Tap "Save" or a similar button to add the calendar to your iPhone. The calendar should now appear in your Calendar app.
3. Subscribing to a Public Calendar:
Many organizations and institutions offer public calendars for events, holidays, or other information. You can subscribe to these calendars to keep informed:
- Find the Calendar URL: Locate the webcal URL for the public calendar you wish to subscribe to. This is usually available on the organization’s website.
- Follow Steps 2: Follow the steps outlined in method 2 to add the calendar using the webcal URL.
Managing Shared Calendars on your iPhone:
Once a shared calendar is added, you can manage its appearance and settings:
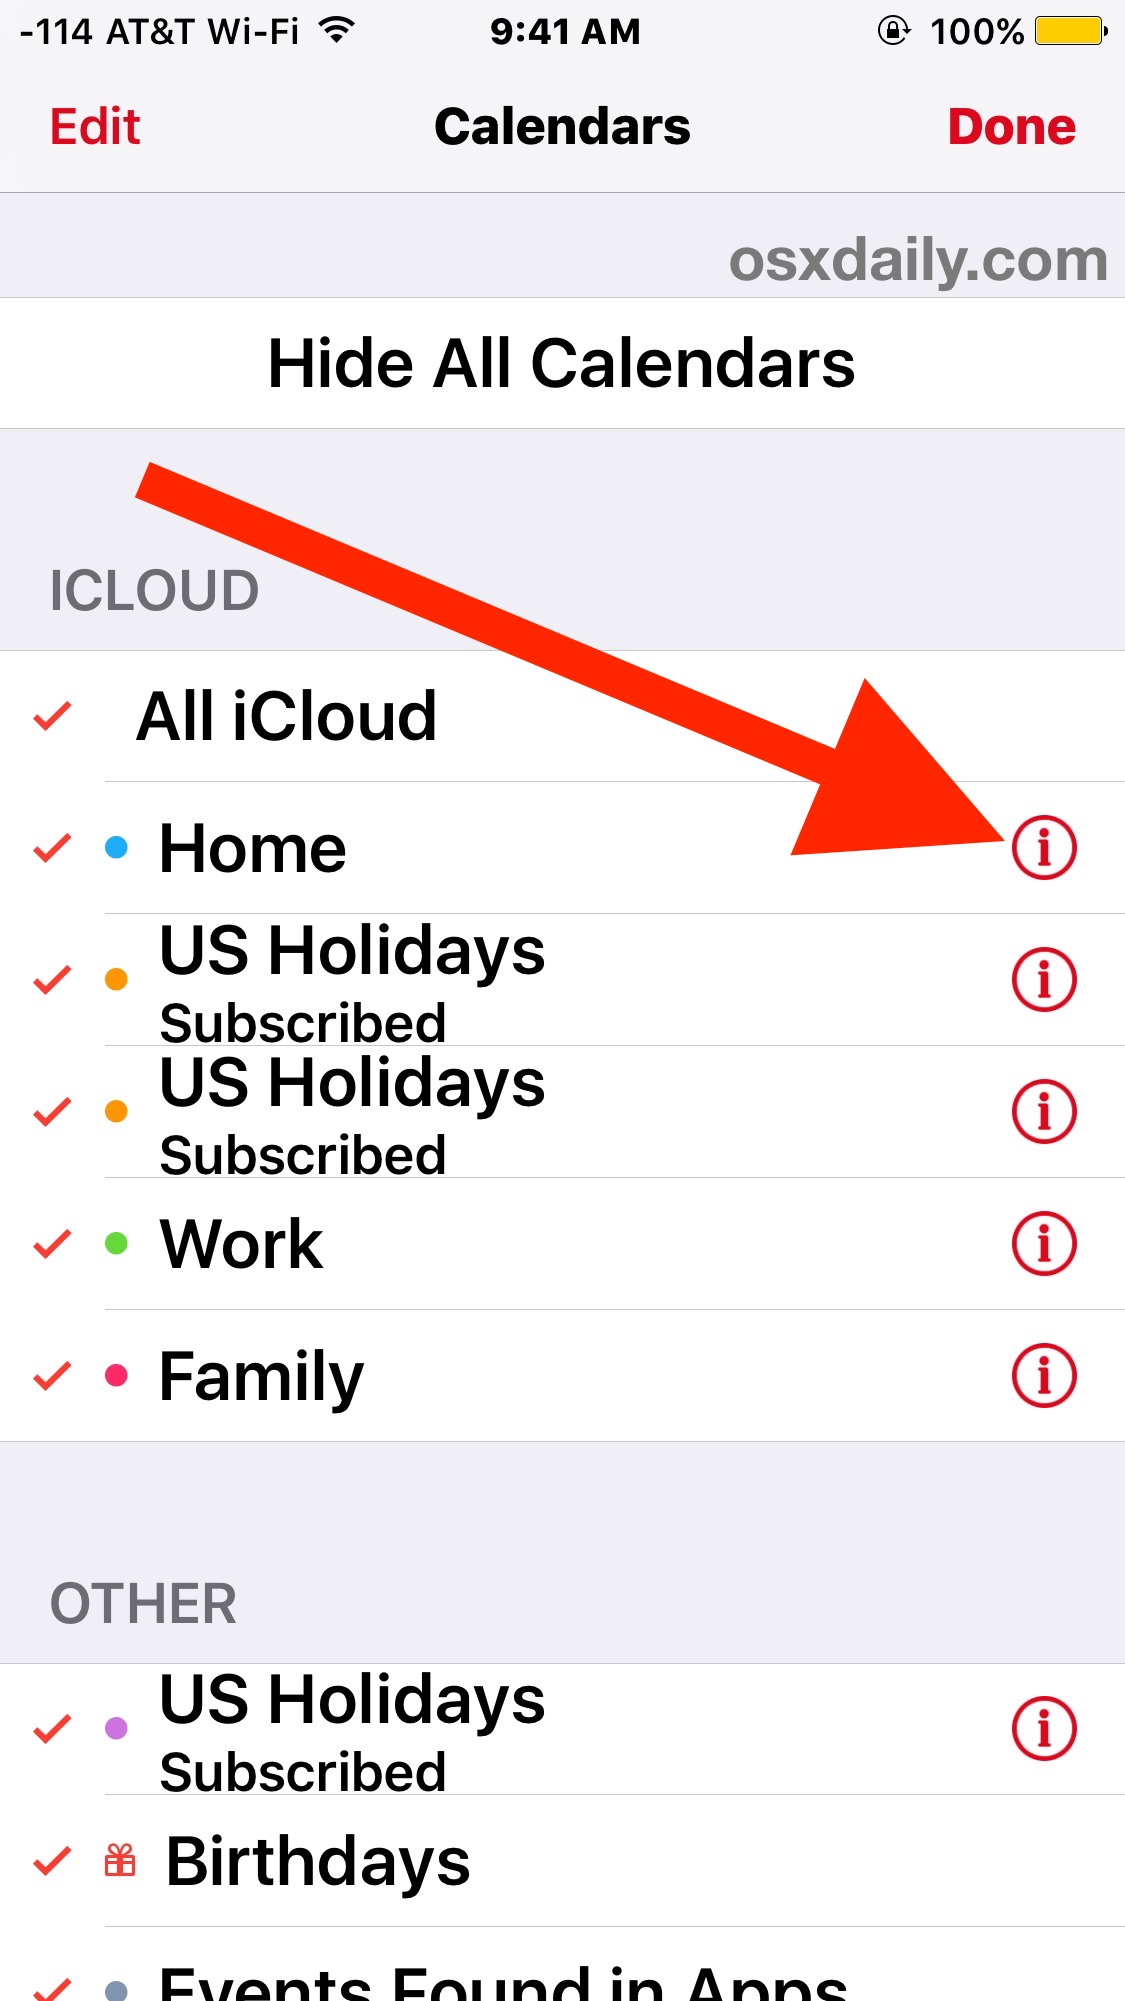
- Viewing Multiple Calendars: The Calendar app allows you to view multiple calendars simultaneously. You can customize which calendars are visible by toggling them on or off in the "Calendars" tab.
- Color-Coding Calendars: Assign different colors to each calendar for easy visual distinction. This is done within the Calendar settings.
- Notification Settings: Adjust notification settings for each shared calendar individually, choosing the type of alerts and their frequency.
- Deleting a Shared Calendar: To remove a shared calendar, navigate to the "Calendars" tab, locate the shared calendar, and swipe left on it. Tap "Delete" to remove it from your iPhone. Note that this only removes it from your view; it doesn’t delete the calendar itself.
Troubleshooting Common Issues:
- Calendar Not Appearing: Ensure you’ve correctly entered the webcal URL or accepted the invitation. Check your internet connection. Restart your iPhone.
- Incorrect Access Levels: If you’re unable to edit or delete events, verify your access level with the calendar owner.
- Notification Problems: Check your notification settings for the specific calendar and ensure that notifications are enabled.
- Synchronization Issues: If the calendar isn’t updating correctly, check your iCloud settings and ensure that Calendar is enabled for iCloud synchronization.
Conclusion:
Adding a shared calendar to your iPhone is a simple yet powerful way to improve your organization, collaboration, and overall productivity. By understanding the various methods and managing the settings effectively, you can harness the full potential of shared calendars to streamline your personal and professional life. This guide provides a comprehensive overview, enabling you to efficiently manage shared calendars and leverage their benefits for a more organized and productive experience. Remember to always respect the access levels granted to you by the calendar owner and maintain a respectful and collaborative approach when using shared calendars.


Closure
Thus, we hope this article has provided valuable insights into Adding a Shared Calendar to Your iPhone: A Comprehensive Guide. We thank you for taking the time to read this article. See you in our next article!